background image

2 in 1 Cordless Lawn Mower  EN

17

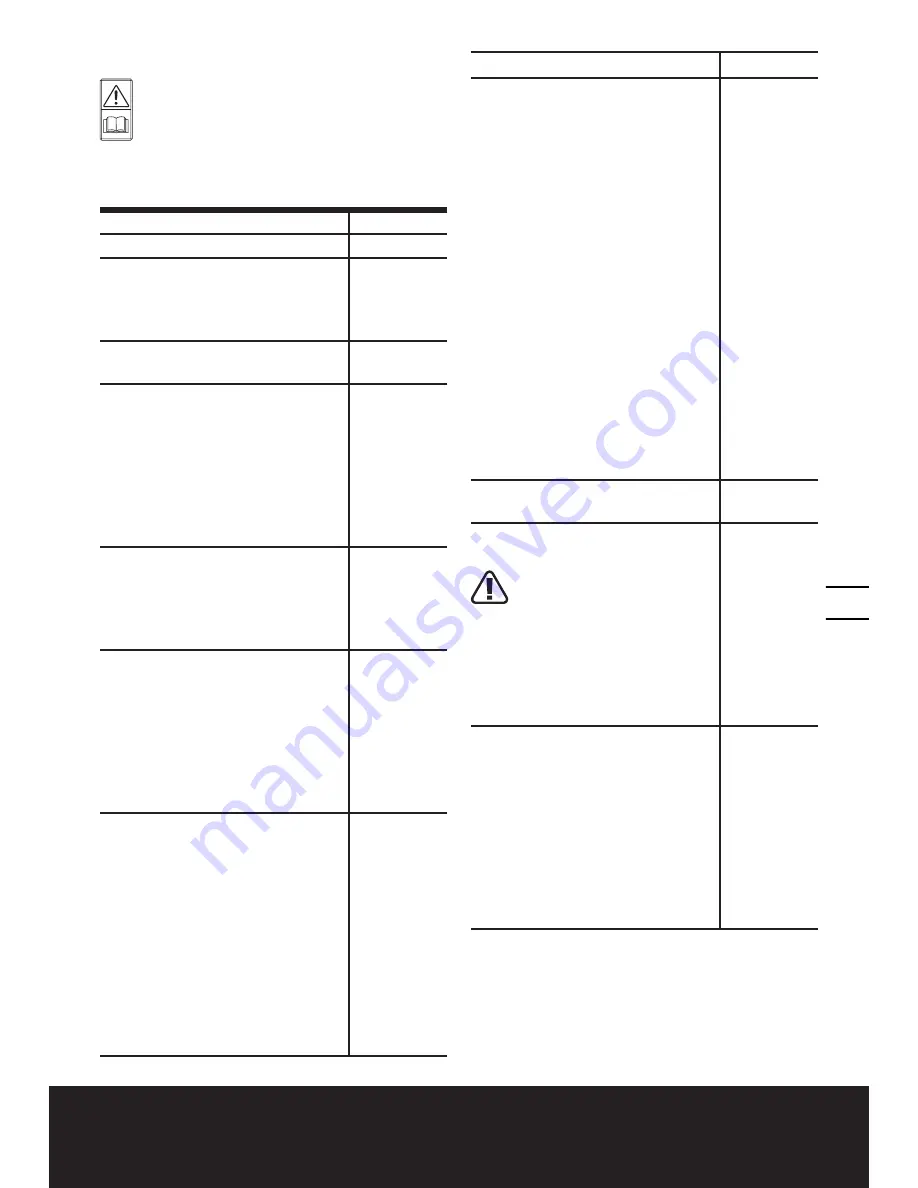
OPERATION INSTRUCTION

NOTE:

 Read instruction handbook 

before operation this machine.

ASSEMBLY AND OPERATION

ACTION

FIGURE

ASSEMBLY

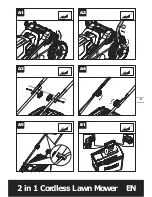
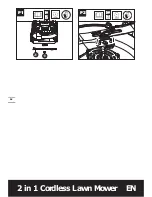
Assembling the handle bar

NOTE: 

Choose one of the two 

holes in the lower handle for 
desired handle’s height.

See Fig. A1, 
A2, A3, A4, 
A5

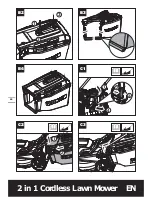
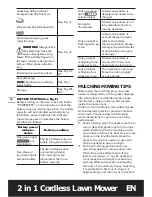
Assembling grass collection bag

See Fig. B1, 
B2, B3, B4

Fitting grass collection bag to 
the lawn mower

NOTE: 

Depress the grass 

collection bag slightly to ensure 
that it is completely installed.

NOTE: 

Take the mulching insert 

out of the lawn mower before 
fitting the grass collection bag.

See Fig. C1, 
C2, C3

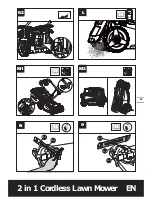
Checking the battery charge 
condition

NOTE: 

Fig. D1 only applies for 

the battery pack with battery 
indicator light.

See Fig. D1

Charging the battery pack

NOTE: 

 The batteries are shipped 

uncharged. Each battery must be 
fully charged before the first mow. 
Always fully charge the two 
batteries at same time. More 
details can be found in charger’s 
manual.

See Fig. D2

Fitting/removing battery

NOTE: This machine will only 
run when 2 batteries are 
installed. Please always use 
two batteries with the same 
capacity and fully charge the 
two batteries.
Using two different sized 
batteries or if one battery 
isn’t fully charged then the 
machine will only run to the 
lowest common denominator.

See Fig. E

OPERATION

Battery power indicator on the 
machine
See details in BATTERY STATUS 
part

IMPORTANT 

When only one light is illuminated, 
at least one battery is depleted and 
needs to be charged, even though 
the mower may still be capable 
of cutting grass. Continuing to 
operate your lawnmower with 
the battery in this discharged 
condition may reduce the life and 
performance of your battery.
When no light is illuminated, 
at least one battery is not fully 
installed or battery may be 
defective, please double check 
the batteries are fully seated into 
position.

See Fig. F

Starting & stopping

See Fig. G1, 
G2

Adjusting the cutting height

WARNING! 

Stop, release 

switch lever and wait until 

the motor stops before adjusting 
height. The blades continue 
to rotate after the machine is 
switched off, a rotating blade 
can cause injury. Do not touch 
rotating blades.

See Fig. H

Selecting the intellicut dial
ECO mode
Select ECO mode when 
mowing in everyday conditions, 
removing approximately 1’’ of 
grass at a time.
TURBO mode
Set the dial to TURBO mode 
when cutting dense or 
overgrown grass.

See Fig. 
I1, I2

Summary of Contents for WG779

Page 1: ...EN F ES 2 in 1 Cordless Lawn Mower Tondeuse gazon sans l 2 en 1 Cortac sped sin cables 2 en 1 P03 P22 P37 WG779 WG779 9...

Page 2: ......

Page 3: ...ain 3 Keep children away All visitors should be kept a safe distance from work area 4 Dress properly Do not wear loose clothing or jewelry They can be caught in moving parts Use of rubber gloves and f...

Page 4: ...ainst a wall or obstruction Material may ricochet back toward the operator Stop the blade when crossing gravel surfaces 9 Do not operate machine without the entire grass catcher discharge guard rear g...

Page 5: ...children to operate a power mower c Keep the area of operation clear of all persons particularly small children and pets d Do not use a mower for any job except that for which it is intended 1 2 Prepa...

Page 6: ...n direct sunlight 2 Dispose of used battery promptly When disposing of secondary cells or batteries keep cells or batteries of different electrochemical systems separate from each other 3 Keep battery...

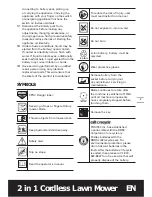
Page 7: ...aintained SYMBOLS KEEP HANDSAND FEET AW AY GARDER MAINS ET PIEDS DI STANCE CPSC Danger label Severing of toes or ngers Rotary mower blade Thrown objects from mower deck Keep bystanders children away S...

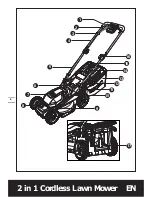
Page 8: ...2 in 1 Cordless Lawn Mower EN 8 2 3 4 5 16 15 14 11 10 9 7 8 13 12 6 1 17...

Page 9: ...TELLICUT DIAL 9 CUTTING HEIGHT ADJUSTMENT KNOB 10 CARRY HANDLE 11 HANDLE KNOB LOWER 12 SAFETY FLAP 13 GRASS COLLECTION BAG 14 BAG HANDLE 15 GRASS BAG INDICATOR 16 HANDLE KNOB UPPER 17 MULCHING INSERT...

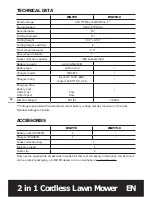
Page 10: ...er model WA3875 Charger rating Input AC 120V 60Hz Output 20V DC 2 0 A Charging time Battery pack 4 0Ah 1pc 4 0Ah 2pcs 2hrs 4hrs Machine Weight 29 1lbs 26 2lbs Voltage measured without workload Initial...

Page 11: ...2 in 1 Cordless Lawn Mower EN 11 1 2 A5 B1 A1 A2 A4 A3...

Page 12: ...2 in 1 Cordless Lawn Mower EN 12 3 1 2 2 1 1 4 2 3 C2 C3 B2 B3 C1 B4...

Page 13: ...2 in 1 Cordless Lawn Mower EN 13 18 100 0 1 2 D1 D2 E F G1 G2...

Page 14: ...2 in 1 Cordless Lawn Mower EN 14 1 3 1 2 88mm 2 3 1 3 84mm 3 2 7 8 74mm 4 2 1 2 64mm 5 2 53mm 6 1 1 2 38mm ECO TURBO 1 1 2 2 3 4 5 6 a b 1 2 0 100 1 2 I2 J1 I1 H K2 J2 K1...

Page 15: ...2 in 1 Cordless Lawn Mower EN 15 O 1 O 2 O 3 N 1 N 2 N 3 1 2 K2 M2 L N O M1 L K2...

Page 16: ...2 in 1 Cordless Lawn Mower EN 16 20 19 P1 O2 P2...

Page 17: ...he same capacity and fully charge the two batteries Using two different sized batteries or if one battery isn t fully charged then the machine will only run to the lowest common denominator See Fig E...

Page 18: ...ve Only one light is ashing twice per cycle At least one battery is over discharged please refer to the battery charge condition please recharge the two batteries at once before use again or storage O...

Page 19: ...battery runtime It is recommended to always use the same two batteries during operation with fully charged levels 2 For the best cutting performance it is recommended to only mow up to 1 3 or less of...

Page 20: ...e blade bolt 19 STORAGE See Fig M1 M2 Stop the mower and always remove the safety key Clean the exterior of the machine thoroughly using a soft brush and cloth Do not use water solvents or polishes Re...

Page 21: ...o turn mower off remove safety key and remove blade Rotate blade 180 degrees and retighten If mower still vibrates return the mower to an authorized service center 6 Battery charger LED s not on A Che...

Page 22: ...nt identique du m me type et du m me fabricant installez galement les accessoires fournis pour retenir les rallonges lectriques le cas ch ant POUR TOUTES LES TONDEUSES GAZON 1 vitez les environnements...

Page 23: ...r risqueraient de surchauffer et de causer des br lures Instructions de s curit pour les tondeuses pouss es IMPORTANT Instructions de s curit pour les tondeuses pouss es I FONCTIONNEMENT G N RAL 1 Lis...

Page 24: ...ENFANTS Des accidents graves peuvent survenir si l op rateur n est pas alert de la pr sence d enfants Les enfants sont souvent attir s par la machine et par l activit de tonte Ne supposez jamais que d...

Page 25: ...z vous qu elle n est pas endommag e puis r parez les dommages le cas ch ant avant de red marrer et d utiliser la tondeuse d Si l appareil commence vibrer de fa on anormale arr tez le moteur et tentez...

Page 26: ...incendie ou de br lure chimique si elle n est pas utilis e avec soin Remplacez la batterie us e uniquement avec une batterie WORX L utilisation de toute autre batterie peut engendrer un risque d incen...

Page 27: ...que des pi ces de rechange identiques Ceci maintiendra la s curit du produit SYMBOLES KEEP HANDSAND FEET AW AY GARDER MAINS ET PIEDS DI STANCE tiquettes de danger CPSC Sectionnement d orteils ou de d...

Page 28: ...Tondeuse gazon sans fil 2 en 1 F 28 2 3 4 5 16 15 14 11 10 9 7 8 13 12 6 1 17...

Page 29: ...AGE DE LA HAUTEUR DE COUPE 10 POIGN E DE TRANSPORT 11 MOLETTES DE POIGN E INF RIEURE 12 BAVETTE DE S CURIT 13 SAC HERBE 14 POIGN E DE SAC 15 T MOIN DE REMPLISSAGE DU BAC DE RAMASSAGE DE L HERBE 16 MOL...

Page 30: ...on Mod le de chargeur WA3875 Valeurs nominales du chargeur Entr e AC 120V 60Hz Sortie 20V DC 2 0 A Temps de recharge Batterie 4 0Ah 1pc 4 0Ah 2pcs 2hrs 4hrs Poids de la machine 13 2kg 29 1lbs 11 9kg 2...

Page 31: ...eries en m me temps Des informations suppl mentaires sont disponibles dans le manuel du chargeur Voir Fig D2 Disposition retrait du bloc batterie REMARQUE Cette tondeuse gazon ne fonctionne que lorsqu...

Page 32: ...LA BATTERIE Voir Fig F Avant la mise en marche ou apr s utilisation appuyez sur le bouton POWERTEST sur la machine pour v ri er la capacit d une batterie Lors de l utilisation la capacit de la batter...

Page 33: ...tondeuse et attendre l immobilisation compl te de la lame Puis retirer la cl de s curit et retourner la tondeuse sur le c t Utiliser un objet comme un b ton pour enlever les accumulations de brins d h...

Page 34: ...E LAME PLI E OU ENDOMMAG E LORS DE L AFF TAGE DE LA LAME 1 S assurer que la lame est toujours quilibr e 2 Aff ter dans l angle original de coupe de la lame 3 Aff ter les ar tes tranchantes des deux ex...

Page 35: ...her l anse pour teindre la tondeuse Retirer la cl de s ret retourner la tondeuse et v ri er que la lame tourne librement En cas de blocage retourner un r parateur autoris La lame devrait tourner libre...

Page 36: ...le chargeur 7 Le voyant du chargeur de piles ne passe pas au vert A La pile doit tre diagnostiqu e La faire v ri er dans un centre de r paration autoris 9 Au d chiquetage l herbe coup e est visible A...

Page 37: ...N En el caso de cortadoras de c sped que funcionen a bater a utilice nicamente bater as de repuesto id nticas que indiquen el tipo PARA TODOS LOS CORTAC SPEDES 1 Evite Ambientes Peligrosos No use arte...

Page 38: ...ue aparecen en la m quina y en el los manual es antes de comenzar 2 No coloque las manos o pies cerca o debajo de la m quina Mantenga libre siempre el ori cio de descarga 3 S lo pueden utilizar esta m...

Page 39: ...e la presencia de ni os Generalmente los ni os se encuentran atra dos por la m quina y la actividad de corte de pasto Nunca presuponga que los ni os permanecer n en el mismo lugar donde los vio por lt...

Page 40: ...detenga el motor y veri que de inmediato la causa Generalmente la vibraci n es un s ntoma de problemas e Detenga el motor cada vez que deje la herramienta sin supervisi n y antes de efectuar una repar...

Page 41: ...rtencia no use un paquete de bater a o dispositivo visiblemente da ado seg n corresponda 7 Advertencia no modi que ni intente reparar el dispositivo o bater a seg n corresponda 8 LA BATER A DEBE RECIC...

Page 42: ...Mantenga alejados a los ni os Alerta de seguridad Resbal n en pendiente Lea el manual Para reducir el riesgo de lesiones el usuario deber leer el manual de instrucciones No exponer a la lluvia ni al...

Page 43: ...Cortac sped sin cables 2 en 1 ES 43 2 3 4 5 16 15 14 11 10 9 7 8 13 12 6 1 17...

Page 44: ...OR INTELLICUT 9 PALANCA DE AJUSTE DE ALTURA DE CORTE 10 MANIJA DE TRANSPORTE 11 MANIJA INFERIOR 12 TAPA DE SEGURIDAD 13 BOLSA PARA PASTO 14 MANIJA DE BOLSA 15 INDICADOR DE LLENADO DE LA BOLSA DE C SPE...

Page 45: ...del cargador WA3875 Clasi caci n de voltaje del cargador Entrada AC 120V 60Hz Salida 20V DC 2 0 A Tiempo de carga Bater as 4 0Ah 1pc 4 0Ah 2pcs 2hrs 4hrs Peso de la m quina 29 1lbs 13 2kg 26 2lbs 11...

Page 46: ...primera vez Siempre cargue completamente las dos bater as al mismo tiempo Se pueden encontrar m s detalles en el manual del cargador Vea la Fig D2 Colocaci n desinstalaci n de paquete de bater a NOTA...

Page 47: ...lada Vea la Fig J2 Instalaci n del inserto de desbroce Vea la Fig K1 K2 Descarga trasera NOTA Retire el inserto de corte primero Vea la Fig L Almacenamiento Vea la Fig M1 M2 ESTADO DE BATER A Vea la F...

Page 48: ...deseada De otra manera haga cortes angostos y pode lentamente 3 Para mejor rendimiento conserve la carcaza de la podadora libre de pasto acumulado De vez en cuando apague la podadora y espere que el a...

Page 49: ...A le la cuchilla en el ngulo de corte original 3 A le los bordes en ambos extremos de la cuchilla rebaje la misma cantidad de material en ambos extremos NOTA 1 Aseg rese que la podadora est apagada y...

Page 50: ...odadora y veri que que la hoja pueda girar libremente Si no est libre devuelva la unidad a un centro de mantenimiento autorizado La hoja debe girar libremente C Se ha cargado la bater a por completo E...

Page 51: ...LED del cargador de la bater a no cambia a verde A Se debe someter la bater a a diagn stico Ll vela a un centro de mantenimiento autorizado 8 La podadora no recoge los recortes de c sped con la bolsa...

Page 52: ...www worx com Copyright 2018 Positec All Rights Reserved Copyright 2018 Positec Tous droits r serv s Derechos reservados 2018 Positec Todos los derechos reservados AR01340200...

Reviews: