background image

3-in-1 Cordless Lawn Mower                 EN

11

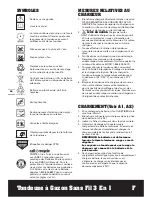
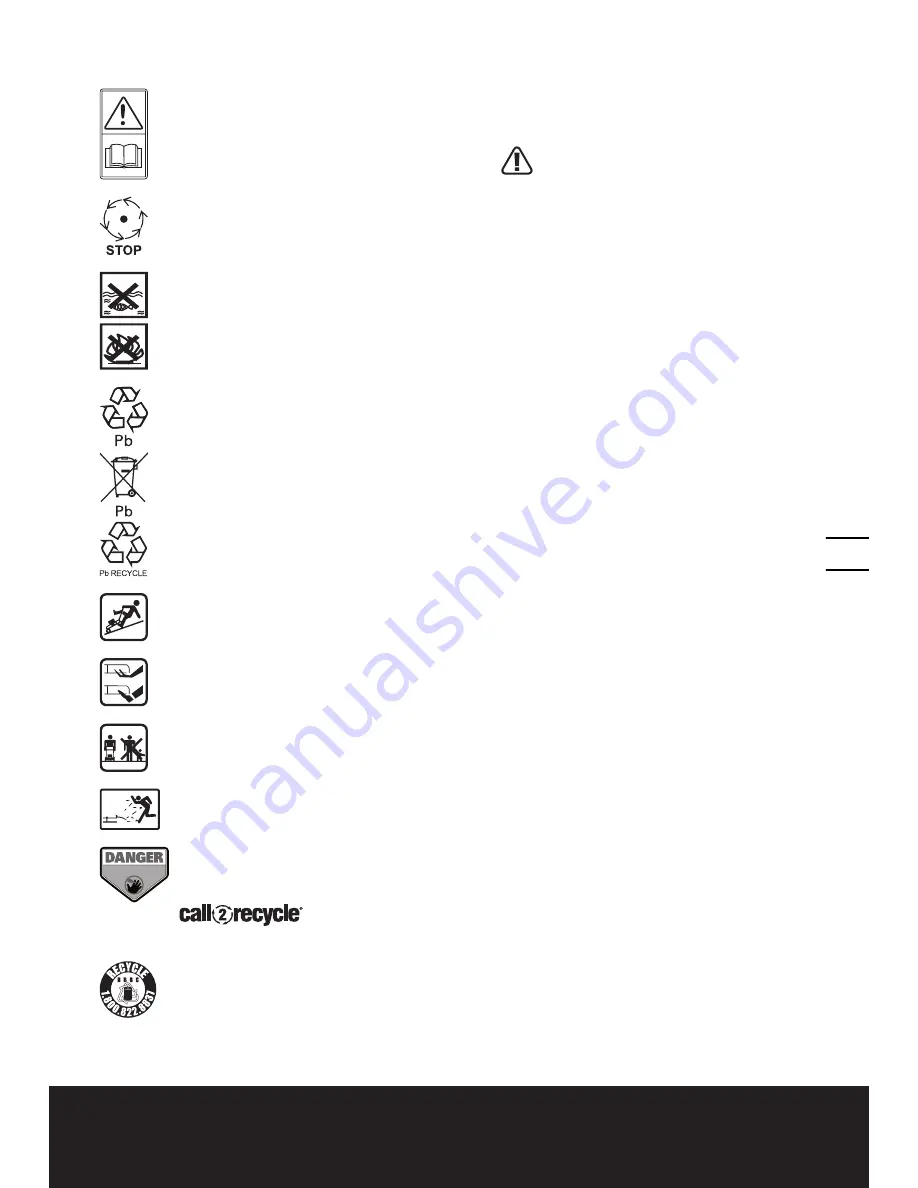
SYMBOLS

CHARGER SAFETY RULES 

1.   Plug charger directly into an electrical outlet. DO 

NOT ABUSE THE CORD. Never carry charger by 

cord. Do not disconnect the charger from the 

outlet or mower by pulling it by the cord.

2. 

CAUTION:

 To reduce the risk of fire, 

electrical shock, or personal injury do not 

attempt to use this charger with any other 

product. Likewise, do not attempt to charge the 

battery with any other charger.

3.   Do not service mower with charger or safety key 

installed.

4.   Do not operate a damaged charger. Replace 

damaged cords or charger immediately by 

calling the WORX Helpline at 1-866-354-9679.

5.   Always charge the mower in a dry area protected 

from the weather. Do not expose the mower or 

charger to rain. Do not charge in wet locations. 

Do not charge mower when temperature is 

above 104°F (40°C) or below 41°F (5°C).

6.   Keep the mower and charger away from water, 

heat sources, (Such as radiators, heaters, 

stoves...etc.) flames, or chemicals. Be careful not 

to damage the charger cord, by keeping cord 

away from sharp edges.

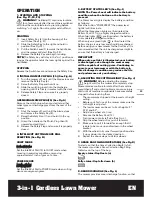
CHARGING PROCEDURE 

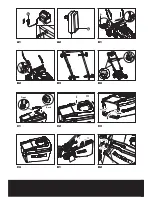
(See Fig. A1, A2)

1.  Charging can be carried out only with the battery 

REMOVED from the machine (See Fig. A1).

2.  Plug the charger connector into the receptacle on 

the battery. (See Fig. A1)

3.  Insert the plug of the charger into the wall 

receptacle. 

4.  The light will be red to show the charging 

is beginning. The light will turn green when 

charging is complete (approximately 6-7hours to 

charge a fully discharged mower). (See Fig. A2)

NOTE:


If the battery is defective, the red light 

will flash.

The lights will only function when the charger 

is connected to both the battery and wall 

receptacle.

5.  Always keep the battery connect with the charger 

and the charger is powered on. After the battery 

is fully charged, the green light will turn on. 

The charger will not switch off and will continue 

charging to make sure the capacity stays above 

90%.

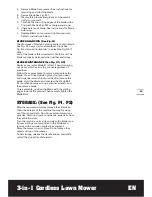
BATTERY CARE

The battery in your cordless lawnmower is a 24-volt 

sealed lead acid system. The battery can be stored in 

any position without fear of leakage.

• 

For optimal battery life and performance the 

battery should be fully charged every 2 months 

during storage

Safety alert

Read the operator’s manual

Blade continues to rotate after the 

machine is switched off. Wait until all 

machine components have completely 

stopped before touching them.

Do not expose to rain or water

Do not burn

Do not dispose of batteries. Return 

exhausted batteries to your local 

collection or recycling point.

Contains Pb battery. Battery must be 

recycled or disposed of properly.

Lead-acid battery, battery must be 

recycled.

Slip on slope

Severing of toes or fingers-Rotary 

mower blade

Keep bystanders/children away

Thrown objects from mower deck

CPSC Danger label

POSITEC Inc. has established a 

partnership with the RBRC Corporation 

to recycle any Positec batteries with 

the RBRC-call2recycle seal. For 

environmental protection, please do not 

discard batteries in the trash. After the 

batteries’ life cycle is ended, then please 

call 1-800-822-8837 for a free service 

that will properly dispose of the battery.

KEEP HANDS AND FEET AWAY
GARDER MAINS ET PIEDS À DISTANCE

Summary of Contents for WG782

Page 1: ...3 in 1 Cordless Lawn Mower EN Tondeuse Gazon Sans Fil 3 En 1 F Cortacesped de Bateria 3 En 1 ES P07 P17 P28 WG782...

Page 2: ......

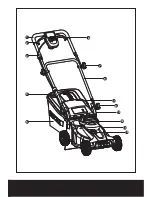
Page 3: ...1 2 3 4 5 6 7 9 8 11 10 12 13 19...

Page 4: ...Front a Back I III II a I II b 14 18 A1 A2 B3 B1 B4 B2 C2 C3 C1 D1 D2 C4...

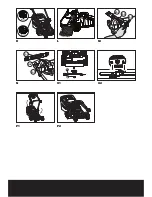
Page 5: ...I I II Rear Front 15 3 2 1 90mm 3 5 70mm 2 75 50mm 2 90mm 3 5 70mm 2 75 50mm 2 D3 E1 E4 E2 F1 E3 F3 G F2 I J H...

Page 6: ...16 17 N 1 N 2 N 3 a b M 1 M 2 M 3 K L O1 M O2 N P2 P1...

Page 7: ...alifornia to cause cancer birth defects or other reproductive harm Some examples of these chemicals are Lead from lead based paints Crystalline silica from bricks and cement and other masonry products...

Page 8: ...ndling batteries in order not to short the battery with conducting materials such as rings bracelets and keys The battery or conductor may overheat and cause burns FOR A BATTERY OPERATED LAWN MOWER EM...

Page 9: ...ing them 9 Maintain or replace safety and instruction labels as necessary SAFE OPERATION PRACTICES FOR WALK BEHIND MOWERS 1 SAFETY INSTRUCTIONS 1 1 Training a Read the operating and service instructio...

Page 10: ...th the equipment Secondary cells and batteries need to be charged before use Always use the correct charger and refer to the manufacturer s instructions or equipment manual for proper charging instruc...

Page 11: ...ed mower See Fig A2 NOTE If the battery is defective the red light will flash The lights will only function when the charger is connected to both the battery and wall receptacle 5 Always keep the batt...

Page 12: ...that clicks into position See Fig C2 2 Clip the plastic clips of the Grass Collection Bag over the metal frame See Fig C3 WARNING Make sure to not fit the handle in the reverse direction as it will no...

Page 13: ...the battery is pressed The Power Level Lights display the battery condition as follows Press the button POWERTEST the power level light s will illuminate When the three green lights are illuminated th...

Page 14: ...e lawn is overgrown it may be necessary to increase the cut height to reduce the pushing effort and prevent overloading the motor For extremely heavy mulching it is advisable to first cut at a high cu...

Page 15: ...hours mowing or 2 years which ever is the sooner regardless of condition Follow these procedures to remove and replace the blade You will need garden gloves not provided and a spanner wrench not provi...

Page 16: ...te for clogging C Wheel height adjustment may be set too low for grass condition Raise cutting height 4 Mower is too hard to push A Raise cutting height to reduce deck drag on grass Check each wheel f...

Page 17: ...spositif de d chiquetage 1 Sac herbe 1 N utilisez que les accessoires compatibles cet outil Les informations des accessoires peuvent tre trouv es sur l emballage du produit chez un d taillant WORX ou...

Page 18: ...risques r duits de blessure Suivez les instructions pour lubrifier et changer les accessoires Gardez les poign es s ches propres et libres d huile et graisse 12 Maintenez les gardes en place et en bo...

Page 19: ...imm diatement la cause Les vibrations indiquent g n ralement un probl me 17 Portez toujours une protection pour les yeux quand vous op rez la machine 18 Consultez les instructions du fabricant pour i...

Page 20: ...diatement d en d celer la cause Les vibrations indiquent g n ralement qu un probl me existe e Arr tez le moteur chaque fois que vous quittez l appareil et galement avant de r parer ou d inspecter l ap...

Page 21: ...gt sur l interrupteur ou sur le dispositif de charge dont l interrupteur est en position de charge 17 D branchez le bloc de batterie de l appareil avant de faire des r glages de remplacer des accessoi...

Page 22: ...icateur de charge est rouge lorsque le chargement de la batterie commence Il devient vert lorsque la batterie est compl tement charg e La charge compl te de la pile plat prend environ 6 7 heures Voir...

Page 23: ...la poign e du bac de ramassage de l herbe sur le dessus du bac tel qu illustr dans les f igures C1 C4 a Identifiez la partie avant et arri re du cadre et du bac de ramassage Voir C1 b Appuyez rapideme...

Page 24: ...e 4 COMMUTATEUR DE MODE DE FONCTIONNEMENT Voir H tat 1 Mode SILENCIEUX S lectionnez le mode SILENCIEUX lorsque vous tondez r guli rement Ce mode coupe environ 1 po 20mm d herbe la fois tat 2 Mode PUI...

Page 25: ...dre la tondeuse puis retirez la clef lorsque vous laissez la tondeuse sans surveillance m me pour une courte dur e 10 CONSEILS RELATIFS LA D SINT GRATION DES BRINS D HERBE En mode de d chiquetage la t...

Page 26: ...a lame de la tondeuse Consulter les rubriques relatives au retrait et l installation de la lame 3 Fixer la lame M 1 dans un tau M 2 4 Porter des lunettes de s curit et prendre soin de ne pas se couper...

Page 27: ...ugment er la hauteur de coupe 4 Il est trop difficile de pousser la tondeuse A Augmenter la hauteur de coupe pour r duire le frottement du chassis sur l herbe V rifier que chaque roue tourne librement...

Page 28: ...s pinturas a base de plomo l la s lice cristalina de los ladrillos del cemento y de otros productos de alba iler a l El ars nico y el cromo de la madera tratada qu micamente El riesgo que se corre a c...

Page 29: ...nga las hojas afiladas 14 Mantenga las manos y los pies lejos del rea de corte 15 Los objetos despedidos por la hoja de la podadora pueden causar heridas graves Siempre debe examinar cuidadosamente el...

Page 30: ...accidentes de resbalones y ca das que pueden causar lesiones graves La utilizaci n de la m quina en pendientes requiere de precauci n adicional Si no se siente seguro sobre una pendiente no utilice l...

Page 31: ...mbiar la direcci n en las laderas No corte el c sped en laderas excesivamente empinadas h Nunca utilice la cortac sped sin las guardas placas u otros dispositivos de protecci n de seguridad adecuados...

Page 32: ...dental 18 En condiciones de uso abusivo es posible que se expulse l quido desde la bater a Evite el contacto Si ocurre un contacto accidental enjuague con agua Si el l quido entra en contacto con los...

Page 33: ...ender de color verde toma aproximadamente 10 12 horas cargar una bater a completamente descargada Ver A2 NOTA Si la bater a se encuentra defectuosa la luz roja comenzar a parpadear Las luces s lo func...

Page 34: ...las barras del mango superior y medio Ver B4 NOTA Aseg rese de guiar el cable por debajo del mango medio Ver B4 2 ENSAMBLAJE DE LA BOLSA PARA PASTO 1 Conecte el mango del dep sito de c sped en la caj...

Page 35: ...E DESBROCE Ver G Para extraer el accesorio de desmenuzado para poder recolectar el c sped siga los pasos que se detallan a continuaci n 1 Apague la podadora espere a que se detenga la cuchilla y quite...

Page 36: ...para pasto y haga que ste se vaya hacia el extreme de la bolsa Limpie tambi n el pasto y cualquier otro desecho que se haya acumulado alrededor del canal de descarga Vuelva a colocar el dep sito de p...

Page 37: ...mos PARA AFILAR LA CUCHILLA EN UNA PRENSA Ver M 1 Aseg rese de haber liberado la palanca del interruptor de que la cuchilla se haya detenido y de quitar la llave de seguridad 2 Saque la cuchilla de la...

Page 38: ...idad Voltee la podadora y verifique que El filo de la hoja Mantenga la hoja afilada No haya obstrucciones en la plataforma o en el conducto de descarga C Es posible que el ajuste de altura de las rued...

Page 39: ...corte de las ruedas para acortar la longitud del corte No corte m s de 1 3 de la longitud total B Verifique el filo de la hoja Siempre mantenga la hoja afilada 10 El tiempo de funcionamiento ser bajo...

Page 40: ...Copyright 2016 Positec All Rights Reserved Copyright 2016 Positec Tous droits r serv s Derechos reservados 2016 Positec Todos los derechos reservados AR01177800 www worx com...

Reviews: