background image

Summary of Contents for WGI55

Page 1: ...2 in 1 Grass Trimmer Edger EN P06 Coupe gazon Taille bordure 2 en 1 F P14 2 en 1 Cortadora de cesped Ribeteadora ES P24...

Page 2: ......

Page 3: ...A1 B2 _ B1 C D F1 F2 G H1 H2...

Page 4: ...K2 K3 M...

Page 5: ...HEEL 9 LINE CUTTER 10 BATTERY PACK 11 TRIMMER HEAD COVER See Fig K2 12 CAP RELEASE LATCH See Fig K2 13 SPOOL See Fig K2 14 TRIMMER HEAD See Fig K2 15 EYELET See Fig K2 1G LINE FEED BUTTON See Fig K1 1...

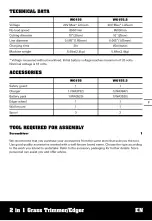
Page 6: ...s Nominal voltage is 18 volts ACCESSORIES WG155 WG155 5 Safety guard Charger Battery pack Edger wheel Wall mount Spool 1 1 WA3732 1 WA3520 1 1 3 1 1 WA3847 1 WA3520 1 1 3 TOOL REQUIRED FOR ASSEMBLY Sc...

Page 7: ...d in appliance with finger on switch Be sure switch is offwhen plugging in 8 Don t Force Appliance It will do the job better and with less likelihood of a risk of injury at the rate for which it was d...

Page 8: ...The cell may explode Check with local codes forpossible special disposal instructions 3 Donot open ormutilate thebattery ies Released electrolyte iscorrosive and may cause damage tothe eyes orskin It...

Page 9: ...the battery to cool down before recharging 3 TO REMOVE OR INSTALL BATTERY PACK See Fig C Depress the battery release button to remove battery pack from your trimmer After recharging insert the battery...

Page 10: ...trimmer line into work area Edging See Fig J Change the tool from trimming to edging mode by putting one foot on the motor housing portion of the trimmer head 20 while gripping the main handle upper s...

Page 11: ...ng inward or down When installed into the spool holder the smooth side of the spool should be visible Release line from cleat on the spool Refit the cap TO FIT NYLON LINE ONLY _ ARNING Take approximat...

Page 12: ...ing head Battery not properly inserted Battery contacts contaminated Battery defective Plug of battery charger not plugged in properly Socket outlet mains cable or battery charger defective Cutting li...

Page 13: ...LOC PILES 11 COUVERCLE DE LA TiTE DE COUPE Voir Fig K2 12 M CANISME DE DI_VERROUILLAGE DU COUVERCLE Voir Fig K2 13 BOBINE Voir Fig K2 14 TiTE DE COUPE Voir Fig K2 15 OEILLET Voir Fig K2 16 BOUTON D AL...

Page 14: ...maximum de 20 volts La tension nominale est de 18V ACCESSOIRES Garde de securit6 Chargeur Bloc piles Roue de coupe bordures Installation murale Bobine WGI 55 1 1 WA3732 1 WA3520 1 1 3 WGI 55 5 1 1 WA...

Page 15: ...on est poussiereuse 6 Utilisez le bon appareil N utilisez pas I appareil pour tout autre travail que pour celui auquel il est destin 7 vitez les demarrages non intentionnels Ne transportez pas les app...

Page 16: ...ou une explosion s applique aux produits fonctionnant avec plus d une batterie primaire remplagable 5 Evitez les demarrages accidentels N inserez pas la batterie avec le doigt pose sur I interrupteur...

Page 17: ...cte de votre Iocalite RETRAIT DE LA PILE ET PRI_PARATION POUR LE RECYCLAGE Pour preserver les ressources naturelles veuillez recycler ou jeter les piles correctement Le produit utilise des piles au li...

Page 18: ...importante Lorsque la batterie est vide la machine s eteint grace a un circuit de protection La poignee de I outil s arr6te de tourner Dans un environnement chaud ou apres une utilisation prolongee le...

Page 19: ...e et pourraient causer de serieuses blessures Ne jamais utiliser d autres materiaux tels que fils ficelle ou corde parce qu ils peuvent casser durant la tonte et causer de serieuses blessures TONTE Te...

Page 20: ...ercle pressez le fermement vers le support de la bobine CHANGEMENT DE LA BOBINE DU CORDON DE COUPE Voir Fig K3 Mettre le coupe herbe a I arr6t et retirer la batterie Retirer le couvercle de protection...

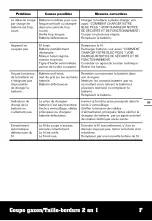
Page 21: ...de ventilation du moteur propres Gardez tousles contr61es de I appareil libres de poussiere D PANNAGE Le tableau suivant decrit les verifications et les interventions que vous pouvez effectuer si votr...

Page 22: ...ectement Le fil est m61e Le fil est use Mesures correctives Charger la batterie a pleine charge voir aussi COMMENT CHARGER VOTRE BLOC PILES _ VOIR CHARGEUR NOTICE DE SECURITE ET DE FONCTIONNEMENT Coup...

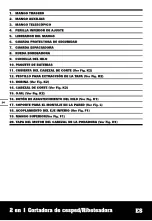
Page 23: ...ETE DE BATERIAS 11 CUBIERTA DEL CABEZAL DE CORTE Ver Fig K2 12 PESTILLO PARA EXTRACCION DE LA TAPA Ver Fig K2 13 BOBINA Ver Fig K2 14 CABEZAL DE CORTE Ver Fig K2 15 O3AL Ver Fig K2 16 BOTON DE ABASTEC...

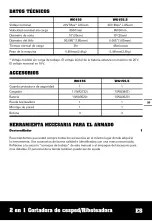
Page 24: ...de 20V El voltaje nominal es 18V ACCESORIOS Guarda protectora de seguridad Cargador Bateria Rueda bordeadora Montaje de pared Bobina WG1 55 1 1 WA3732 1 WA3520 1 1 3 WG155 5 1 1 WA3847 1 WA3520 1 1 3...

Page 25: ...decuada para contener el cabello largo 5 Utilice gafas de seguridad Emplee siempre mascara para la cara o mascara anti polvo en operaciones donde se emite mucho polvo 6 Utilice la herramienta correcta...

Page 26: ...baterias en direcci6n opuesta podria producirse una fuga o explosi6n Aplicable a productos que empleen mas de una bateria principal sustituible de forma independiente 5 Evite un encendido accidental...

Page 27: ...bezal de la podador Ajuste la guarda de seguridad con el tornillo suministrado Iocalizado en el interior de la guarda 2 MONTAJE DE LA RUEDA BORDEADORA Ver Fig B1 B2 Inserte la rueda bordeadora en los...

Page 28: ...ga el mango principal y aplique la fuerza adecuada para realizar el ajuste como indica la Fig H1 Ajuste el angulo del cabezal de corte hacia arriba Coloque un pie sobre la guarda de seguridad sostenga...

Page 29: ...bordeadora alcanzara la velocidad maxima Para abastecer mayor Iongitud de hilo detenga completamente la maquina y luego vuelva a arrancarla dejando que el motor alcance la maxima velocidad Reitere est...

Page 30: ...antenga limpias las ranuras de ventilaci6n del motor Mantenga todos los controles de funcionamiento libres de polvo ALMACENAMIENTO DE LA BORDEADORA DE CESPED a ENSAMBLE DEL SOPORTE PARA MONTAJE EN LA...

Page 31: ...sa Acci6n correctiva Vuelva a cargar la bateria consulte tambien COMO CARGAR EL PACK DE BATERJA VER CARGADOR MANUAL DE SEGURIDADY OPERACION Espere a que la bateria se enfrie caliente P6ngase en contac...

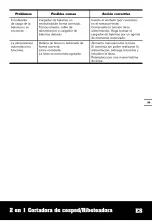
Page 32: ...Bobina de linea no bobinada de forma correcta Linea enredada La linea se encuentra agotada Acci6n correctiva Inserte el enchufe por completo en el tomacorriente Compruebe la tensi6n de la alimentaci6n...

Page 33: ...it s your nature Designed in Italy Made in China Con_ u en Italie Fabriqu6 en Chine UiseRado en Italia Fabricado en China Copyright _2012 Positec All Rights Reserved...

Reviews: