Circular Saw WT430K
13
12
The angle markings on the angle scale (17) are accurate
for most general purposes but it is recommended, for
accurate work, to set the angle with a protractor and
make a test cut on other material. Do not use the depth
of cut scale (10) when making bevel cuts due to pos-
sible inaccuracy.
7. CUTTING GUIDE
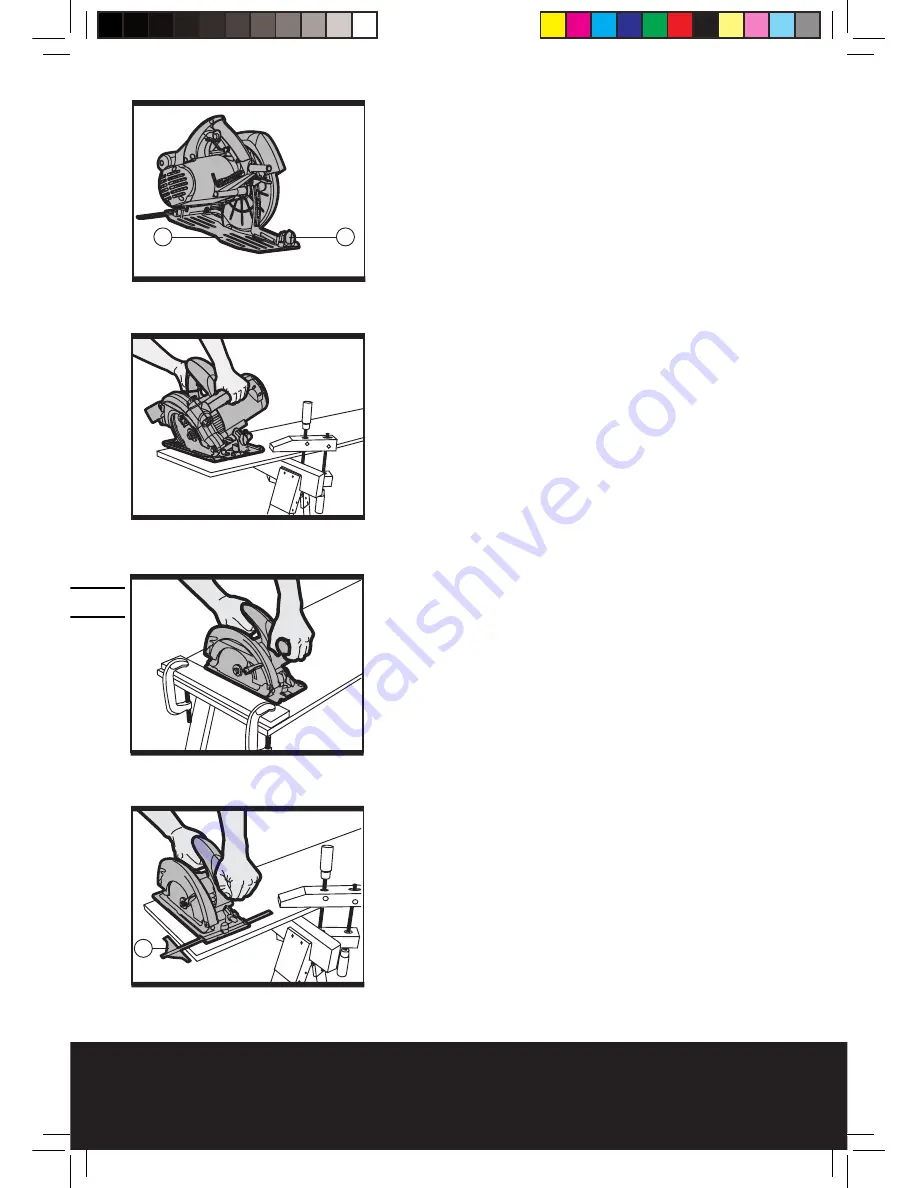
There is a cutting guide notch (18) on the front of the
base plate (3) for use with a parallel guide (20). For
straight cuts, use the 0º guide mark to align with your
parallel guide scale. For a 45º bevel cut, use the 45º
guide mark to align with your parallel guide scale (See
Fig 6 and 7). Securely clamp the parallel guide (20). Al-
ways make a trial cut to check the setting.
8. PARALLEL GUIDE ADJUSTMENT
The parallel guide is used for making cuts parallel to a
work-piece edge at a chosen distance. Slide the parallel
guide (21) arm through both fixtures (19) to achieve the
required cutting distance and tighten screw to lock into
position (See Fig 8). It can be used from both sides of
the base plate (3). The cutting distance is shown on the
guide scale and by using the 90º or 45º notch edge (18)
on the base plate (3). Always make a trial cut to check
the setting.
9. DUST EXTRACTION OUTLET
To remove sawdust, connect a suitable external dust
extraction device (e.g. vacuum cleaner) to the dust ex-
traction outlet (12) using the adapter (19) and a flexible
hose connection. Ensure the hose connection is secure
(See Fig 9).
WORKING HINTS FOR YOUR CIR-
CULAR SAW
a) If your power tool becomes too hot, run your circular
saw no load for 2-3 minutes to cool the motor. Avoid
prolonged usage at very low speeds.
b) Always use a blade suited to the material and mate-
rial thickness to be cut. The quality of cut will improve
as the number of blade teeth increase.
c) Always ensure the work-piece is firmly held or
clamped to prevent movement. Support large panels
close to the cut line. Any movement of the material
may affect the quality of the cut. The blade cuts on the
upward stroke and may chip the uppermost surface or
edges of your work piece. When cutting, ensure your
uppermost surface is a non-visible surface when your
20
Fig 8
Fig 7
Fig 6
7
3
Fig 5
NA-WT430K B37-M-050929.indd 12
2005-9-29 11:53:05


