- 7 -
“x” for later reference and discard the remaining piece of the plug.
34.
Using hot-melt glue (best), spray adhesive (sprayed into a puddle and then spread on) or 5
minute epoxy (not ideal), glue the base slice back into the bottom of the battery cut-out hole,
creating a base for the battery recess. Use the markings you made to orientate it correctly,
ensuring a perfect fit. Put the foam lid aside for later use.
35.
Decide whether you want to mount your receiver flush with the top surface of the wing or
embed it beneath the surface. Base this decision on the layout and size of your receiver and
whether you intend to use a switch or plug the battery plug directly into the receiver. I
personally usually use receivers that have the plug sockets on the top surface (and preferably
the crystal as well) and mount them flush with the top surface of the wing. This means the
servo plugs are then sticking up above the wing’s surface (adding a little drag and ugliness),
but it is then simple and convenient to just
plug in and take out the battery lead to turn
it on and off and gain easy access for
charging.
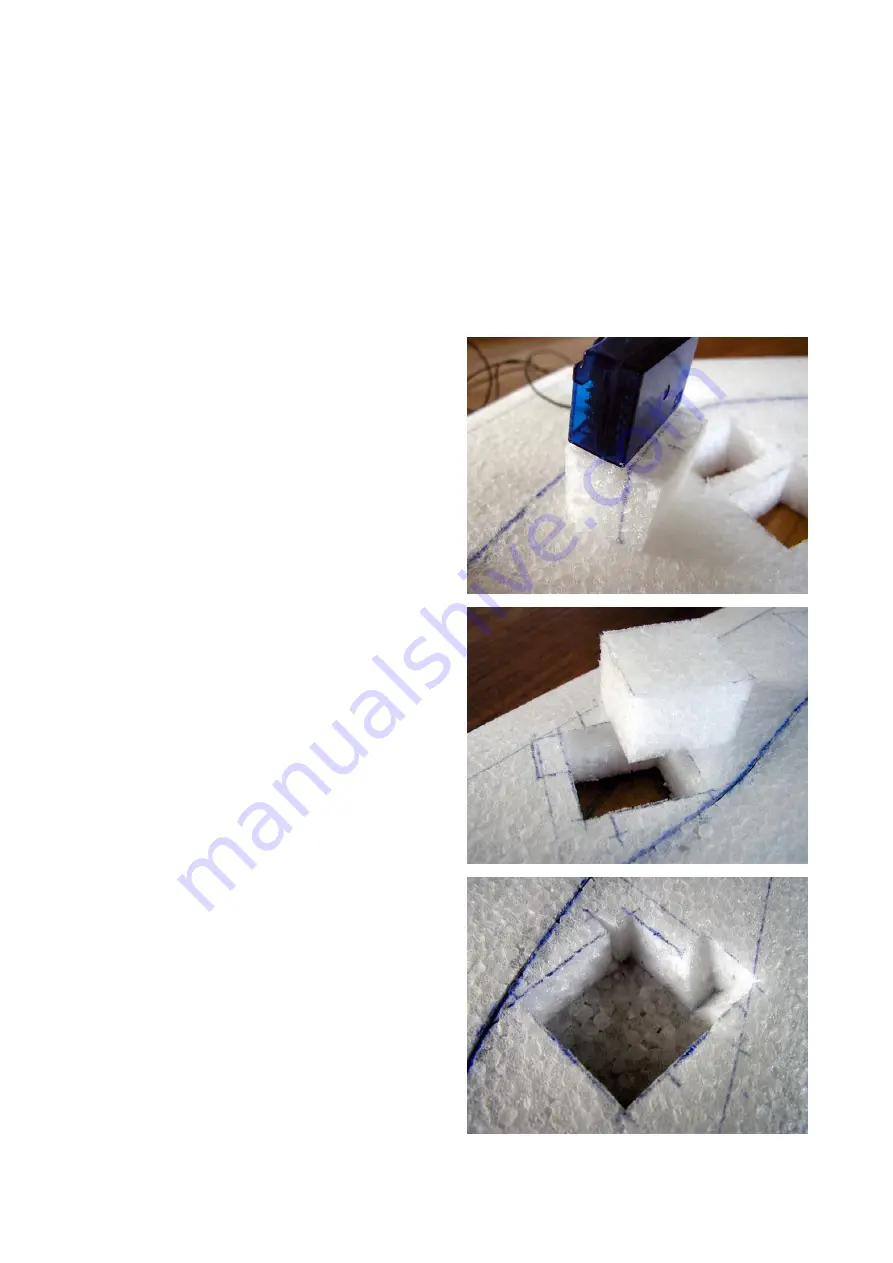
36.
Cut around the outline you made for the
receiver all the way through the foam to
the other side. Remove this foam plug and
draw a line vertically up its front side for
later reference.
37.
Hold the side of your receiver against the
side of the foam plug in the desired
position (eg. flush with the top surface)
and trace the line(s). Repeat this for all
four sides and then cut off a bottom slice
along this outline, and a top slice if you’ve
decided to have your receiver embedded
below the surface. Mark the top of the
slice(s) with an “x” for later reference and
discard the remaining piece of the plug.
38.
Glue the bottom slice of the foam plug into
the bottom of the receiver cut-out hole
forming a base for the receiver recess. Use
the marks on its front side and top to
orientate it correctly, ensuring a perfect fit.
If you have a top slice, put it aside for later
use as a lid over the receiver.
39.
Cut around the outlines you made for the
servos with a sharp knife all the way down
through the foam. Push out the foam plug
and mark with a vertical line up its front
side for later reference.
40.
Hold the side of your servo against the side
of the foam plug flush with the top surface
of the wing and trace out a line. Repeat this
for all four sides and then cut off a bottom
slice along this outline. Mark the top of the
slice with an “x” for later reference and
discard the remaining piece of the plug.


