


proVEOS Installation Guide
51
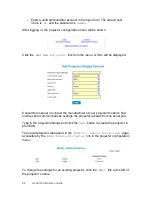
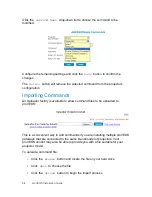
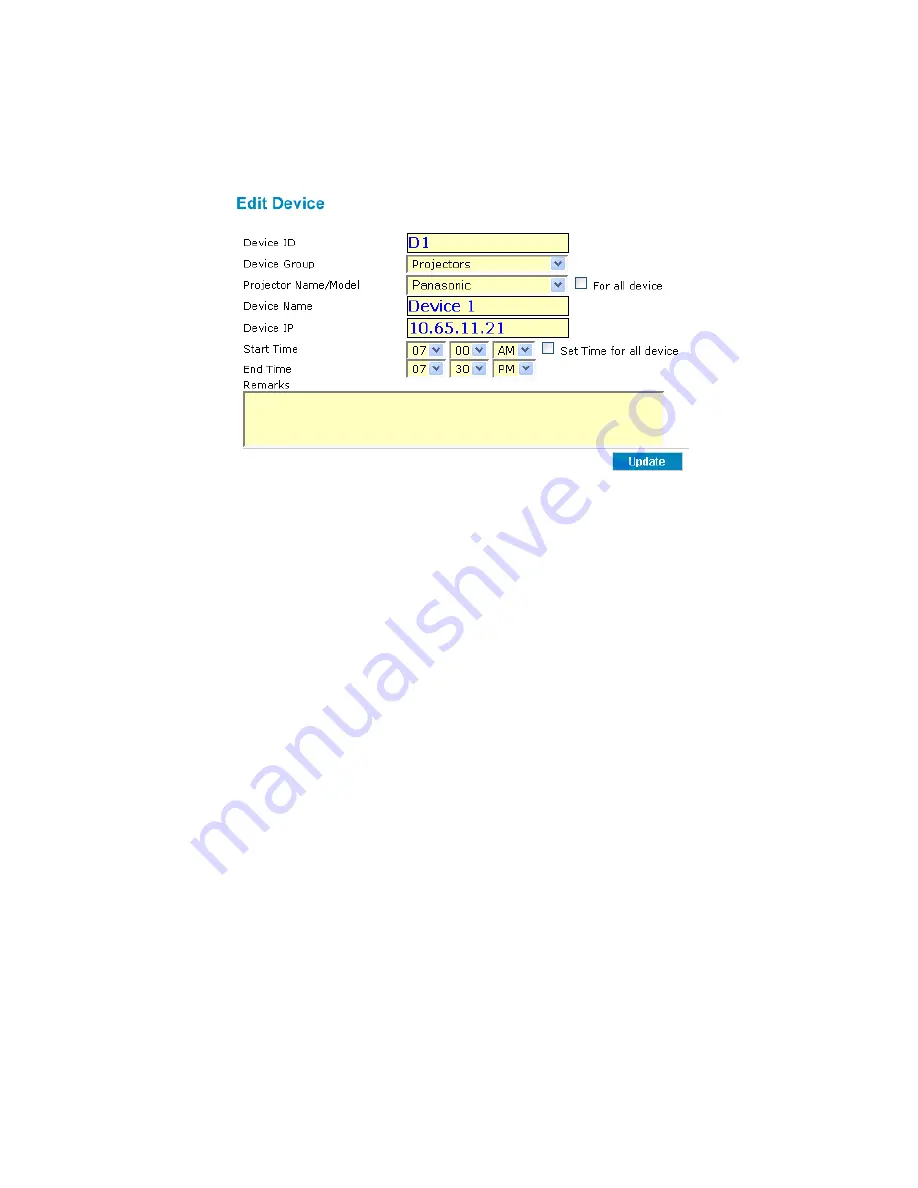
To select a projector, click the
Edit Device
button in the main menu. A list of
projectors will be shown. Click the
Edit
link beside the first projector shown in
the list and the following form appears:
Device ID:
Provide a unique ID for the proVEOS gateway. Special
characters like underscores “_” cannot be used.
Project Name/Model:
Choose the name of the projector being used. The
For all device
checkbox will set this for all projectors available.
Device Name:
Enter an appropriate name for the projector indicating the
location. For example,
Conference Room
.
Device IP:
Specify an IP address for the proVEOS gateway
Start Time:
The time that the projector is turned on daily. The
Set Time
for all device
checkbox sets the provided start and end times for all
projectors available.
End Time:
The time that the projector is turned off daily
Click the
Update
button to save the projector setting.
Adding and Editing Projectors
To add and edit projectors in proVEOS, access the web admin:
Start a web browser
Type the IP address of proVEOS
Click the
Administrator login
link
Summary of Contents for proVEOS
Page 1: ...Installation Guide ...
Page 2: ......
Page 4: ......
Page 5: ...Welcome ...
Page 7: ...Overview ...
Page 10: ......
Page 11: ...Setting Up the Hardware ...
Page 17: ...Installing the proVEOS System ...
Page 21: ...Configuring proVEOS ...
Page 29: ...Presenting from a Client ...
Page 48: ......
Page 49: ...Configuring Projectors ...
Page 56: ......
Page 57: ...Activating proVEOS ...
Page 62: ......
Page 63: ...Troubleshootin g ...


