2s
A
A
D
F
G
F
E
C
C
B
• Use only fresh batteries of the required size and recommended type.
• Do not mix old and new batteries, different types of batteries [standard (Carbon-Zinc), Alkaline or
rechargeable] or rechargeable batteries of different capacities.
• Remove rechargeable batteries from the toy before recharging them.
• Rechargeable batteries are only to be charged under adult supervision.
• Please respect the correct polarity, (+) and (-).
• Do not try to recharge non-rechargeable batteries.
• Do not dispose of batteries into fire.
• Replace all batteries of the same type/brand at the same time.
• The supply terminals are not to be short-circuited.
• Remove exhausted batteries from the toy.
• Batteries should be replaced by adults.
• Batteries should be recycled or disposed of as per state and local guidelines.
• rotect the environment by not disposing of this product with household waste. Check your local
authority for recycling advice and facilities.
IMPORTANT BATTERY INFORMATION:
HOW TO PLAY
SLEEP MODE:
To conserve energy, your Fingerlings
®
will enter sleep
mode after 5 minutes of inactivity. Flip the power switch
off and on again to bring your monkey back to life.
Hang your monkey
upside down
Explore your monkey's
silly side!
Blow air kisses to
your monkey
Your monkey will kiss
you back!
Pet your monkey's head
Your monkey will show
you love!
Tap your monkey's head
For fun reactions!
Press & hold both
sensors (2s)
For a silly surprise!
Clap once or twice
Watch it monkey around!
Cradle your monkey
For sleepy reactions!
BATTERY INFORMATION
Installing or changing batteries in Fingerlings
®
:
1. Lay Fingerlings
®
down so that the battery compartment
faces upwards. Fingerlings
®
requires 4 x “LR44 / AG13”
Button Cell Batteries (included).
2. Using a Phillips screwdriver (not included) remove the
screws on the battery compartment cover.
3. Remove any existing batteries and insert new batteries
according to the diagram. Ensure that the positive and
negative polarities match the illustrations inside the
battery compartment.
4. Replace the battery compartment cover and tighten
screws using the screwdriver. Do not over-tighten.
Fingerlings
®
Battery Diagram/Installation
4 x “LR44 / AG13” Button
Cell Batteries (included)
LOW BATTERY INDICATORS:
When the batteries grow weak, Fingerlings
®
will become slow and unresponsive. When this happens.
Power OFF and replace all batteries.
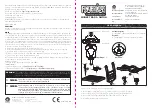
ASSEMBLY INSTRUCTION
STEP 1
STEP 2
*Must be conducted by adult.


