background image


14 

l


Wi-Fi Channel: 

Set the Wi-Fi mode (Country, Channel, Bandwidth).


l


SSID: 

Modify the SSID, hide SSID or not, or turn on/off SSID. 

l


Password: 

Modify the password of Wi-Fi SSID, or hide the password setting.


l


My Screen: 

The main screen of receiver can be change by this tab. Prepare the 

main screen and then enter the tab to upload it. 

l


Dynamic Wallpaper: 

Set dynamic wallpaper.


l


Admin Password: 

The default admin password is “000000”, it can be changed by 

this tab.


l


Screen Saver: 

Set the screen saver to OFF, 15 Minutes, 30 Minutes or 1 Hour. 


l


Upgrade: 

Upgrade software version.


l


Reboot: 

Reboot the device.


l


Reset to Factory Default: 

Reset the device to factory default.


Summary of Contents for WL-HD-02

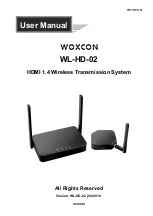
Page 1: ...WL HD 02 HDMI 1 4 Wireless Transmission System All Rights Reserved Version WL HD 02_2020V1 0 User Manual...

Page 2: ...troduction 3 Features 3 Packing List 3 Technical Specification 4 Transmitter 4 Receiver 5 Panel Description 6 System Installation 7 System Connection 7 Indicator Status 8 Product Pairing 9 Main Screen...

Page 3: ...wireless audio and video transmission in the office and home audio visual systems Features l One key pairing without any settings The paired devices do not need to be paired again they can be automat...

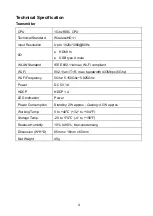
Page 4: ...802 11a n ac Wi Fi compliant Wi Fi 802 11ac 1T1R max bandwidth 433Mbps 5Ghz Wi Fi Frequency 5Ghz 5 150Ghz 5 825Ghz Power DC 5V 1A HDCP HDCP 1 4 LED Indication Power Power Consumption Standby 2W approx...

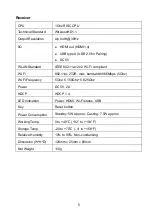
Page 5: ...mpliant Wi Fi 802 11ac 2T2R max bandwidth 866Mbps 5Ghz Wi Fi Frequency 5Ghz 5 150Ghz 5 825Ghz Power DC 5V 2A HDCP HDCP 1 4 LED Indication Power HDMI Wi Fi status USB Key Reset button Power Consumption...

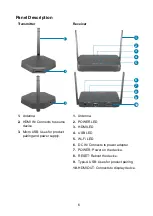
Page 6: ...USB Uses for product pairing and power supply 1 Antenna 2 POWER LED 3 HDMI LED 4 USB LED 5 Wi Fi LED 6 DC IN Connects to power adapter 7 POWER Power on the device 8 RESET Reboot the device 9 Type A U...

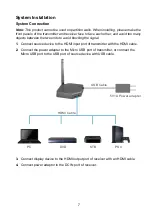
Page 7: ...to avoid blocking the signal 1 Connect source device to the HDMI input port of transmitter with the HDMI cable 2 Connect the power adapter to the Micro USB port of transmitter or connect the Micro USB...

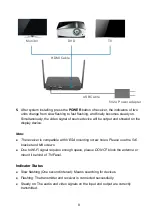
Page 8: ...compatible with VESA mounting screw holes Please use the 5x5 bracket and M4 screws l Due to Wi Fi signal requires enough space please DO NOT block the antenna or mount it behind of TV Panel Indicator...

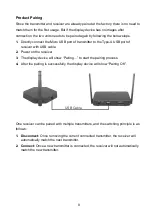
Page 9: ...port of receiver with USB cable 2 Power on the receiver 3 The display device will show Pairing to start the pairing process 4 After the pairing is successfully the display device will show Pairing OK...

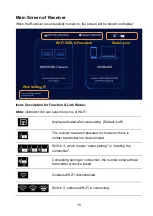
Page 10: ...play activated after web setting Default is off The receiver has been powered on however there is neither transmitter nor device linked Shift in 3 which means under pairing or building the connection...

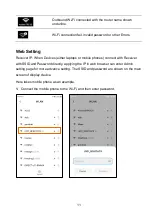
Page 11: ...Devices either laptops or mobile phones connect with Receiver with SSID and Password directly applying the IP in web browser can enter Admin setting page for more advance setting The SSID and password...

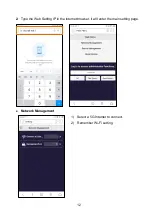
Page 12: ...12 2 Type the Web Setting IP in the internet browser it will enter the main setting page l Network Management 1 Select a 5G Internet to connect 2 Remember Wi Fi setting...

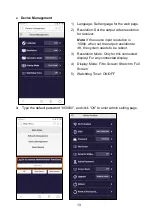
Page 13: ...he source input resolution is 1080p when set the output resolution to 4K the system needs to be reboot 3 Resolution Mode Only for this connected display For any connected display 4 Display Mode Fit to...

Page 14: ...of receiver can be change by this tab Prepare the main screen and then enter the tab to upload it l Dynamic Wallpaper Set dynamic wallpaper l Admin Password The default admin password is 000000 it ca...

Reviews: