14
5.
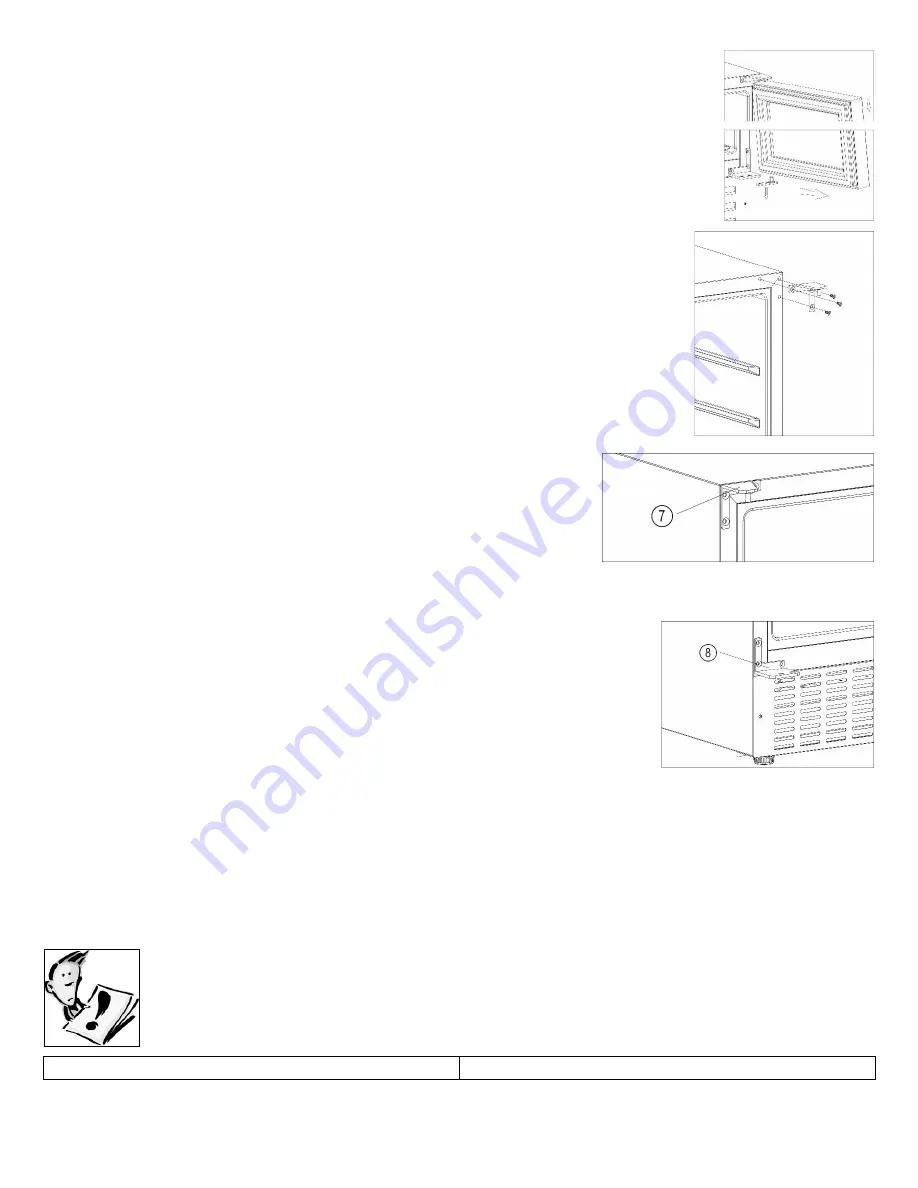
Gently remove the upper door and set it on a non scratching surface with the outside up
to avoid the risk of damage.
NOTE: When removing the door, watch for washer(s) between the center hinge and the
bottom of the freezer door that may stick to the door. Do not lose.
6.
Unscrew the upper hinge which at the top right corner of the wine cooler, and
then use a putty knife or thin blade screwdriver to prize the screw hole cover which at
the left side comer of the wine cooler, re-cover the screw holes on the right hand side.
7.
Screw the alternative left top hinge (included in the fittings) to the top left corner
of the wine cooler and tighten securely.
8.
Rotate the door 180° and then relocate the door to the designated position. Then screw the bottom hinge
assembly on the left desig- nated position and tighten it after the door is leveled.
IMPORTANT: DO NOT HEAT THE DOOR SEAL ON ANYTHING BUT THE LOWEST HEAT SETTING, OR HEAT THE
SEAL FOR A LONG PERIOD OF TIME. OTHERWISE DAMAGE MAY BE CAUSED TO THE DOOR SEAL, WHICH WOULD
NOT BE RECTIFIED UNDER THE GUARANTEE FREE OF CHARGE.
IMPORTANT: WHEN YOU HAVE REVERSED THE DOOR OF THE APPLIANCE, IF YOU HAVE PLACED THE APPLIANCE
ON ITS BACK, YOU MUST WAIT FOR 8 HOURS BEFORE SWITCHING THE APPLIANCE BACK ON.
Troubleshooting
IMPORTANT: If your wine cooler appears not to be operating properly, before contacting the
Customer Care Department, please refer to the checklist below.
PROBLEM
POSSIBLE CAUSE


