background image

PRO2000_DR/AB-6/98

Tampa, FL33618

Technical Support: 800 832 4003

®

16

Installation

Other X-10 PRO products

Modules

A wide range of switch and control modules are available from X-10 Pro, all of which
can be controlled from the same remote controls which are used to operate the security
system. Modules available include replacement wall switches, X-10 controlled AC
outlets, screw-in lamp modules, plug-in appliance modules and many others.

Remotes

As well as being able to add up to 16 security remotes to the system, it is also possible
to add any number of Home Automation wireless remotes such as the handheld Sixteen
Plus™ remote which controls up to 16 modules around the house.

Controls

A range of plug-in controls are available including the Mini Timer which can control up
to four modules with two on/off times each day, the Telephone Responder which allows
the owner to use any touch tone 'phone to call home and control X-10 Pro modules, and
products which allow any Windows™ or DOS PC to control X-10 functions.

Special products

For special installation requirements a range of accessory products are available
including powerline filters for multiple installations in close proximity, RF and powerline
repeaters for larger installations and interface modules to tie-in X-10 control with third
party security products.

Summary of Contents for Pro 2000

Page 1: ...Monitored Security System Installer s Guide Monitored Security System Model Pro 2000 2000...

Page 2: ...the telephone line draws power from the telephone line This is referred to as the device s ringer equivalence number or REN If more than one telephone or other device is connected to the same line add...

Page 3: ...in Remote 10 Door Window Sensor 11 Motion Detector 12 Power Horn 14 Lamp Module 15 Other X 10 PRO Products 16 Monitoring Station Setup 17 Introduction 17 Options downloaded for the monitoring station...

Page 4: ...to 16 Handheld Security Remote with arm disarm and panic functions and buttons to control the security light and up to four additional X 10 Pro Home Automation modules to operate lights and appliance...

Page 5: ...et since this will block the RF signals from sensors and remotes and prevent the system from working The installer can configure the console via downloading to dial out without activating the built in...

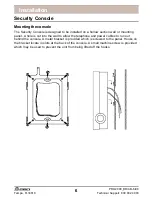
Page 6: ...on a hollow section wall or mounting panel A hole is cut into the wall to allow the telephone and power cables to run out behind the console A metal bracket is provided which is screwed to the panel H...

Page 7: ...ld be connected to the Tip Ring connections coming into the house from the telephone company You then connect the red and green that goes to all the phones in the house to T1 and R1 When the RJ31X plu...

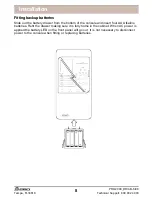
Page 8: ...attery drawer from the bottom of the console and insert four AA Alkaline batteries Refit the drawer making sure it is fully home in the cabinet When AC power is applied the battery LED on the front pa...

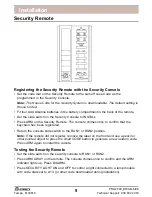
Page 9: ...the Security Remote The console chimes once to confirm that the keychain has been registered Return the console slide switch to the RUN1 or RUN2 position Note If the remote did not register remove th...

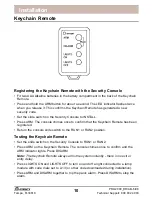
Page 10: ...to confirm that the Keychain Remote has been registered Return the console slide switch to the RUN1 or RUN2 position Testing the Keychain Remote Set the slide switch on the Security Console to RUN1 or...

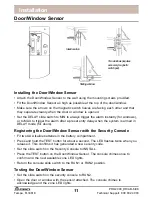
Page 11: ...oors Registering the Door Window Sensor with the Security Console Fit two AA Alkaline batteries in the battery compartment Press and hold the TEST button for about a second The LED flashes twice when...

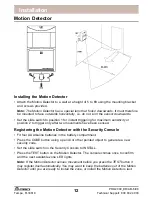
Page 12: ...after two movements have been sensed Registering the Motion Detector with the Security Console Fit four AA Alkaline batteries in the battery compartment Press the CODE button using a pencil or other...

Page 13: ...The LED flashes twice when you release it Wait 20 seconds for the sensor to settle Walk in front of the Motion Detector The indicator LED lights each time it senses movement Check the coverage area an...

Page 14: ...r Horn can then be adjusted to any other unused setting and so will not be triggered when the security light is turned on Plug the Power Horn into a convenient AC outlet preferably an unswitched one t...

Page 15: ...ling the Lamp Module to control other lights Set the House Code dial to match the security lamp code downloaded by the installing security firm The default House Code is A Set the Unit Code dial to an...

Page 16: ...Automation wireless remotes such as the handheld Sixteen Plus remote which controls up to 16 modules around the house Controls A range of plug in controls are available including the Mini Timer which...

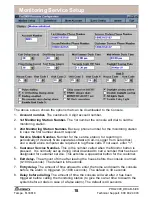
Page 17: ...mode the console turns the three modules on and off randomly between dusk and the Security Light OFF time These modules are typically used for inside lights and a radio or stereo to give the impressio...

Page 18: ...calls If not used enter 1 5 Customer Service Number This is the number called when the Monitor button is pressed It is normally set up during initial download to call a number that has been designate...

Page 19: ...ns on when the system is armed in the away mode and and turns off when the system is disarmed This lets you set back heating air conditioning while you re away as an example Default setting is B12 17...

Page 20: ...office then take it to the customer s location All phone numbers and options are permanently stored in the Console in EEROM Electrically Erasable Read Only Memory until you change them by downloading...

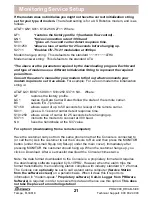
Page 21: ...59 allows a wait of up to 59 seconds for receipt of the remote carrier S9 1 gives a 0 1 second carrier detect response time S10 250 allows a loss of carrier for 25 seconds before hanging up S37 1 inst...

Page 22: ...nfiguration data telephone numbers entry exit delays etc as well as the security codes for the remotes and sensors However the time and date will be lost and will need to be redownloaded from the inst...

Page 23: ...h on the security console to RUN2 Open the door or window with the sensor attached The console chimes to acknowledge and the zone LED lights Testing the Motion Sensor To test the Motion Detector Set t...

Page 24: ...motion detector is good If you need to arm the system and want to ignore a sensor motion detector which is not functioning 1 Press ARM on the Remote control You hear a repetitive trouble alarm to ale...

Page 25: ...e house before you have time to disarm it Arm the system in the delay mode To do this Set the MIN MAX switch on the entrance Door Window Sensor to MAX and the Remote Control to MAX on the Hand held Se...

Page 26: ...and re install the sensor if necessary If appliances turn off during an alarm The system flashes lights by repetitively transmitting on off commands for a specific code Security Light default A13 or o...

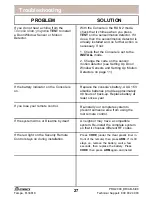
Page 27: ...ors on page 11 If the battery indicator on the Console is on Replace the console s battery 4 AA 1 5V alkaline batteries provide approximately 48 hours of back up Replace battery at least once a year I...

Page 28: ...e Security Light downloaded to the Console default A13 Plug the POWERHORN into another outlet near the Console The Motion Detector causes false alarms All brands of motion detectors sense motion by de...

Page 29: ...same lights that the security system controls RF Interference As with any Radio Transmitter Receiver you may experience areas within your installation that have heavy interference caused by electrical...

Page 30: ..._____________________________________________ Customer Service Phone Number___________________________________________________ PRO2000 Download Information 1 Account number 2 1st Monitoring Station Nu...

Page 31: ...27 Disable Daylight savings 28 All Lights Flash 29 Enable Entry Light PRO2000 Zone and Remote Set up Zone Type Door Window Motion Name front door etc Delay Instant D I 1 2 3 4 5 6 7 8 9 10 11 12 13 14...

Page 32: ...PRO2000_DR AB 6 98 Tampa FL33618 Technical Support 800 832 4003 32...

Reviews: