- 10 -
- 11 -
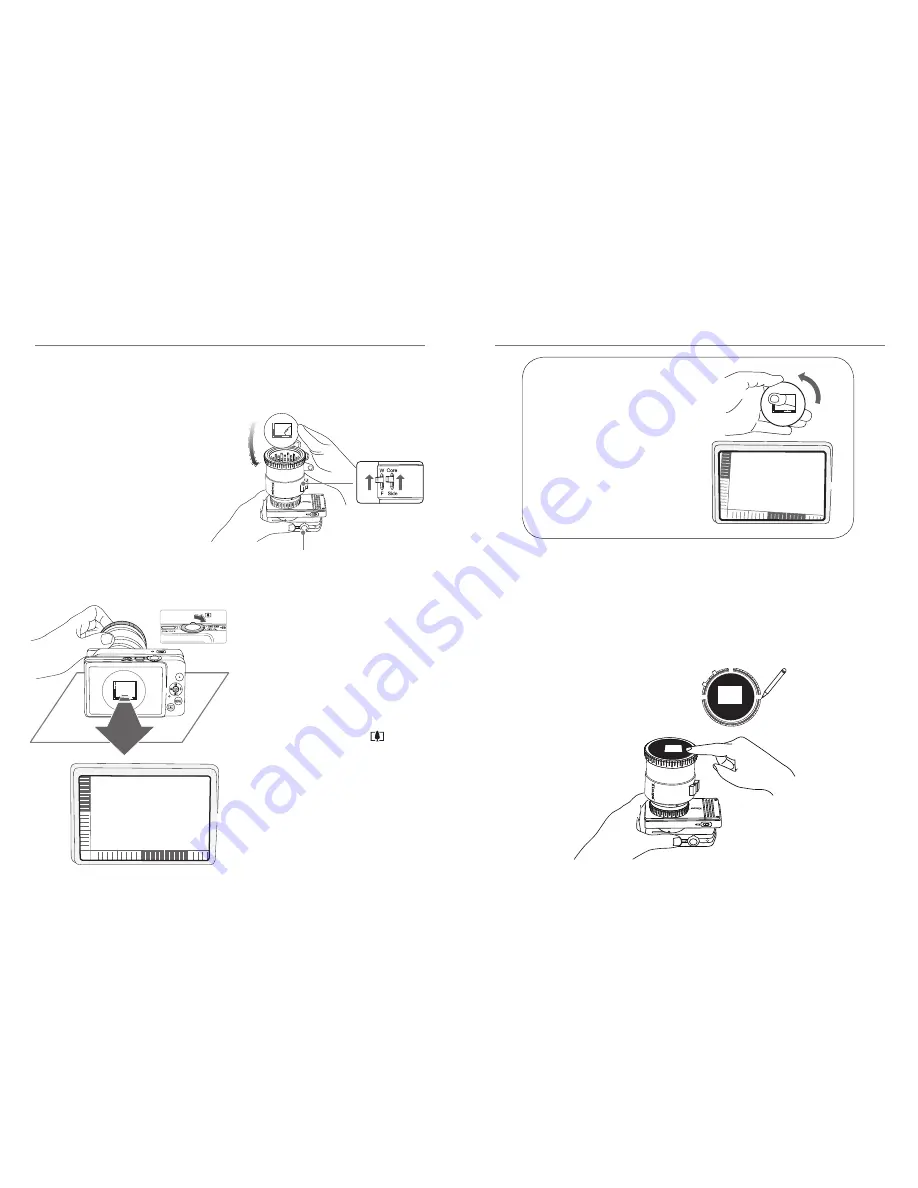
3 Steps in positioning and bonding of L-Square Ruler
(1) Have the lens cleaning cloth
placed on the table (to avoid
a rub of camera LCD screen),
then set the assembled finished
MGP4_PLUS upright on; the
way holding camera as shown in
Figure 1.
(2) Make sure the light setting
switched on W & Core.(Figure 2)
(3) Face the ruler side of the sticker
(still keep the plastic film), and
then place it fitted into the groove
of lens top.
(4) With left hand hold the front of lens
to keep the sticker position while
make the lens barrel with camara
body forward lay down flat on the
table as shown in Figure 3.
(5) Turn on both power of Camera and
Module; the image will appear on
LCD screen as shown in Figure 3.
Move the zoom lever (at the upper
right of camera) toward , till
the image is enlarged as shown in
Figure 4.
figure 3
figure 4
Oblique Image Rectification
If the image of L-Square Ruler
is slanted, with the left point finger
to hook into the Ruler while adjust
the image. (The scale line of ruler
should along the edge parallel to
frame of screen).
(6) Once the L-ruler is close to the screen frame which look like a double- L, with left
hand to fix the position while re-erect the lens barrel as shown in Figure 5.
(7) Make pencil marks across the edges of L-ruler and lens so that can be replaced
at this position (shown as figure 5, upper right);
(8) Then tack out L-ruler sticker, remove the plastic cover now, once again align the
marks while replace it into the groove, then gently press the adhesive edge for
fixed.
figure 5
figure 1
figure 2
Power
Summary of Contents for Conceiver series MPG4 PLUS
Page 1: ...Conceiver series MPG4_PLUS User Guide ...
Page 14: ... 24 25 ...
Page 16: ... 28 MEMO ...


