Rev.081022
Page 12 of 22
FUS-20852000-0031
4.
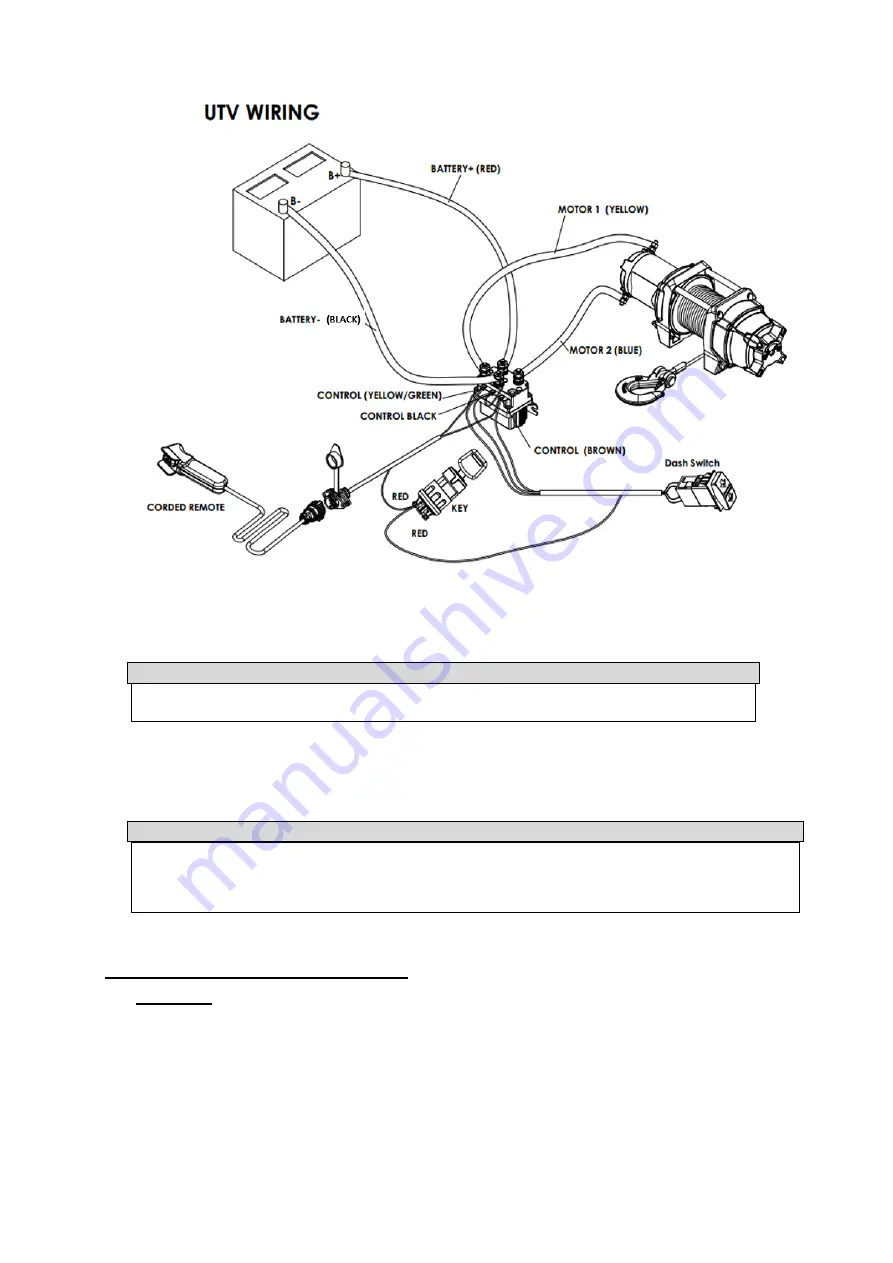
Attach
the blue and yellow cables to their corresponding terminals on the winch.
Apply Di-Electric
Grease to protect connections from corrosion.
5. Install the control wiring or switch wiring harnesses.
NOTE:
Use the images shown above to make all electrical wiring connections for the controls included
with your specific winch kit.
6 . Attach the black battery cable directly to the negative terminal of the battery.
7 . Attach the red battery cable directly to the positive terminal of the battery.
8. Lift the socket cover exposing the electrical switch connector. Insert the wired remote controller
into the socket.
NOTE:
The attachment of the Motor Cables determines the operation of the Remote button. After the unit is
mounted and powered, check the direction of the Power-In and Power-Out on the Remote button. If
you wish to change the direction on the Remote, disconnect the Battery Cables from the battery,
switch the Motor Cable connections on the Motor Assembly, then reconnect the Battery Cables.
9. Disconnect the corded remote controller when not in use.
Preparing & Stretching Winch Rope:
WARNING: Always pre-stretch all new ropes before first use. Failing to pre-stretch rope will
reduce maximum capacity of rope and may cause premature failure.
1. Position the vehicle on a flat surface approximately one full rope-length distance from an anchor point,
such as a large tree.
2. Connect rope to anchor point with at least five (5) full wraps of rope on the winch drum.
3. Recoil the rope back into the winch under at least 500 lb. (227 kg) of tension. Apply light pressure to
vehicle brake pedal as needed to produce load.


