e X a c t A u t o - S c a n S y s t e m
5
Unpacking and Inspection
After removing the instrument from the shipping carton, inspect it for damage. If any damage has
occurred during shipping, immediately contact the transportation company. Do not proceed with
installation until the carrier’s agent has inspected the damage.
Your instrument was packaged in a specially designed carton to assure against damage. If shipment is
necessary, the instrument should be packaged in the original carton along with all the accessories. If the
original carton is not available, contact X-Rite to have a replacement shipped to you.
Packaging Contents:
•
eXact Auto-Scan
•
Handled paper stop (2)
•
Charging Adapter
•
Vacuum pump (optional)
•
USB interface cable
•
Foot switch (optional)
•
AC adapter (X-Rite P/N SE30-277) and line cord
•
eXact InkKeyControl 2 software (optional)
•
Paper stop / flat hold down magnet (4)
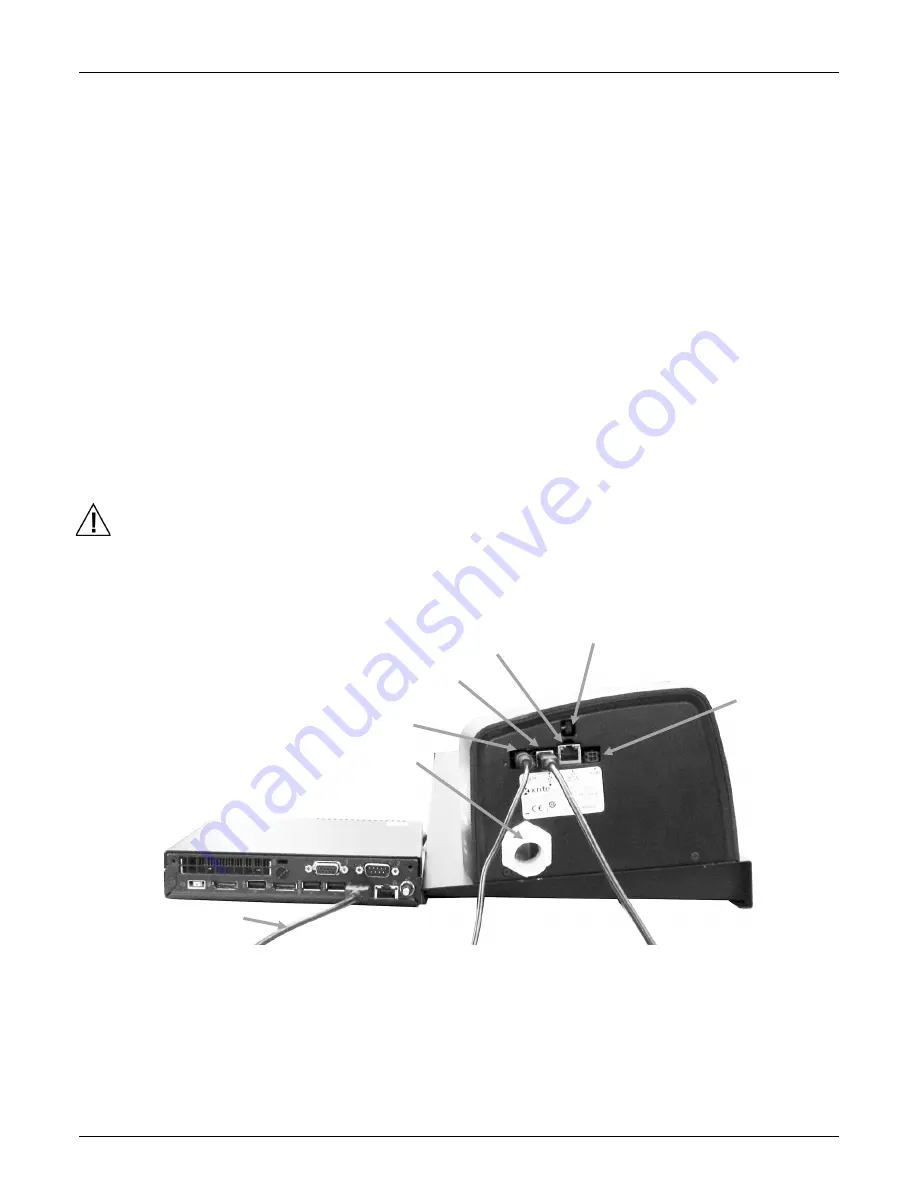
System Connections
Note:
Please allow the system to stabilize at room temperature before plugging the power supply into
an AC wall receptacle.
Operational hazard exists if a power supply other than X-Rite SE30-277 is used.
1.
Plug one end of the USB cable into the port on your computer.
2.
Plug the other end of the cable into the USB port (1) on the right side of the system.
3.
Plug the input connector from the eXact Auto-Scan power supply into the input port (2) located on
the right side of the system.
4.
Plug the detachable line cord into the power supply and then plug the line cord into the AC wall
receptacle.
5.
Connect the computer power supply, monitor, keyboard and mouse (if applicable) to the computer
according to the instructions supplied with those devices.
NOTE:
Refer to the following pages for information on connecting the optional vacuum pump and foot
switch if required.
Power supply (2)
USB port (1)
Optional vacuum pump hose connection
Optional vacuum
pump/foot switch
connection
USB cable
Computer
Ethernet port (not used)
Laser alignment wheel (refer to the
Appendix)
Summary of Contents for PANTONE exact Auto-Scan
Page 1: ...Auto Scan Setup and Operation ...
Page 2: ......
Page 13: ...e X a c t A u t o S c a n S y s t e m 11 Charging station 5 ...


