background image


Page15

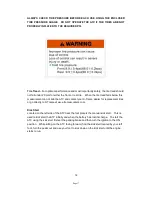
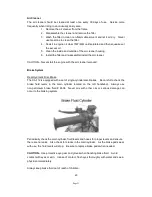
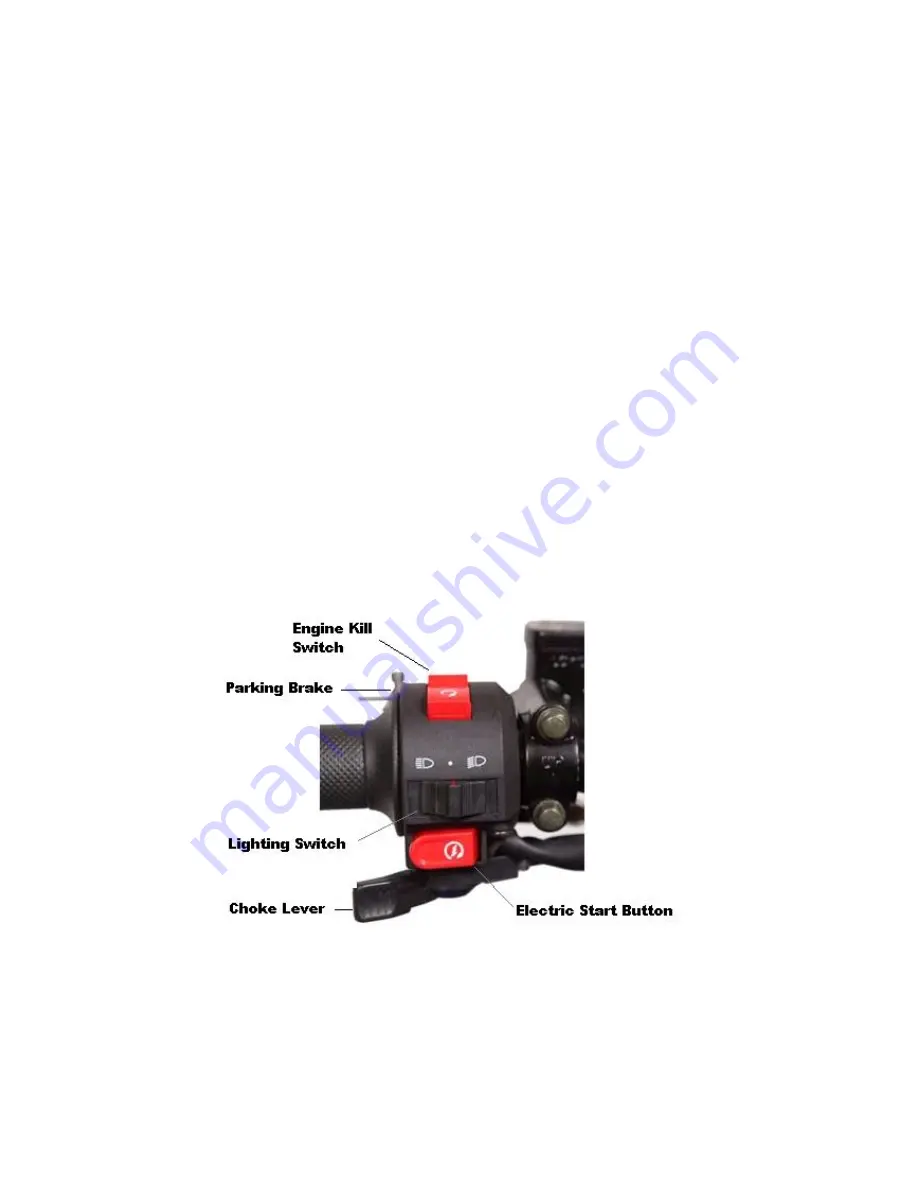
Left Handlebar Controls 


Emergency Kill Switch 

During normal use, the switch is set in the middle position.    To stop the engine, simply 

push the RED emergency kill switch to either the right or left position.    Once the engine 

has stopped you must reset the switch by pressing it in (towards the front of the ATV) to be 

able to start the engine again.   


Parking Brake 

When the ATV is not in use, and to keep the ATV from rolling, always engage the parking 

brake. The parking brake is located on top of both the left and right hand brakes.    Pull the 

hand brake towards the rider and press the button down to engage the parking brake. 


Electric Starter Button


To start the ATV using the electric starter button, the battery must be fully charged from 

previous riding.    First, set the parking brake.    Then turn the ignition key to the right (ON) 

position and depress the left hand brake while pressing the starter button.   


Headlight Hi/Lo Switch 

To change from Hi/Lo beam, simply push or retract the switch as shown below.     


14 

Summary of Contents for XA-112

Page 1: ...Page1 Model XA 112 Gas 110CC ATV Product Manual Revised 01 20 09 Recommended age 12 years or older X Treme TM Electric Scooters ...

Page 2: ...ENTS 8 GETTING STARTED ASSEMBLY 9 10 HANDLEBARS 9 FRONT REAR GRILL GUARD 9 BATTERY 9 10 WHEELS 10 ITEM DESCRIPTIONS OPERATION 11 16 FRONT HANDLEBAR 11 LEFT VIEW 11 RIGHT VIEW 12 IGNITION SEAT FUEL 12 SEAT LOCK FUSE 13 LEFT HANDLEBAR 14 MAX SPEED ADJUSTMENT 15 ENGINE OIL 15 TIRES TIRE PRESSURE 15 16 OPERATION GUIDE 17 18 PRE RIDE INSPECTION 17 STARTING 18 MAINTENANCE STORAGE 19 24 ENGINE OIL 19 AIR...

Page 3: ...E It is recommended that you use this same oil when refilling or changing Please take care of your XA 112 FOR OFF ROAD USE ONLY It is illegal to ride this vehicle on public roads or highways DO NOT JUMP or ABUSE THIS PRODUCT DO NOT RIDE IN WET ICY CONDITIONS Failure to follow these instructions properly will VOID YOUR WARRANTY 2 IMPORTANT Failure to follow these INSTRUCTIONS will VOID YOUR WARRANT...

Page 4: ...ecommended that all operators read thru this user manual completely before riding and have had proper safety and riding training or completed ATV riding courses SAFETY Persons without excellent vision balance coordination reflex muscle and bone strength and good decision making capabilities should not use this product Riders under the age of 12 are not recommended to operate this ATV Manufacturer ...

Page 5: ...or proper slowing down and smooth stops Maintain your X Treme XA 112 as recommended in this Product Handbook Use only quality replacement parts as recommended by the manufacturer Inspect the entire ATV prior to each use Replace any part that is cracked chipped or damaged before use NEVER operate this ATV if you are under the age of 12 NEVER ATTEMPT TO OPERATE THE ATV WHILE UNDER THE INFLUENCE OF A...

Page 6: ...erator age 12 or older Below are the required warning labels and their location Should a label become removed or lost from the ATV contact your dealer or www x tremescooters com support for a replacement label 1 Type I Age Recommendation Warning Label This label is located on the right front fender facing the rider and is visible when riding Figure 1 5 ...

Page 7: ...Page7 2 Tire Pressure Warning Label This label is located on the rear left fender Figure 2 3 Overloading Warning Label This label is located on the rear left fender Figure 3 6 ...

Page 8: ...Page8 4 Type I General Warning Label This label is located on the front left fender Figure 4 5 Type I Passenger Warning Label This label is located on the rear left fender Figure 5 7 ...

Page 9: ...r X Treme XA 112 comes with the following items in the box Please locate all of the following 1 The X Treme XA 112 ATV 2 12V Battery Charger 3 Tool Kit 4 Product Handbook 5 4 Wheels 6 Ignition Key 7 Bag of parts nuts washers cotter pins spacers handlebar clamps 8 ...

Page 10: ...t it on the top of the handle bar you can then fit bolts through clips then screw into the ATV bracket Leave loose until all 4 bolts are started and then tighten when in position desired 3 Your XA 112 also comes with the front bumper grill detached for shipping Begin by locating the 4 bolts Next attach the left and right bracket to the ATV frame as shown and secure with the supplied bolt as shown ...

Page 11: ...he nut Rear Wheel Assembly To fit the rear wheel first you must insert the right left tube over axle Now you can fit the rear wheel onto the rear axle Once in place you can fit the big washer then the slotted nut Fully tighten the slotted nut and secure it with the supplied split pin Fully insert the split pin between spines in nut and whole through the axle When completely through bend the split ...

Page 12: ...Page12 Item Descriptions Front Handlebar Descriptions Left View Descriptions 11 ...

Page 13: ...ch The ignition is located on the front right side X Indicates the off left position Engine and lights will not operate and the key can be removed Indicates the on right position Engine and lights can be operated and the key cannot be removed 12 ...

Page 14: ...sive under certain conditions Always refuel in a well ventilated area with the engine turned off Do not smoke or allow flames or sparks within the area while refueling or where gasoline is stored Never overfill the tank After refueling be sure the gas cap is securely closed Be careful not to spill fuel when refueling Spilled fuel or fuel vapors can ignite Be sure to clean up any spilled fuel and e...

Page 15: ...ep the ATV from rolling always engage the parking brake The parking brake is located on top of both the left and right hand brakes Pull the hand brake towards the rider and press the button down to engage the parking brake Electric Starter Button To start the ATV using the electric starter button the battery must be fully charged from previous riding First set the parking brake Then turn the ignit...

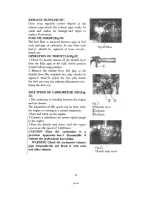
Page 16: ... every 50 100 hours of use To change the oil unscrew the drain plug located on the bottom of the crank case and drain the oil being sure to dispose of the oil properly and within regulations Replace the plug and refill using the recommended oil as listed above CAUTION RUNNING THE ENGINE WITH INSUFFICIENT OIL CAN CAUSE SERIOUS DAMAGE TO THE ENGINE BE SURE TO CHECK THE OIL LEVEL BEFORE EACH USE AND ...

Page 17: ...nd contact your X Treme dealer for replacement tires or go directly to X Treme at ww x tremescooters com Kick Start Located on the left side of the ATV near the foot plate is the manual kick start This is used to kick start the ATV initially and when the battery has lost its charge To start the ATV using the kick start first set the parking brake and then turn the ignition to the ON position While...

Page 18: ...ate properly Check all four tires for proper inflation pressure using the tire pressure gauge Inspect each tire for wear tear and tread depth Check proper throttle operation When let go the throttle should spring back to the idle position Inspect the ATV and test all nuts bolts for tightness Ensure all nuts bolts are securely fastened Test the steering to ensure the steering operates properly and ...

Page 19: ...conds before pressing again 5 When starting and warming up be sure to maintain the throttle slightly 6 Allow the engine to warm up for a few minutes before riding Once the ATV is properly started and has warmed up release the parking brake and with both hands on the handlebars depress the throttle slowly to begin forward movement To slow down release the throttle and depress both the left and righ...

Page 20: ...e oil level should be between the upper and lower level marks on the dipstick Add oil when necessary Changing of Engine Oil As noted in the maintenance schedule the oil should be changed every 50 100 hours of use 1 Remove the cap from the crankcase and drain the oil completely 2 Replace the cap 3 Add the recommended oil The amount to fill is approximately 0 8L CAUTION Running the engine with the i...

Page 21: ...emoved Brake System Rear Hydraulic Disc Brake The XA 112 is equipped with a set of single cylinder disc brakes Be careful to check the brake fluid levels in the main cylinder located on the left handlebar Always use non petroleum brake fluid 4604 Never mix with other oils or serious damage can occur to the braking system Periodically check the main cylinder fluid levels and hoses for proper levels...

Page 22: ...Page22 21 ...

Page 23: ...ve off battery gases Keep away from sparks flames and lit cigarettes Provide adequate ventilation when charging the battery CAUTION Always wear gloves and protective eye gear when handing battery fluid Contact with the skin or eyes can cause permanent damage If battery fluid comes in contact with eyes or is ingested flush eyes immediately with water or drink water and seek a physician s assistance...

Page 24: ...Page24 23 ...

Page 25: ... please go to the X Treme website at www x tremescooters com Thank you for purchasing an X Treme XA 112 and please tell your friends how much fun you re having on the X Treme ATV 24 For General Information or Parts Visit www x tremescooters com For Technical Support or Assistance Visit www x tremescooters com support ...

Page 26: ...Page26 ...

Reviews: