


- 1 -
PLEASE READ THIS MANUAL BEFORE
USING YOUR NEW X-TRONIC Model
#3050-PRO-X SOLDERING STATION
This manual is provided to make a safe and effective use of the X-Tronic
3050-PRO-X soldering station and to maintain this instrument in proper
working condition. Be sure to keep this manual in a handy place near the
unit for future reference.
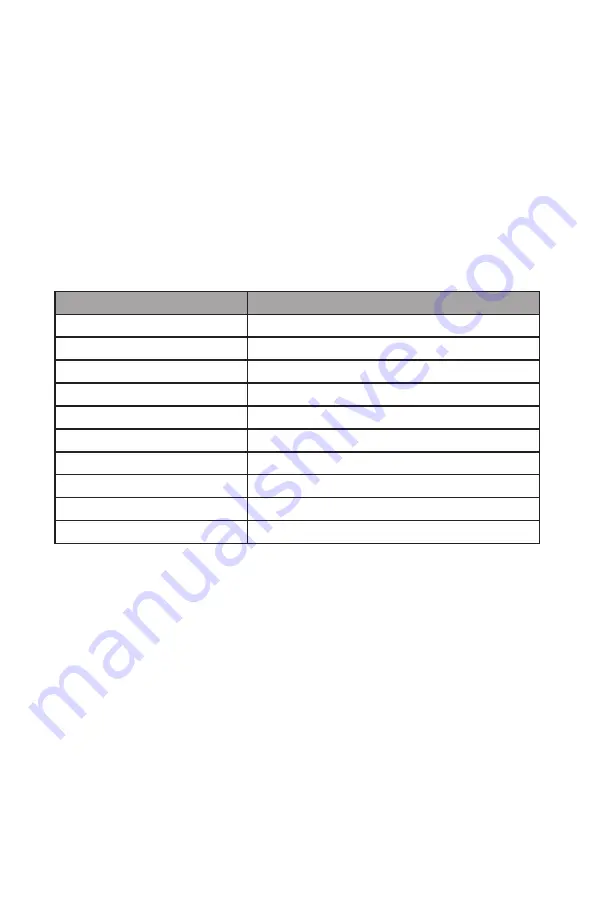
PRODUCT SPECIFICATIONS
Model
XTR- 3050-PRO-X
Dimensions (assembled)
5.5” L x 5.25” W x 6” H
Weight
1.5 lbs
Working Environment
32°F ~ 104°F / 0°C ~ 40°C
Storing Environment
-4°F ~ 176°F / -20°C ~ 80°C
Storage Humidity
35% - 45%
Temperature Range
392°F ~ 896°F / 200°C ~ 480°C
Temperature Stability
± 3.6°F / 2.0°C (Static)
Grounded Tip Voltage
< 1 mV
Tip Impedance
< 1Ω
Cord Length
≥ 48 in
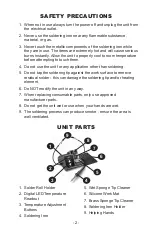
PACKAGE CONTENTS
• Main Power Unit with LED Display
• 75 Watt Soldering Iron with Ergonomic Grip
• Attachable Helping Hands (set of two)
• Built in Heat Resistant Soldering Iron Holder
• Solder Roll Holder
• Brass Sponge Soldering Tip Cleaner
• Wet Sponge Soldering Tip Cleaner


