


- 2 -
SAFETY PRECAUTIONS
1. When not in use always turn the power off and unplug the unit from
the electrical outlet.
2. Never use the soldering iron near any flammable substance,
material, or gas.
3. Never touch the metallic components of the soldering iron while
they are in use. The items are extremely hot and will cause serious
burns instantly. Allow the unit to properly cool to room temperature
before attempting to touch them.
4. Do not use the unit for any application other than soldering.
5. Do not tap the soldering tip against the work surface to remove
residual solder - this can damage the soldering tip and/or heating
element.
6. Do NOT modify the unit in any way.
7. When replacing consumable parts, only use approved
manufacturer parts.
8. Do not get the unit wet or use when your hands are wet.
9. The soldering process can produce smoke - ensure the area is
well ventilated.
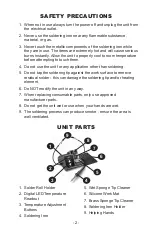
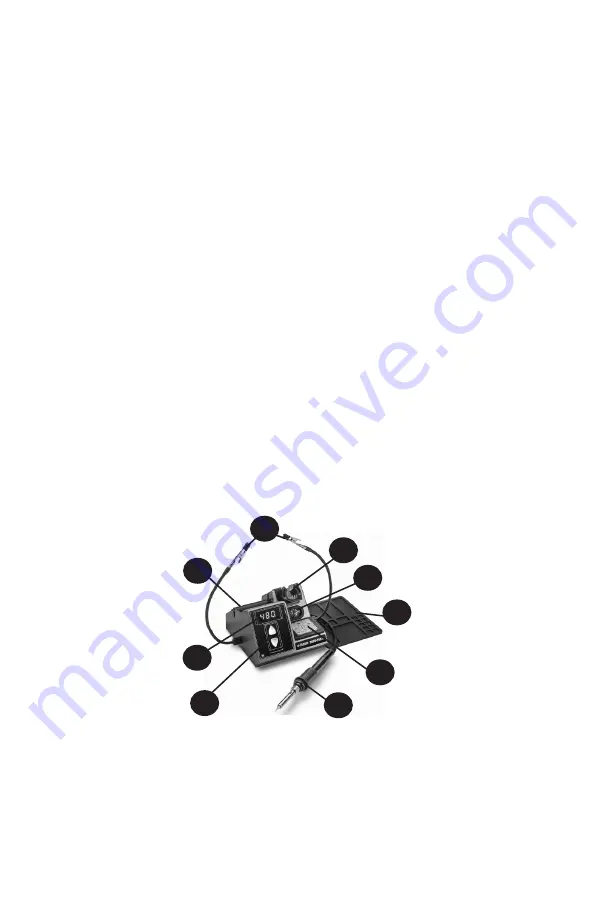
UNIT PARTS
1
3
4
5
6
7
8
2
9
1. Solder Roll Holder
2. Digital LED Temperature
Readout
3. Temperature Adjustment
Buttons
4. Soldering Iron
5. Wet Sponge Tip Cleaner
6. Silicone Work Mat
7. Brass Sponge Tip Cleaner
8. Soldering Iron Holder
9. Helping Hands


