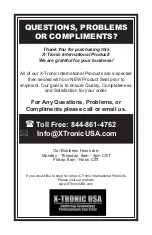
background image

QUESTIONS, PROBLEMS

OR COMPLIMENTS?

Thank You for purchasing this 

X-Tronic International Product! 

We are grateful for your business!

All of our X-Tronic International Products are inspected 

then sealed with our NEW Product Seal prior to 

shipment. Our goal is to ensure Quality, Completeness, 

and Satisfaction for your order. 

For Any Questions, Problems, or 

Compliments please call or email us.

If you would like to shop for other X-Tronic International Products

Please visit our website

www.XTronicUSA.com

Toll Free: 844-861-4762

 Info@XTronicUSA.com

Our Business Hours are: 

Monday - Thursday: 8am - 4pm CST

Friday: 8am - Noon CST

Summary of Contents for 4010-PRO-X

Page 1: ......

Page 2: ......

Page 3: ...iagram 4 Initial Set up 4 User Interface 5 Operating Instructions 6 Features 6 Celsius Fahrenheit Conversion 6 Mute Unmute Function 6 Memory Preset Channels 6 Lock Unlock Mode 7 Calibration Function 7 Sleep Function 8 Maintenance 9 Soldering Tip Care 9 Changing the Soldering Tip 9 Replacing the Heating Element 10 Replacing the Fuse 11 Troubleshooting 11 Warranty 12 Contact Information 14 ...

Page 4: ...Tip Impedance 1Ω Display Type LED Bright White Cable Length Material 54 in 137 cm Silicone PACKAGE CONTENTS Main Power Unit 60 Watt Soldering Iron with Ergonomic Grip 54 Silicone Cord on Soldering Iron Virtually NO Memory Soldering Iron Holder Attached to Main Unit Soldering Cord Extension Holder Anti Static Grounding Wire Fuse Replacement 1 In the Fuse Holder in the Back of the Unit Silicone Base...

Page 5: ...n the power off unplug the unit and let it fully cool down before attempting to replace any parts tips heating element etc 6 Use only genuine replacement parts for this unit 7 Do not use the unit for any application other than soldering 8 Do not tap the soldering iron against the work bench to remove residual solder 9 Do not modify the unit in any way 10 When replacing consumable parts only use ap...

Page 6: ...verything from the packaging 3 Place the soldering cord extension holder in the bracket on the right hand side see 1 in drawing above 4 Plug the soldering iron into the back of the unit and place the soldering iron in the soldering iron holder see 2 in drawing above Secure the core in the extension holder optional 5 The brass sponge is in the silicone opening right below the soldering iron see 9 i...

Page 7: ... Set Temperature 5 3 Preset Memory Channels 6 Function Setting Button 7 Currently Selected Preset Channel 8 Lock Unlock Indicator 9 Temperature Setting Buttons 10 PID Proportional Integral Derivative Self Correcting Indicator Light 11 Mute Indicator 1 2 3 5 4 1 Soldering Iron Socket 2 Ground Wire Socket 3 Power Cord Socket 4 Fuse 5 Power Switch FRONT BACK ...

Page 8: ...e to remove excess solder The tip should then be shiny 7 The soldering iron is now ready to solder Proceed according to your standard working practice FEATURES CELSIUS FAHRENHEIT CONVERSION To switch between displaying the temperature in Celsius or Fahrenheit press the SET once quickly The display will toggle between C F MUTE UNMUTE FUNCTION The unit beeps when buttons are pushed or when it goes i...

Page 9: ... will affect the life of the heating element and can cause fatigue When a heating element begins to fatigue the heat that is transferred to the soldering tip from the heating element will begin to drop If the typical temperature used to solder is not working as well as when it was new then it might be time to calibrate the unit Note Heating elements are consumable parts for soldering stations Ther...

Page 10: ...ep if not muted to indicate when Sleep Mode is activated To bring the unit out of Sleep Mode simply pick up the soldering iron from the holder Note The unit will NOT go into sleep mode unless the soldering iron is in the holder To change the default time before sleep mode is activated turn the unit off with the switch on the back of the unit Press and hold the CH1 button while switching the unit o...

Page 11: ...n and tin the tip after each use This will aid in the prevention of oxidation on the tip and help extend its life span 7 Do not allow the soldering iron or the tips to sit idle at high temperatures for extended periods of time 8 Never use a file or other abrasive materials to remove oxidation from the tips 9 To remove oxidation simply flood the tip with fresh solder and wipe it clean on the damp s...

Page 12: ...ding on them from the circuit board and pull the heating element away from the board Please take note of the location of the wire thickness color for installation of new heating element see diagram below 6 On one side of the circuit board solder a thin wire to 1 and a thick wire to 2 see diagram below 7 Flip the circuit board over and solder a thin wire to 3 and a thick wire to 4 see diagram below...

Page 13: ...rd is securely attached to both the unit and the outlet and that the unit is powered on at the back of the unit Ensure that the outlet is functional Check the fuse in the back of the unit to see if it is in good working condition If not replace fuse S E Error Ensure the soldering iron is securely plugged into the back of the unit The heating element may need to be replaced Tip is not heating up as...

Page 14: ... at 2159 Magnum Circle Lincoln Nebraska 68522 we extend this limited warranty only to the consumer who originally purchased the product in the United States the District of Columbia or Canada you It does not extend to a any subsequent owner or other transferee of the product b any product shipped outside of the United States the District of Columbia or Canada or c anyone who may have purchased it ...

Page 15: ...TY With respect to any defective product during the Initial Warranty Period we will in our sole discretion either a replace such product or the defective part free of charge or b refund the purchase price of such product With respect to any defective product during the Remaining Warranty Period we will repair such product free of charge and provide a full service inspection of your product You wil...

Page 16: ...our NEW Product Seal prior to shipment Our goal is to ensure Quality Completeness and Satisfaction for your order For Any Questions Problems or Compliments please call or email us If you would like to shop for other X Tronic International Products Please visit our website www XTronicUSA com Toll Free 844 861 4762 Info XTronicUSA com Our Business Hours are Monday Thursday 8am 4pm CST Friday 8am Noo...

Reviews: