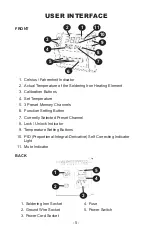
- 6 -
OPERATING INSTRUCTIONS
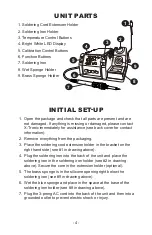
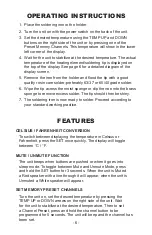
1. Place the soldering iron in the holder.
2. Turn the unit on with the power switch on the back of the unit.
3. Set the desired temperature using the TEMP UP and DOWN
buttons on the right side of the unit or by pressing one of the
Preset Memory Channels. This temperature will show in the lower
left corner of the display.
4. Wait for the unit to stabilize at the desired temperature. The actual
temperature of the heating element/soldering tip is displayed on
the top of the display. See page 6 for a detailed diagram of the
display screen.
5. Remove the iron from the holder and flood the tip with a good
quality rosin core solder-preferably 63/37 or 60/40 grade solder.
6. Wipe the tip across the moist sponge or dip the iron into the brass
sponge to remove excess solder. The tip should then be shiny.
7. The soldering iron is now ready to solder. Proceed according to
your standard working practice.
FEATURES
CELSIUS / FAHRENHEIT CONVERSION
To switch between displaying the temperature in Celsius or
Fahrenheit, press the SET once quickly. The display will toggle
between °C / °F.
MUTE / UNMUTE FUNCTION
The unit beeps when buttons are pushed or when it goes into
sleep mode. To toggle between Mute and Unmute Mode, press
and hold the SET button for 3 seconds. When the unit is Muted
a Red speaker with a line through it will appear, when the unit is
Unmuted a White speaker will appear.
SET MEMORY PRESET CHANNELS
Turn the unit on, set the desired temperature by pressing the
TEMP UP or DOWN arrows on the right side of the unit. Wait
for the unit to stabilize at the desired temperature. Then to set
a Channel Preset, press and hold the channel button to be
programmed for 5 seconds. The unit will beep and the channel has
been set.


