


- 10 -
REPLACING HOT AIR GUN NOZZLE
1. Turn the power off to the unit and unplug it
from the power source.
2. Allow the hot air gun to reach room
temperature before proceeding.
3. The nozzle is held on with a clamp ring,
using the Metal Nozzle Extractor on the
upright tower holder, place the Metal
Nozzle Extractor in the 3mm gap between
the nozzle and the hot air gun and then
pull to remove the nozzle. The nozzle will fall into the metal area,
which will protect the work area if the nozzle is still hot.
** DO NOT TOUCH THE HOT AIR GUN TO INSTALL A NOZZLE
UNTIL IT IS FULLY COOLED DOWN **
4. Place the desired nozzle on the end of the hot air gun, applying a
little pressure so it can clamp into place.
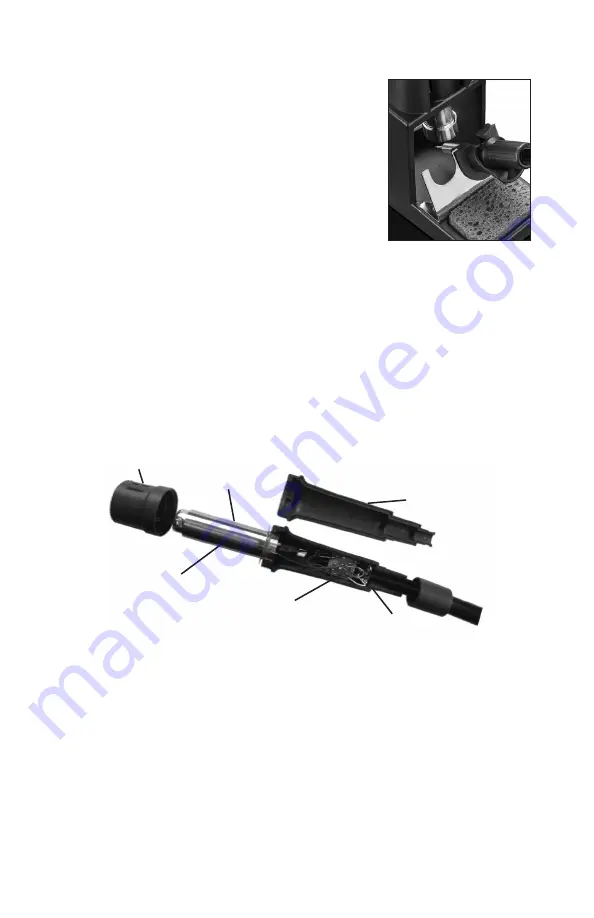
REPLACING THE HOT AIR GUN HEATING ELEMENT
Handle Cover -
Side 1
Heating Element
& Mica Paper
(inside)
Handle
Cover -
Side 2
Discharge
Tube
Retaining
Cap
Circuit
Board
1. Turn off the unit and unplug it from the outlet. Allow the hot air gun
to cool down to room temperature.
Never attempt to handle the gun while the it is hot.
2. Slide the ergonomic grip up and unscrew the retaining cap, pull the
ergonomic grip down off the handle.
3. Unscrew both of the screws at the base of the handle and separate
the two handle sides.
4. Pull the heating element out of the Mica Paper and Discharge
Tube, being careful not to disconnect grounding wire.


