PHC01_02-6/98
Tampa, FL33618
Mini Controller
™
®
3
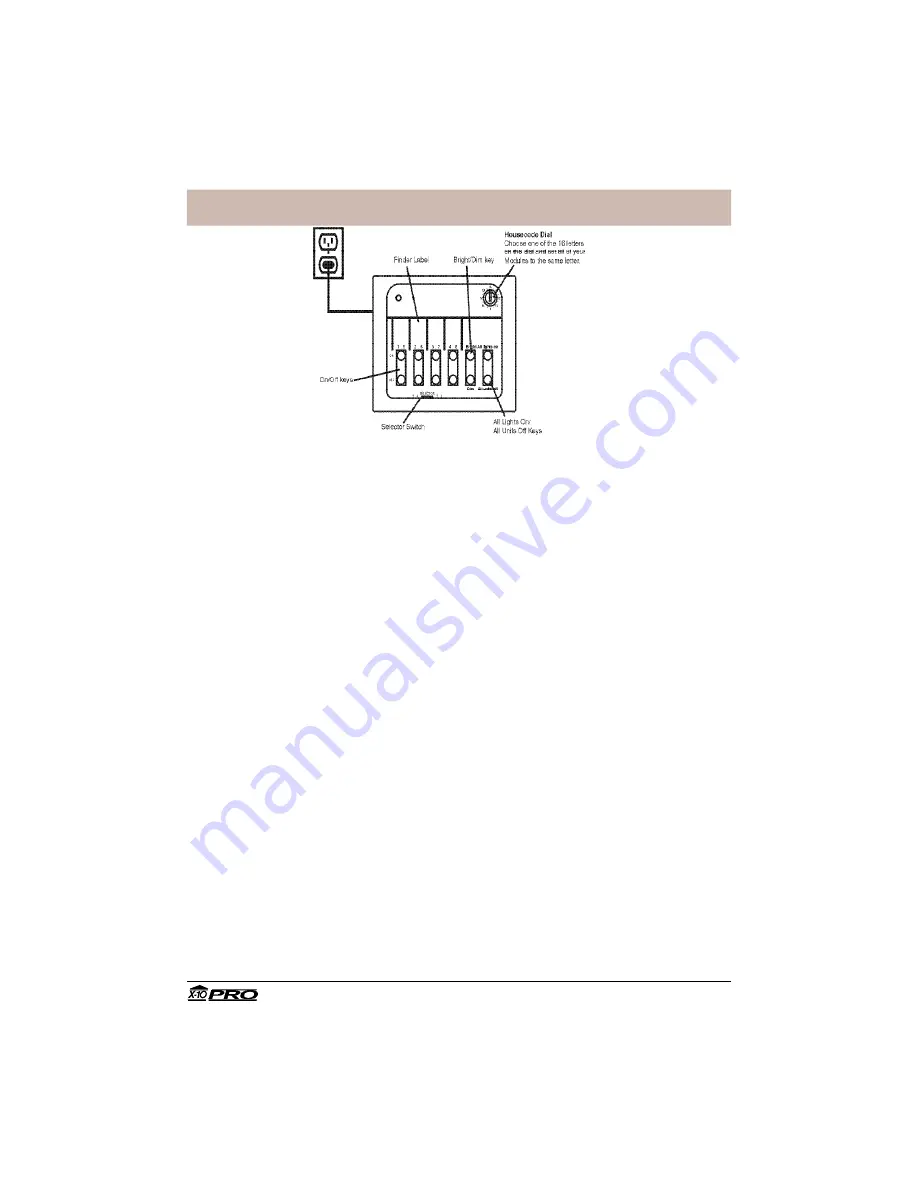
Having 16 choices for the Housecode enables you to set up several independent systems
in one home without interaction among them. Also, you can avoid interference with, or
from, a neighbour’s system by choosing a different Housecode letter.
Install and set up the Modules (sold separately)
1 Install and set up all of your X-10 Modules referring to the instructions included with
them. Be sure to turn off the power at the circuit breaker panel when installing Wall
Switch Modules.
2 Set all of your Modules to the same Housecode as you set on the Mini Controller.
3 Set each Module to a Unit Code between 1 and 4 (or between 5 and 8 if you set the
Selector Switch on the Mini Controller to 5-8).
To turn ON a light or appliance
Press and release the TOP of one of the 4 number keys corresponding to the Unit Code set
on the Module to be controlled.
To turn OFF a light of appliance
Press and release the BOTTOM of one of the 4 number keys corresponding to the Unit
Code set on the Module to be controlled.
The “Selector Switch” selects whether keys 1 thru 4 control Modules set to 1 thru 4 or 5 thru
8.
To Dim or Bright lights
Press and release the TOP of the number key for the Lamp Module or Wall Switch Module
you wish to Dim or Brighten (you can’t Dim or Brighten Appliance Modules). Then press
the TOP of the Dim/Bright key to Brighten or the BOTTOM of the Dim/Bright key to Dim the
light. Hold the key pressed until the desired brightness level is reached.
To Turn All Lights On
Press the TOP of the All Lights On/ALL Units Off key to instantly turn on ALL lights connected
to Lamp Modules and Wall Switch Modules (which are set to the same Housecode as the
Mini Controller). This key does not affect Appliance Modules.
Using the Mini Controller


