U
SER
M
ANUAL
X
ORAYA
S
UITE
64
CAN > Routing:
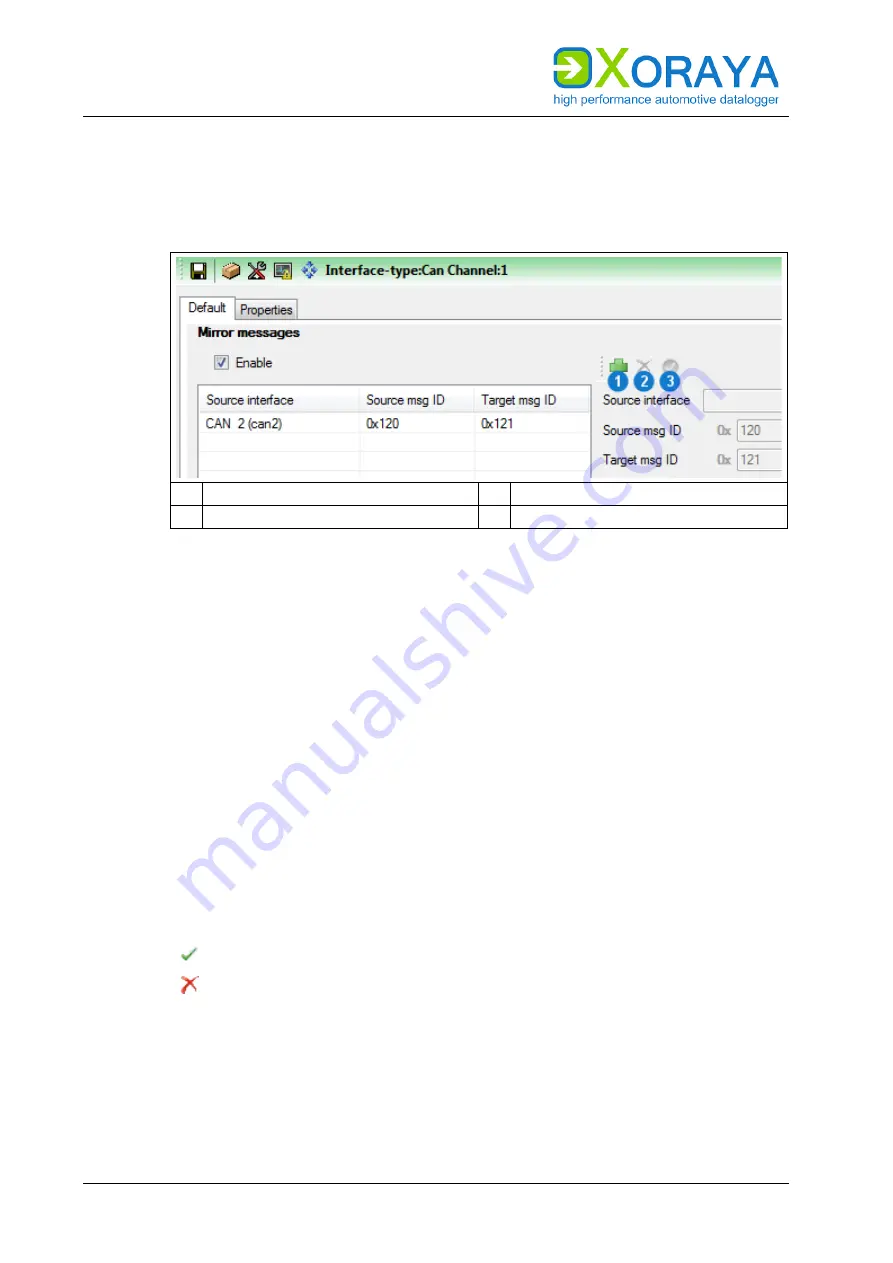
Here, you configure the routing of messages received on other CAN
channels via the currently selected channel. The payload is not changed
while the IDs of source and target message can differ.
1 Add routing
3 Save routing
2 Delete routing
Configure routing:
Select the check box
Enable
.
Click
Add routing
(1)
.
Under
Source interface
, choose the receiving CAN channel.
Under
Source msg ID
, specify the ID of the source message.
(
➔
Changing the numbering system)
Select the check box
Ext. ID
for a 29-bit ID instead of a 11-bit ID.
Optional: Under
Target msg ID
, specify content and length of the
target message ID.
If you do not specify a target message ID, the source message ID is
applied.
Click
Save routing
(3)
.
Repeat as necessary for further routings via this channel.
Meaning of the symbols for the available CAN channels:
enabled
not enabled
Summary of Contents for XORAYA ML-N4000
Page 1: ...User Manual XORAYA ML N4000 Edition 1 1 3 May 2022...
Page 70: ...USER MANUAL XORAYASUITE 70 RS 232...
Page 186: ......
Page 187: ......
Page 188: ......
Page 189: ......


