

Installation
Controller Installation
820-0332
3-3
Controller Installation
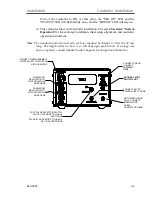
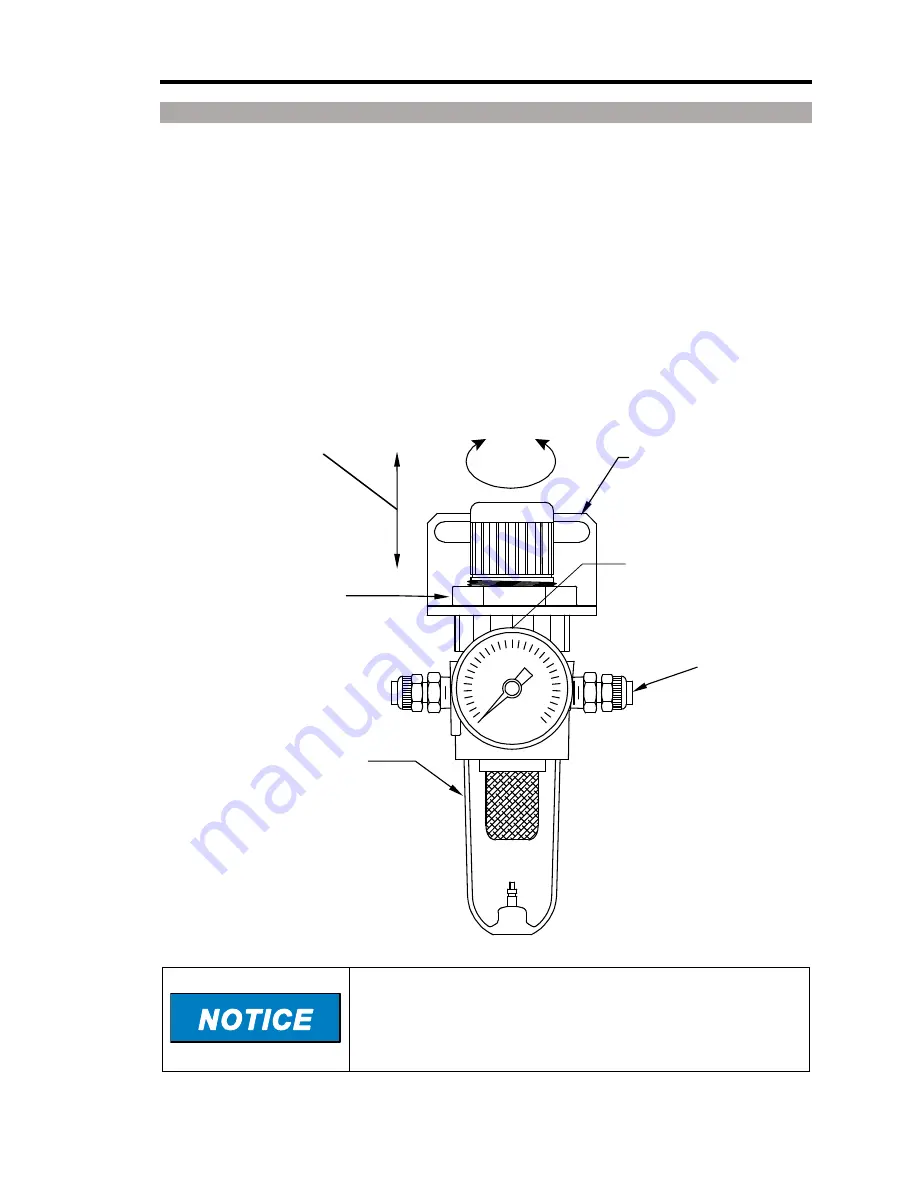
Regulator Assembly and Installation
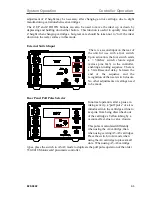
The Micro-Z Small Dot Controller requires two regulated air inputs. The supplied air
hoses connecting the regulators to the controller are 6 ft (182 cm) in length. Install the two
regulators close enough to the controller location that ensures free air flow. Make sure the
air hoses are not overextended, twisted, bent or kinked. Install each regulator as follows;
1.
Remove the bracket from the regulator/filter assembly by removing the plastic
retaining nut. Mount the regulator/filter bracket in a convenient location
(mounting screws are not supplied). Re-mount the regulator to the bracket with
the supplied nut after the bracket is installed.
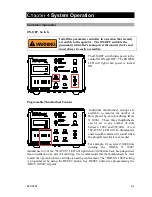
The Model 350-0027 Small Dot Controller is designed to
operate at 80 ± 5 PSI. FAILURE TO SET THE
REGULATORS PROVIDING AIR INPUT TO THE
CONTROLLER AT 80 PSI WILL RESULT IN
INCONSISTENT SYSTEM PERFORMANCE!
AIR FLOW ARROW
LOCATED ON ONE
SIDE ONLY
(BEHIND GAUGE)
INSTALL
REGULATOR - TO-
CONTROLLER AIR
HOSE HERE
(P/N 210-2001)
REGULATOR/FILTER
ASSEMBLY
P/N 220-0076
LIFT KNOB TO UNLOCK,
TURN KNOB TO ADJUST
PRESSURE SETTING AND
PUSH KNOB DOWN TO LOCK.
PLASTIC NUT
RETAINS BRACKET
MOUNTING BRACKET
Summary of Contents for 340-7110
Page 10: ...1 2 820 0332 This page is intentionally left blank...
Page 18: ...Controller Installation Installation 3 6 820 0332 This page is intentionally left blank...
Page 34: ...Cartridge Priming Tips System Operation 820 0332 4 16 This page is intentionally left blank...
Page 40: ...Ink Removal Information Ink 820 0332 5 6 This page is intentionally left blank...