


Cartridge Preparation
System Operation
820-0332
4-8
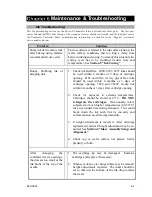
Cartridge Preparation
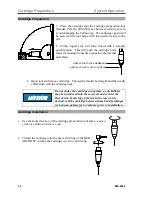
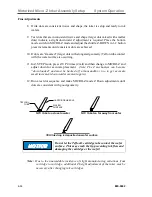
1.
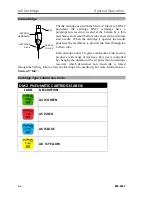
Place the cartridge into the cartridge preparation tool
(Xandex Part No. 200-0001) as shown, exercising care to
avoid damaging the Teflon
tip. The cartridge cap should
be seated in the tool hinge with the needle resting in the
slot.
2.
Firmly squeeze the tool fully closed with a smooth,
quick motion. This will push the cartridge body
forward, causing the needle to puncture the internal
membrane.
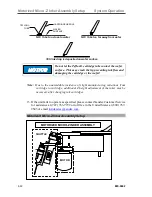
3.
Open tool and remove cartridge. The needle should be straight and the needle
collar flush with the cartridge neck.
Do not shake the cartridge at any time, as air bubbles
may be introduced into the reservoir and restrict the
flow of ink. If mixing of the ink in the reservoir is
desired, roll the cartridge between thumb and forefinger
(or between palms) for 1-2 minutes prior to installation.
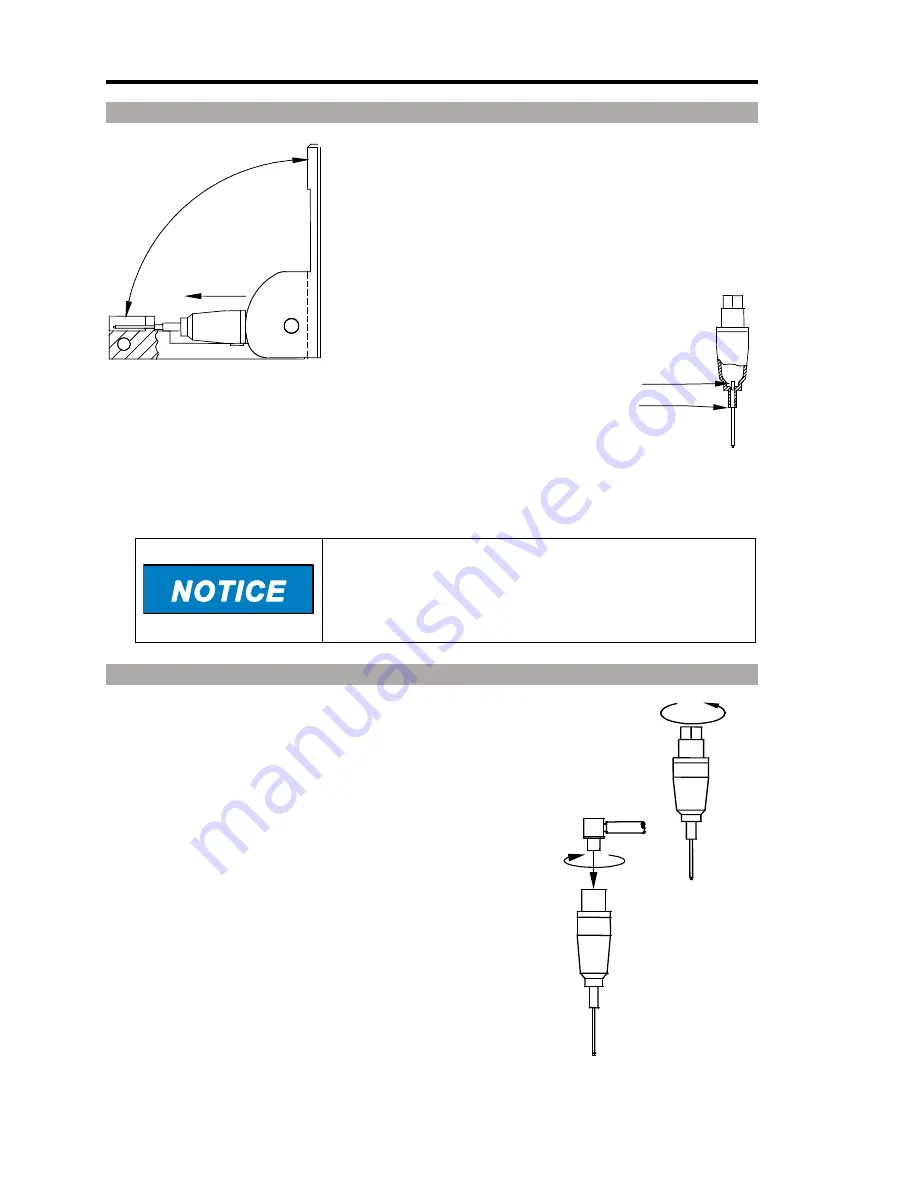
Cartridge Installation
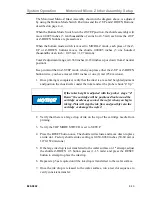
1.
Use the slotted section of the cartridge preparation tool and a
counter-
clockwise
motion to remove cap.
2.
Thread the cartridge onto the brass air fitting of the RED
AIR HOSE, turning the cartridge
clockwise
until snug.
NEEDLE COLLAR FLUSH WITH NECK
NEEDLE PUNCTURES MEMBRANE
Summary of Contents for 340-7110
Page 10: ...1 2 820 0332 This page is intentionally left blank...
Page 18: ...Controller Installation Installation 3 6 820 0332 This page is intentionally left blank...
Page 34: ...Cartridge Priming Tips System Operation 820 0332 4 16 This page is intentionally left blank...
Page 40: ...Ink Removal Information Ink 820 0332 5 6 This page is intentionally left blank...


