background image

10-14  Troubleshooting

bb

____________________________________

Paper Exit Area

Use the following procedure to clear paper exit area jams.

1.

Open the rear cover by pressing in and pulling the latch back
and down (fig. 10.11).

Fig. 10.11  Open the Rear Cover

Summary of Contents for Accel-a-Writer 812

Page 1: ...reventing Jams Clearing Jams Status Messages Printer Status Messages Printer Error Messages Preliminary Troubleshooting The General Checkup Macintosh Environment Checkup PC Environment Checkup Miscellaneous Troubleshooting Print Quality Troubleshooting Calling for Technical Support Troubleshooting Information ...

Page 2: ...10 2 Troubleshootingbb____________________________________ Notes ...

Page 3: ...nd how to place a service call Jams This section covers preventing and clearing media jams Preventing Jams Many jams are the result of using the wrong consumables either toner or media and handling the consumables incorrectly The following tips can help avoid these types of jams Make sure all media meets the guidelines in Media Handling in chapter 6 Make sure media is stored following the guidelin...

Page 4: ... print side down and the fold down paper tray media print side up Empty the output tray when it gets full to prevent the media already in the tray from blocking media as it exits the printer Use XANTÉ supplied toner Do not use refilled toner cartridges Make sure to handle and store toner cartridges following the guidelines in the Handling and Replacing the Toner Cartridge section of chapter 6 Keep...

Page 5: ...his means if the feature is enabled and a multiple page job jams as long as you do not turn off the printer to remove the jam the printer reprints the jammed page and the rest of the job See The Jam Recovery Menu in chapter 5 for more details Paper Pick up Areas Use the following procedure to clear paper pick up area jams 1 If you are using the fold down tray skip to step 3 If you are using a 500 ...

Page 6: ...gure 10 2 ONLINE FORM FEED TRAYSELECT ENTER MENU RESET TEST DATA MANUAL READY Fig 10 2 Remove the Jam from the Cassette Slot 3 Check the fold down tray slot for a media jam If it is there gently pull the media out in the direction of the arrow in figure 10 3 ONLINE FORM FEED TRAYSELECT ENTER MENU RESET TEST DATA MANUAL READY Fig 10 3 Remove the Jam from the Fold Down Tray ...

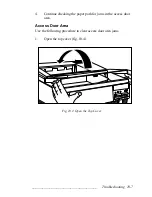
Page 7: ...ntinue checking the paper path for jams in the access door area Access Door Area Use the following procedure to clear access door area jams 1 Open the top cover fig 10 4 ONLINE FORM FEED TRAYSELECT ENTER MENU RESET TEST DATA MANUAL READY Fig 10 4 Open the Top Cover ...

Page 8: ...ig 10 5 Remove the Toner Cartridge Caution The toner cartridge is sensitive to bright lights and direct sunlight Do not keep it out of the printer for any extended periods without putting it in the bag it was shipped in or covering it with a dark cloth The cartridge contains a magnet so keep it away from your hard disk s and monitor to prevent possible data loss or equipment damage ...

Page 9: ..._____________________________________ Troubleshooting 10 9 3 Open the paper access door by pulling the green lever on the left fig 10 6 Fig 10 6 Open the Paper Access Door ...

Page 10: ...ound remove the jam in one of the following ways a Remove the jam by gently pulling it out from the standard cassette slot if you can see the media in the slot and it will easily pull out fig 10 7 ONLINE FORM FEED TRAYSELECT ENTER MENU RESET TEST DATA MANUAL READY Fig 10 7 Remove the Jam via the Cassette Slot ...

Page 11: ...nter and then pulling it toward you fig 10 8 Fig 10 8 Remove the Jam via the Access Door Area c If the media has already entered the fuser area and does not come out easily skip to the next section Fuser Assembly Area 5 Close the paper access door 6 Continue checking the paper path for jams in the fuser assembly area ...

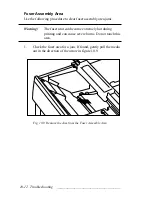
Page 12: ... clear fuser assembly area jams Warning The fuser unit can become extremely hot during printing and can cause severe burns Do not touch this area 1 Check the fuser area for a jam If found gently pull the media out in the direction of the arrow in figure 10 9 Fig 10 9 Remove the Jam from the Fuser Assembly Area ...

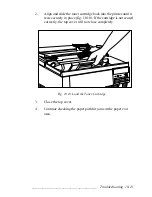
Page 13: ...er until it rests securely in place fig 10 10 If the cartridge is not seated correctly the top cover will not close completely ONLINE FORM FEED TRAYSELECT ENTER MENU RESET TEST DATA MANUAL READY Fig 10 10 Load the Toner Cartridge 3 Close the top cover 4 Continue checking the paper path for jams in the paper exit area ...

Page 14: ...b____________________________________ Paper Exit Area Use the following procedure to clear paper exit area jams 1 Open the rear cover by pressing in and pulling the latch back and down fig 10 11 Fig 10 11 Open the Rear Cover ...

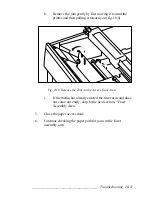
Page 15: ...e of the following methods a If the media is not completely past the fuser area first gently pull the media s trailing edge loose from the fuser unit and then pull the lead edge to remove the media via the paper exit fig 10 12 Fig 10 12 Remove the Jam from the Fuser and Paper Exit Area ...

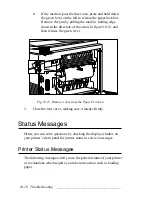
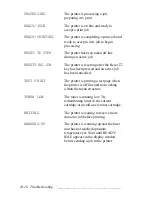
Page 16: ...in figure 10 13 and then release the green lever Fig 10 13 Remove a Jam from the Paper Exit Area 3 Close the rear cover making sure it latches firmly Status Messages Often you can solve questions by checking the display window on your printer s front panel for printer status or service messages Printer Status Messages The following messages alert you to the general status of your printer or to sit...

Page 17: ...NITIALIZING The printer is warming up performing setup routines and getting ready to go on line NO EP CART The toner cartridge is either not in the printer or not seated firmly in the printer Install a toner cartridge or reseat the current cartridge OFFLINE The printer is off line which means it is not ready to receive and process data PAPER JAM A media jam has occurred along the paper path Clear ...

Page 18: ...nter is resetting after the Reset key has been pressed and an active job has been cancelled TEST PRINT The printer is printing a test page when the printer is off line and not working within the menu structure TONER LOW The toner is running low Try redistributing toner in the current cartridge or install a new toner cartridge WAITING The printer is waiting to receive more data on a job before prin...

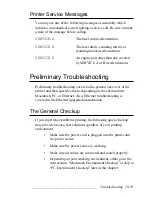
Page 19: ...ubleshooting covers both a general once over of the printer and then specific checks depending on the environment Macintosh PC or Ethernet Also Ethernet troubleshooting is covered in the Ethernet upgrade documentation The General Checkup If you experience problems printing the following quick checkup may provide an easy fast solution regardless of your printing environment Make sure the power cord...

Page 20: ...ake sure you install screen fonts to match the printer fonts you use See Loading Screen Fonts in chapter 3 for details If you have an Ethernet setup make sure all Ethernet cabling is connected correctly See your network documentation for details If you have an Ethernet setup open the Control Panel click Network make sure Ethernet is selected and change from LocalTalk to EtherTalk PC Environment Ch...

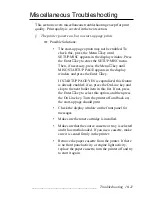
Page 21: ...indow and press the Enter key If STARTUP PAGE YES is capitalized this feature is already enabled if so press the On Line key and skip to the next bullet item in this list If not press the Enter key to select this option and then press the On Line key Turn the printer off and back on the start up page should print Check the display window on the front panel for messages Make sure the toner cartridg...

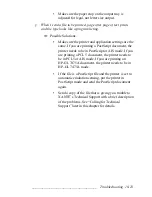
Page 22: ... paper cassette turn the printer off and start the printer again When I print a legal size document the text is chopped off for a letter size page Possible Solutions If you try to print legal size documents from the fold down tray you have to select legal paper size and manual feed within your application If you have a legal tray installed you have to select legal paper size within your applicatio...

Page 23: ...ment the printer needs to be in PostScript or AIS mode If you are printing a PCL 5 document the printer needs to be in PCL5 or AIS mode If you are printing an HP GL 7475A document the printer needs to be in HP GL 7475A mode If the file is a PostScript file and the printer is set to automatic emulation sensing put the printer in PostScript mode and send the PostScript document again Send a copy of ...

Page 24: ...ain Select the Chooser from the Apple menu make sure LocalTalk is active and select the Accel a Writer 812 printer If you have an Ethernet setup select Control Panels from the Apple menu then select Network and make sure Ethernet is selected Continue printing as usual The Accel a Writer 812 does not show up on the Chooser Possible Solutions Check for proper termination on all LocalTalk cables and ...

Page 25: ... for details Use laser quality media and make sure it meets all the requirements in the Media Handling section of chapter 6 Install a new toner cartridge See Handling and Replacing the Toner Cartridge in chapter 6 for details Scanned images are dark and the details are lost Possible Solutions Check the original image to see if it is dark If not rescan the image and try to print it again Try increa...

Page 26: ...ails Replace the media with new media making sure it meets all the requirements in the Media Handling section of chapter 6 Adjust the screen frequency for the images within the applications The printer default screen frequency is 85 lpi Also see chapter 7 Advanced Imaging for more details on screen frequency Horizontal white lines occur on the page Possible Solutions Clean the printer See Cleaning...

Page 27: ...hort break in run of several copies since toner can settle during storage See Handling and Replacing the Toner Cartridge in chapter 6 for details The start up page has banding along the vertical axis of the page Possible Solutions Clean the printer See Cleaning the Printer in chapter 8 for details Remove the toner cartridge and redistribute the toner See Redistributing Toner in chapter 6 for detai...

Page 28: ...chapter before calling for technical support If these solutions do not work gather the following troubleshooting information and then call XANTÉ s Technical Support Troubleshooting Information A start up page from the printer The model of your printer The current printer firmware version this appears on the start up page The type of host and the operating system version number you are using The cu...

Page 29: ...en a call number and your call will be placed next in line for the first available technician XANTÉ Fax Support You have an option of 24 hour fax support XANTÉ s Technical Support fax number is 334 342 4635 If you decide to use our fax support be sure to include the information listed under Troubleshooting Information earlier in this section Also indicate whether you wish the response to be faxed ...

Page 30: ...10 30 Troubleshootingbb____________________________________ ...

Reviews: