____________________________________________
Options 9-17
10.
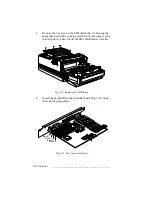
Lower the EMI shield back in place and replace the seven
original screws to secure it (fig. 9.14).
Fig. 9.14 Replace the EMI Shield
11.
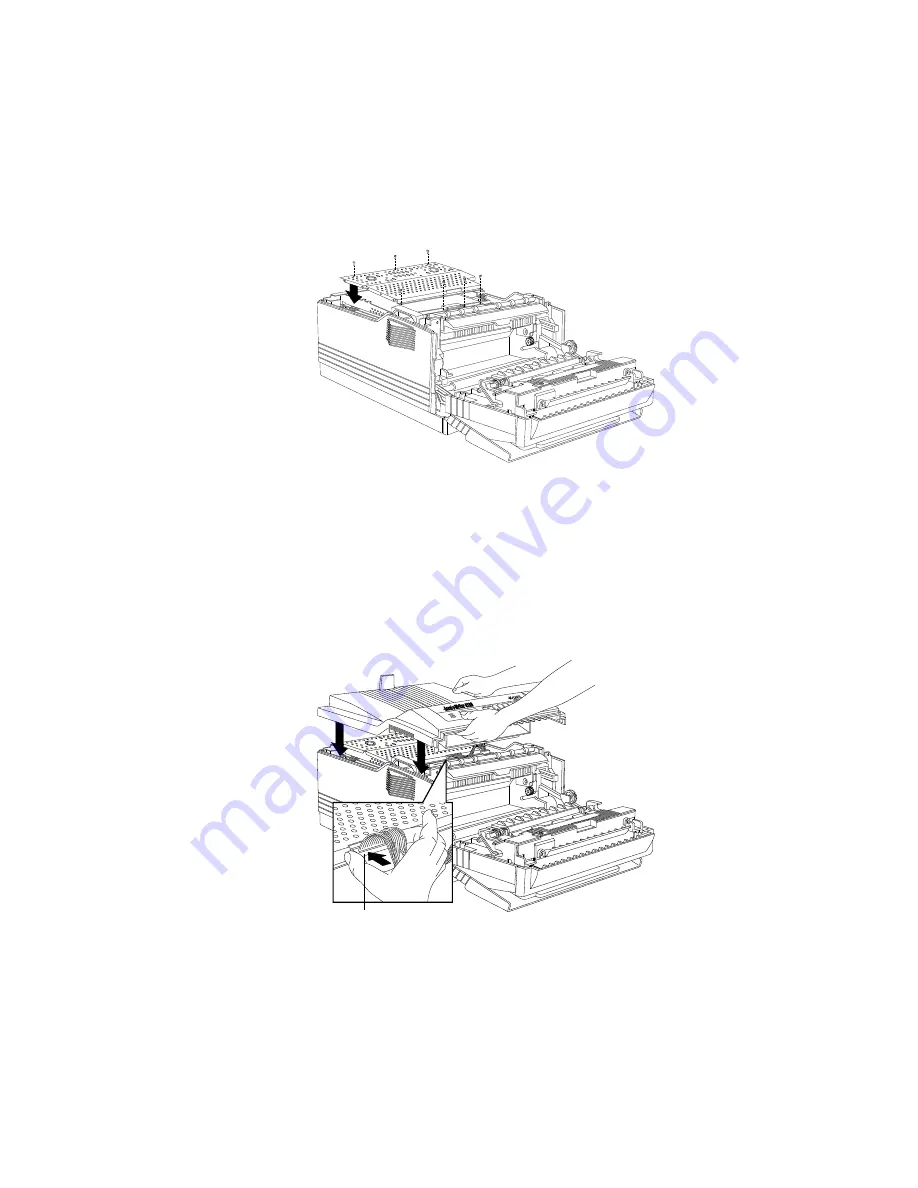
Reconnect the end of the front panel cable to the printer’s
controller board (fig. 9.15).
12.
Replace the output tray making sure the pegs at the back of the
tray seat in the holes on the printer. Then, replace the two
original screws to secure the tray to the printer (fig. 9.15).
Connect Front
Panel Cable
MANUAL
READY
ON LINE
FORM
FEED
RESET
TEST
ENTER
MENU
TRAY
SELECT
®
Fig. 9.15 Replace the Output Tray

