Chapter 12 - Accessories • 207
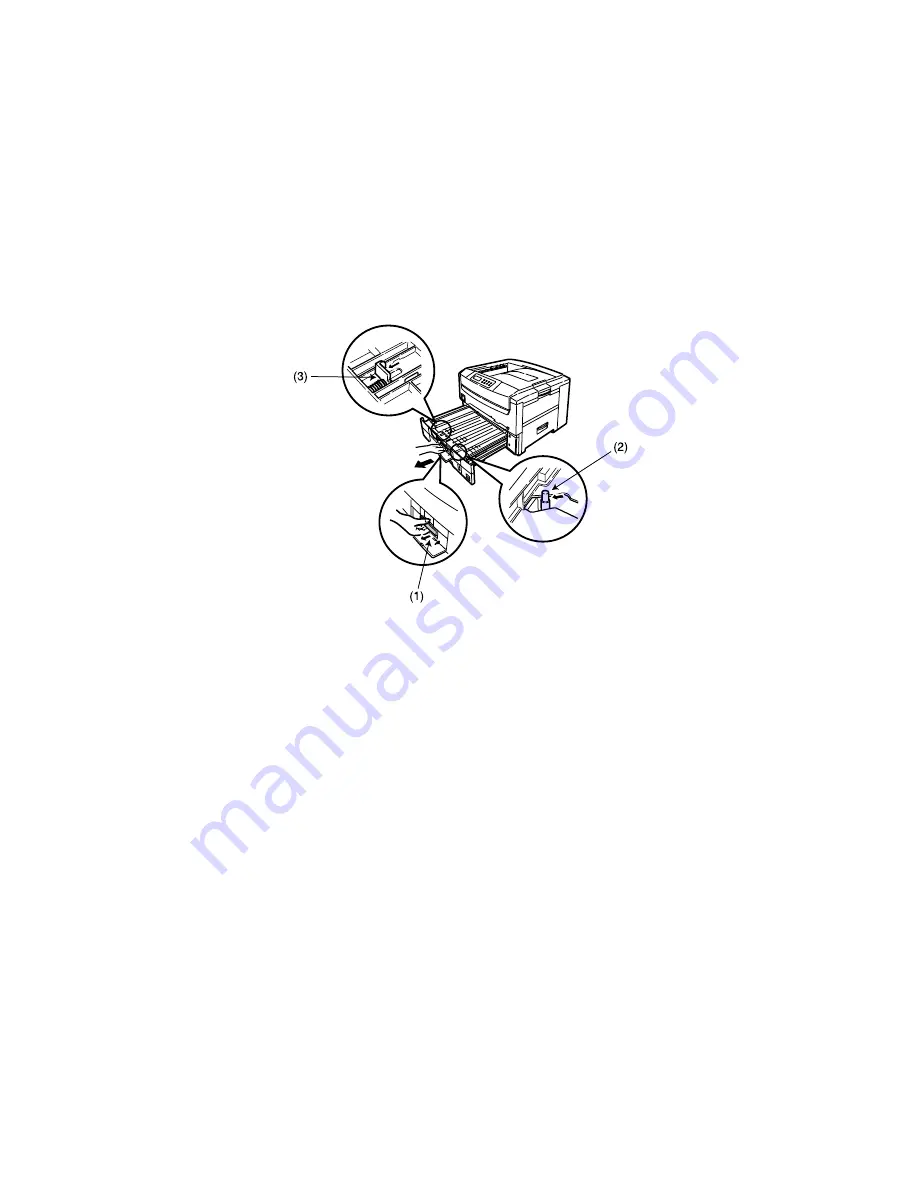
Removing the duplex unit
The duplex unit may be removed from the printer as follows.
1.
Switch off the printer and disconnect the power cable.
2.
Open the small front cover and pull the colored handle (1) to slide
the duplex unit/paper tray out of the printer as a complete unit.
3.
Slightly lift up the duplex unit/paper tray together and remove
completely from the printer.
4.
Pull the post (2) forward and pull the two stoppers (3) forward to
release the duplex unit from the paper tray, then remove the
duplex unit from the paper tray.
5.
Reattach the original front cover, then reinstall the paper tray.
6.
Connect the power cable and switch the printer on.
7.
Change the DUPLEX setting in the menu to OFF: to do this,
follow the steps in the NOTE on page 206 in reverse.
8.
Press the ONLINE button to turn the printer back to online status.
Summary of Contents for CL30
Page 1: ......
Page 21: ...Chapter 2 Getting Started 12...
Page 61: ...Chapter 3 Setting Up 52...
Page 62: ...Chapter 3 Setting Up 53 Item Value...
Page 63: ...Chapter 3 Setting Up 54 Item...
Page 64: ...Chapter 3 Setting Up 55...
Page 83: ...Chapter 3 Setting Up 74...
Page 85: ...Chapter 4 Mac OS 8 6 9 2 2 Printer Driver 76 4 Click Select to activate the Description file...
Page 89: ...Chapter 4 Mac OS 8 6 9 2 2 Printer Driver 80...
Page 91: ...Chapter 4 Mac OS 8 6 9 2 2 Printer Driver 82...
Page 121: ...Chapter 5 Mac OS 8 6 9 2 2 Operation 112...
Page 123: ...Chapter 6 Mac OS 10 1 5 Printer Drivers 114...
Page 204: ...Chapter 11 Troubleshooting 196...


