4-32 PC Setup
bb
__________________________________________
3.
Select the disk to store the spooled jobs (or select NONE to
disable spooling); then click OK. The spool device is set up;
then, the Spooler window reappears.
4.
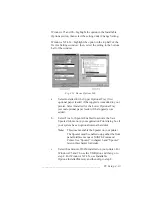
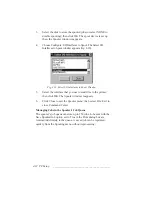
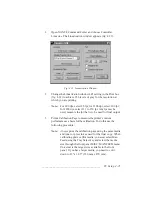
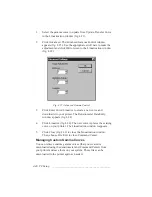
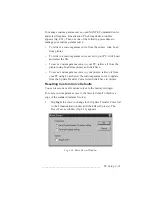
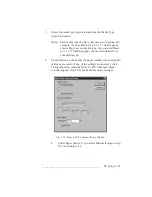
Choose Configure: I/O Interfaces to Spool. The Select I/O
Interfaces to Spool window appears (fig. 4.20).
Fig. 4.20 Select I/O Interfaces to Spool Window
5.
Select the interface that you use to send files to the printer;
then click OK. The Spooler window reappears.
6.
Click Close to exit the Spooler menu; then select File: Exit to
close Command Center.
Managing Jobs in the Spooler’s Job Queue
The spooler’s job queue can store up to 250 jobs. Jobs sent with the
Save Spooled Job option set to True in the Print dialog box are
retained indefinitely in the queue. A saved job can be reprinted
quickly from the Spooling menu without reprocessing.
Summary of Contents for PlateMaker 3
Page 2: ...1 2 Introductionbb ________________________________________ Notes...
Page 10: ...1 10 Introductionbb ________________________________________...
Page 12: ...2 2 Installationbb_________________________________________ Notes...
Page 40: ...3 2 Macintosh Setupbb ____________________________________ Notes...
Page 90: ...3 52 Macintosh Setupbb ____________________________________...
Page 92: ...4 2 PC Setupbb __________________________________________ Notes...
Page 142: ...5 2 Ethernet Setupbb ______________________________________ Notes...
Page 212: ...6 38 Configurationbb ______________________________________...
Page 214: ...7 2 Media Optionsbb ______________________________________ Notes...
Page 224: ...8 2 Printing with Various Media Types bb _____________________ Notes...
Page 232: ...9 2 Maintenance and Specificationsbb ________________________ Notes...
Page 246: ...10 2 Printer Optionsbb ____________________________________ Notes...
Page 262: ...10 18 Printer Optionsbb ____________________________________...
Page 264: ...11 2 Troubleshootingbb____________________________________ Notes...

