975-0767-01-01
23
Basic Installation Procedures
This
section for use by
qualified per
sonnel
only.
AC Output Connections
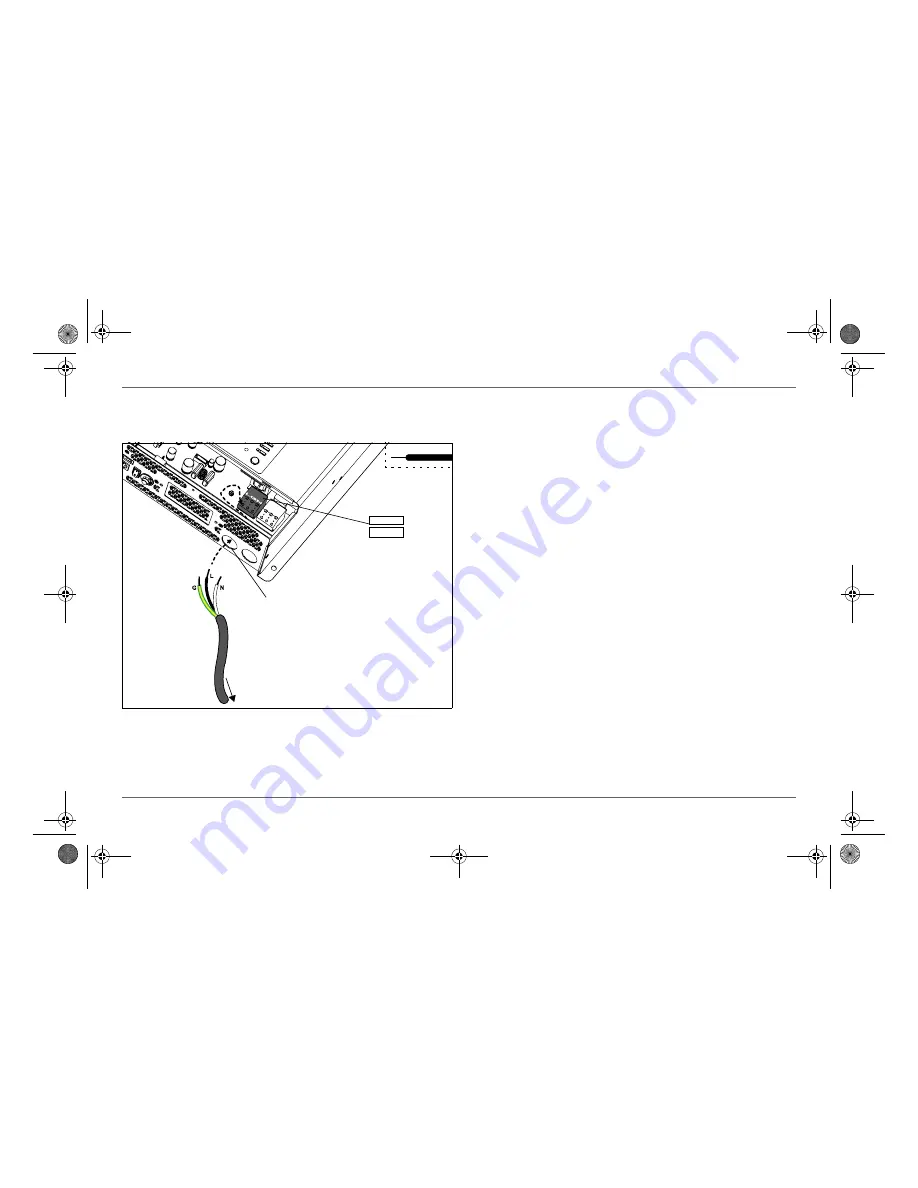
To make a permanent connection to existing AC wiring:
10mm
to circuit
breaker
AC Output knockout
NOTE
: install a strain
relief clamp (not shown)
•
L
•
G
•
N
1. Ensure AC and DC power sources are turned off, if not already
done from “Step 4: Connecting the AC Input Wires” on page
18.
2. Install the required circuit breaker in the inverter distribution
panel receiving AC power from the inverter.
3. Remove the AC compartment cover, if not already done from
“Step 4: Connecting the AC Input Wires” on page 18.
4. Strip a single AC output wire, as appropriate.
5. Remove the knockout and install a ½" strain relief clamp.
6. Route the wires through the strain relief clamp (not shown in
the figure).
7. Locate the Line, Ground and Neutral terminals on the AC OUT
terminal labeled as
L
,
G
, and
N
respectively.
8. If you are installing a GFCI device, proceed to “GFCI
Connections” on the next page. Otherwise, proceed to step 9.
9. Using a 3mm slot long neck screwdriver, open the spring clamp
by inserting the tool in the clamp slot and gently pulling the
screwdriver handle forward, for Ground terminal.
Alternatively, if the unit is equipped with screw terminals,
loosen the screw without removing it.
10. Insert Line AC wire into Line (
L
) terminal slot on the unit.
11. Release the spring clamp to secure the wire.
Alternatively, if the unit is equipped with screw terminals,
tighten the screw to secure the wire.
12. Repeat previous steps 8 through 10 for Ground (
G
) and
Neutral (
N
) connections.
13. Tighten the strain relief clamp to secure the wires.
Freedom X Owners Guide.book Page 23 Wednesday, May 11, 2016 10:32 AM
Summary of Contents for 806-1212
Page 2: ...Freedom X Owners Guide book Page ii Wednesday May 11 2016 10 32 AM ...
Page 12: ...Freedom X Owners Guide book Page x Wednesday May 11 2016 10 32 AM ...
Page 14: ...Freedom X Owners Guide book Page ii Wednesday May 11 2016 10 32 AM ...
Page 77: ...Freedom X Owners Guide book Page i Wednesday May 11 2016 10 32 AM ...


