Jump-starting a Vehicle Engine
20
7. Connect the black negative (–) clip of the jump-start
cables to the engine block, cylinder head, or other
stationary heavy metal part of the motor, or to the
negative (–) battery terminal.
The Battery Clips Connected Properly (green light)
illuminates.
Before starting the engine, make sure the XPower
Powerpack and the jump-start cables are clear of belts
and fans. Do not crank the engine for more than 4
seconds. Once the engine has started, go to Step 10.
OR
The reverse polarity alarm sounds and the Battery Clips
Connected Improperly (red light) illuminates.
8. Remove the red positive (+) clip first, and then the black
negative clip (–) to cancel the alarm.
9. Repeat steps 1, 5, 6, and 7.
When the Battery Clips Connected Properly (green light)
is illuminated, make sure that the XPower Powerpack
and the jump-start cables are clear of belts and fans
before attempting to start the engine.
10. Remove the red positive (+) clip and then the black
negative (–) clip from the vehicle’s battery terminal.
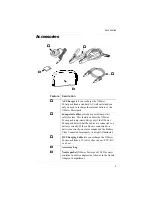
11. Remove the jump-start cables from the Jumper Cable
Port.
WARNING: Explosion
Do not remove the jump-start cables from the Jumper
Cable Port when the positive and negative clips are
connected to the vehicle’s battery terminals. Removing the
jump-start cables from the Jumper Cable Port while they
are connected to the vehicle’s battery terminals disables
the jump-start safety feature and could result in sparking
and explosion.
Important:
Recharge the XPower Powerpack as soon as
possible after each use. See “Recharging the XPower
Powerpack Battery” on page 26.

