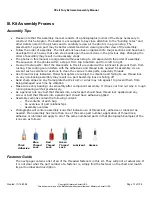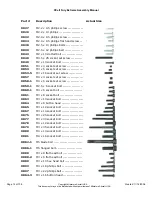
background image

XCell Fury Extreme Assembly Manual 

Created: 11/14/2006 


Copyright Miniature Aircraft USA


      Page 15 of 138 

                                                        This document may not be distributed without permission of Miniature Aircraft USA 

Step #1 – Gear Ratios 

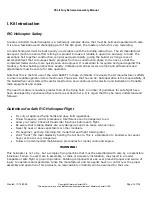
A) Gear Ratio - Bag #1A – Kit Specific 

8:18 Ratio 


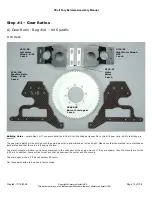
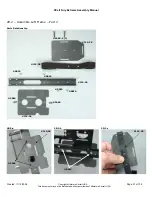
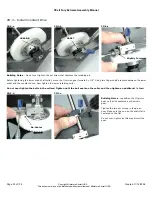
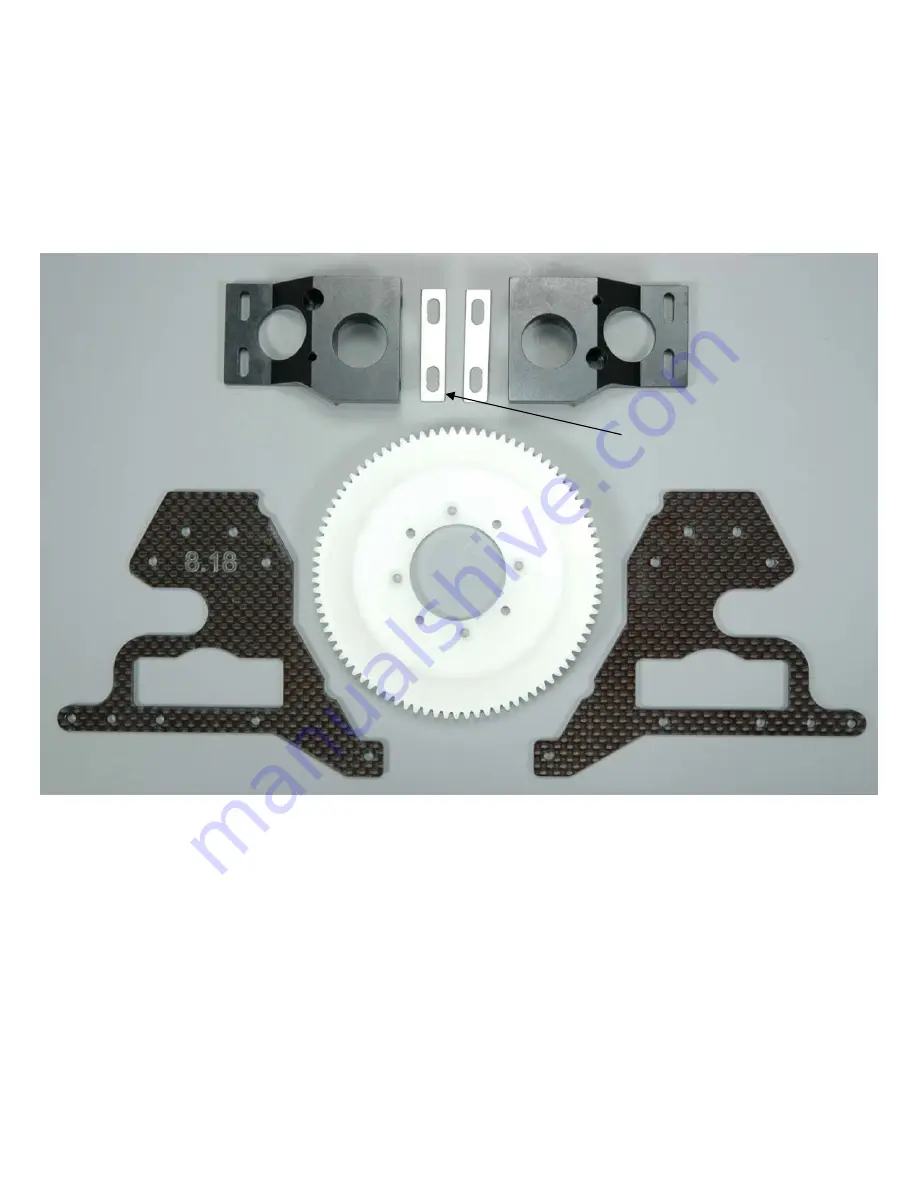
Building Notes – Locate Bag 1A. If you purchased the 8.18 kit it will contain parts specific to the 8.18 gear ratio. Verify that they are 
correct. 
 
The gear ratio plates will be etched with the actual gear ratio and marked as left and right. Make sure that the marked ratio matches on 
both plates and that there is a left and right plate. 
 
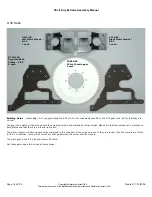
The motor mounts will have round holes machined in the wide part of the engine mount. If they are square, then the mounts are for the 
8.45 kit. In addition, there will be two shims that go between the motor and the mounts. 
 
The main gear in the 8.18 kit will contain 90 teeth. 
 
Set these parts aside to be used in future steps. 


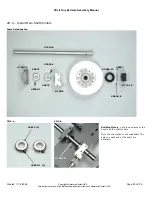
#119-118 
Graphite Ratio 
Plates – 8:18 

2 each 

#0865-90 
90 tooth main gear 

1 each 

#115-50 
Left Motor 
Mount – 8:18 

1 each 

#115-51 
Right Motor Mount – 
8:18 

1 each 


#115-47 
Motor 
Shims 
2 each 

Summary of Contents for Fury Extreme

Page 1: ...ury Extreme Assembly Manual Created 11 14 2006 Copyright Miniature Aircraft US This document may not be distributed without permission of Miniature Aircraft USA XCell Fury Extreme Assembly Manual Vers...

Page 2: ...USA Created 11 14 2006 This document may not be distributed without permission of Miniature Aircraft USA For More Information contact Miniature Aircraft USA 31713 Long Acres Drive Sorrento FL 32776 U...

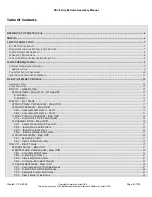
Page 3: ...5 Ratio 16 STEP 2 LEFT FRAME 17 A Main Frame Components Bag 2A 17 B Frame Fasteners Bag 2B 18 2B 1 Assemble Left Frame Part 1 19 2B 2 Assemble Left Frame Part 2 21 C Drive Train Components Bag 2C 23 2...

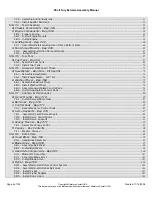
Page 4: ...er Bag 6B 75 6B 1 Assemble Washout Mixer 76 6B 2 Install Washout Mixer 78 6B 3 Assemble Swashplate Control Rods 79 6B 4 Install Swashplate Control Rods 79 STEP 7 CONTROL SYSTEM CANOPY 80 A Servo Mount...

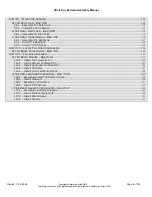
Page 5: ...R Pitch Yoke 119 STEP 10 LOCATE TAIL BOOM COMPONENTS 120 A Tail Boom Components Bag 10 120 STEP 11 TAIL BOOM ASSEMBLY 121 A Tail Boom Mounts Bag 11A 121 11A 2 Install T R Transmission 122 11A 3 Instal...

Page 6: ...hout permission of Miniature Aircraft USA Revisions to this Manual R1 0 10 01 06 Revisions for final kitting modifications 11 10 06 Revisions to main rotor blade arm bearing order For the most current...

Page 7: ...ilder flyer and starts with careful construction and continues with selection and installation of reliable radio equipment and engine The need for safety is nowhere greater than at the flying field A...

Page 8: ...e is required send the component in question if not missing together with a photocopy of your bill of sale and an accurate description of the problem and part Ship components fully insured and prepaid...

Page 9: ...without permission of Miniature Aircraft USA II Kit Prerequisites In order to assemble this kit you will need a number of additional supplies and tools to ensure the best final result They are as fol...

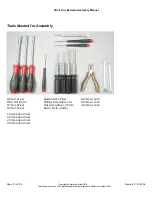
Page 10: ...buted without permission of Miniature Aircraft USA Tools Needed for Assembly M5 Nut Driver M5 5 Nut Driver M7 Nut Driver M4 Nut Driver 1 5mm allen driver 2 0mm allen driver 2 5mm allen driver 3 0mm al...

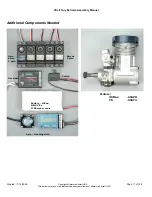
Page 11: ...Aircraft USA Page 11 of 138 This document may not be distributed without permission of Miniature Aircraft USA Additional Components Needed Gyro Heading Hold Battery NiCad NiMH LiPo 1700mah or more Sw...

Page 12: ...ht Miniature Aircraft USA Created 11 14 2006 This document may not be distributed without permission of Miniature Aircraft USA Mufflers Hatori SB16 SB17FH Muscle Pipe MP2 Main Rotor Blades 690 710mm 5...

Page 13: ...or acetone to clean the various metal parts especially threads Use thread lock as indicated Model helicopters are subject to vibration and failing to use thread lock on any non locking assembly may r...

Page 14: ...051 M3 x 3 socket set screw 0053 M3 x 5 socket set screw 0053 5 M3 x 16 socket set screw 0057 M4 x 4 socket set screw 0058 1 M4 x 6 socket set screw 0059 1 M2 5 x 6 socket bolt 0060 1 M3 x 6 socket bo...

Page 15: ...ctual gear ratio and marked as left and right Make sure that the marked ratio matches on both plates and that there is a left and right plate The motor mounts will have round holes machined in the wid...

Page 16: ...tio and marked as left and right Make sure that the marked ratio matches on both plates and that there is a left and right plate The motor mounts will have square holes machined in the wide part of th...

Page 17: ...ame Components Bag 2A Building Notes Locate Bag 2A which contains the major frame components for the left frame assembly These parts will be used in the following steps 120 10 Main Shaft 1 each 115 30...

Page 18: ...cer 2 each 115 58 Fan Shroud Mount 1 each 106 41 Front Canopy Standoff 1 each 0169 Bellcrank Stud 1 each 0862 1 Rudder Bellcrank Stud 1 each 0874 1 Anti rotation 1 each 0019 M3 Locknut 8 each 0060 1 M...

Page 19: ...be distributed without permission of Miniature Aircraft USA 2B 1 Assemble Left Frame Part 1 Parts Relationship 0060 1 0060 1 2 115 10 115 14 115 12 106 41 126 69 0019 0019 0089 115 62 0079 2 115 62 2...

Page 20: ...yright Miniature Aircraft USA Created 11 14 2006 This document may not be distributed without permission of Miniature Aircraft USA 2B 1 a 2B 1 b 2B 1 c 2B 1 d 2B 1 e 2B 1 f 2B 1 g 0060 1 126 69 0060 1...

Page 21: ...Aircraft USA Page 21 of 138 This document may not be distributed without permission of Miniature Aircraft USA 2B 2 Assemble Left Frame Part 2 Parts Relationship 2B 2 a 2B 2 b 2B 2 c 115 28 115 26 115...

Page 22: ...ircraft USA Created 11 14 2006 This document may not be distributed without permission of Miniature Aircraft USA 2B 2 d 2B 2 e 2B 2 f 2B 2 G 2B 2 H 2B 2 I 2B 2 J 2B 2 K 0064 3 0019 0217 9 140 ONLY 120...

Page 23: ...craft USA C Drive Train Components Bag 2C 120 9 Front Input Shaft 1 each 123 87 5mm collar 1 each 0232 15 tooth bevel gear 1 each 115 18 Lower Main Shaft Block 1 each 120 12 Upper Main Shaft Block 1 e...

Page 24: ...ed 11 14 2006 This document may not be distributed without permission of Miniature Aircraft USA 2C 1 Install Drive Train Components Parts Relationship 2C 1 a 2C 1 b 2C 1 c 120 9 120 8 120 12 115 18 12...

Page 25: ...Manual Created 11 14 2006 Copyright Miniature Aircraft USA Page 25 of 138 This document may not be distributed without permission of Miniature Aircraft USA 2C 1 d 2C 1 e Align set screw with Flat on S...

Page 26: ...70 tooth Crown Gear 1 each 0866 6 Crown Gear Mounting Base 1 each 0866 4 Main Hub Unit 1 each 0866 13 M14 x 0 1 Shim 1 each 0866 10 M14 x 0 2 Shim 2 each 0866 11 Teflon 0 ring 2 each 0866 12 Retaining...

Page 27: ...age 27 of 138 This document may not be distributed without permission of Miniature Aircraft USA 2D 1 Assemble Constant Drive Unit Parts Relationship 0866 10 0866 11 0866 13 0866 6 0866 70 0088 2 Qty 8...

Page 28: ...14 2006 This document may not be distributed without permission of Miniature Aircraft USA 2D 1 a 2D 1 b 2D 1 c 2D 1 d 2D 1 e 2D 1 f 2D 1 g 2D 1 h 2D 1 i 0866 13 0866 11 0866 10 0866 10 0866 11 0088 4...

Page 29: ...rmission of Miniature Aircraft USA 2D 2 Install Main Shaft Collars Parts Relationship 2D 2 a 2D 2 b Building Notes note the positions of the bevels on the shaft collars Note the orientation of the mai...

Page 30: ...t r pinion gear forward by 1 8 Using two fingers hold pressure between the lower collar and the constant drive Now tighten the lower retaining collar Do not over tighten the bolts in the collars Tigh...

Page 31: ...USA Page 31 of 138 This document may not be distributed without permission of Miniature Aircraft USA 2D 4 Install Left Gear Ratio Plate 2D 4 a Building Notes the ratio plates are marked as left and ri...

Page 32: ...14 2006 This document may not be distributed without permission of Miniature Aircraft USA E Clutch Assembly Bag 2E 121 11 11 Tooth Clutch Bell Unit 1 each 121 7 Clutch Unit 1 each 115 45 M6 O Ring 1...

Page 33: ...ge 33 of 138 This document may not be distributed without permission of Miniature Aircraft USA Parts Relationship 2E 1 Assemble Clutch 2E 1 a 2E 1 b Building Notes Do not lubricate the o ring 115 45 1...

Page 34: ...Miniature Aircraft USA 2E 2 Install Clutch Assembly 2E 2 a 2E 2 b 2E 2 c Building Notes Do not tighten the four clutch bolts until gear spacing has been set Set the gear spacing by running a small st...

Page 35: ...l Fury Extreme Assembly Manual Created 11 14 2006 Copyright Miniature Aircraft USA Page 35 of 138 This document may not be distributed without permission of Miniature Aircraft USA 0060 1 0060 1 0089 0...

Page 36: ...embly Manual Page 36 of 138 Copyright Miniature Aircraft USA Created 11 14 2006 This document may not be distributed without permission of Miniature Aircraft USA 0060 1 0032 0061 0063 0060 1 0061 0063...

Page 37: ...Manual Created 11 14 2006 Copyright Miniature Aircraft USA Page 37 of 138 This document may not be distributed without permission of Miniature Aircraft USA Step 3 Right Frame A Right Frame Bag 3A 115...

Page 38: ...nut 9 each 115 98 Lower Clutch Spacer 1 each 115 96 Upper Clutch Spacer 1 each 115 40 CNC Landing Gear Brackets 2 each 126 69 22mm Hex Spacer 2 each 106 41 Front Canopy Stand Off 1 each 0169 Bellcrank...

Page 39: ...nt may not be distributed without permission of Miniature Aircraft USA 3B 1 Assemble Right Frame Parts Relationship 120 Bellcrank Location 140 Bellcrank Location 126 68 0019 0169 0169 0060 1 115 35 02...

Page 40: ...ed 11 14 2006 This document may not be distributed without permission of Miniature Aircraft USA 3B 1 a 3B 1 b 3B 1 c 3B 1 d 3B 1 e 126 69 126 68 0060 1 4 0169 0169 0019 Completed Outside View 140 Comp...

Page 41: ...ed without permission of Miniature Aircraft USA 3B 2 Install Right Frame 3B 2 a 3B 2 b 3B 2 c 3B 2 d 3B 2 e 3B 2 f Building Notes Install the bolts through the frame channels with lock nuts Make sure...

Page 42: ...Fury Extreme Assembly Manual Page 42 of 138 Copyright Miniature Aircraft USA Created 11 14 2006 This document may not be distributed without permission of Miniature Aircraft USA 0060 1 0061 0061 0061...

Page 43: ...s document may not be distributed without permission of Miniature Aircraft USA 3B 3 Install Right Ratio Plate Parts Relationship 3B 3 a 3B 3 b 3B 3 c 0063 4 0003 2 0009 2 119 18 19 R 115 96 115 98 006...

Page 44: ...ument may not be distributed without permission of Miniature Aircraft USA 3B 3 d Building Notes After the ratio plate is in place first tighten the bolts around the outside of the plate Then tighten t...

Page 45: ...2006 Copyright Miniature Aircraft USA Page 45 of 138 This document may not be distributed without permission of Miniature Aircraft USA 3B 4 Install Landing Gear Mounts Parts Relationship 3B 4 a 3B 4 b...

Page 46: ...34 Elevator Frame Support 1 each 0019 M3 Locknut 2 each 0113 M3 Double Ball 1 each 0107 M3 x 6 Threaded Ball 5 each 0105 M3 x 4 5 Threaded Ball 1 each 115 38 Rudder Bellcrank 1 each 0159 M3 x 7 Ball B...

Page 47: ...006 Copyright Miniature Aircraft USA Page 47 of 138 This document may not be distributed without permission of Miniature Aircraft USA 3C 1 Assemble Aileron Pitch Bellcranks Parts Relationship 3C 1 a 3...

Page 48: ...mbly Manual Page 48 of 138 Copyright Miniature Aircraft USA Created 11 14 2006 This document may not be distributed without permission of Miniature Aircraft USA 3C 2 Install Aileron Pitch Bellcranks 3...

Page 49: ...iature Aircraft USA Page 49 of 138 This document may not be distributed without permission of Miniature Aircraft USA 3C 3 Assemble Elevator Bellcrank Parts Relationship 3C 3 a 3C 3 b 0113 0866 11 0105...

Page 50: ...8 Copyright Miniature Aircraft USA Created 11 14 2006 This document may not be distributed without permission of Miniature Aircraft USA 3C 4 Install Elevator Bellcrank 3C 4 a 3C 4 b 3C 4 c 3C 4 d 3C 4...

Page 51: ...06 Copyright Miniature Aircraft USA Page 51 of 138 This document may not be distributed without permission of Miniature Aircraft USA 3C 5 Assemble Rudder Bellcrank Parts Relationship 3C 5 a 3C 5 b 3C...

Page 52: ...eme Assembly Manual Page 52 of 138 Copyright Miniature Aircraft USA Created 11 14 2006 This document may not be distributed without permission of Miniature Aircraft USA 3C 6 Install Rudder Bellcrank 3...

Page 53: ...without permission of Miniature Aircraft USA Step 4 Frame Assembly A Chassis Components Bag 4A Building Notes Locate Bag 4A which contains the lower frame components These parts will be used in the f...

Page 54: ...or Mount 1 each 0546 16 Dampers 2 each 546 11 Upper Collet YS 1 each 0579 4 Cooling Fan 1 each 546 5 Upper Collet OS 1 each 546 6 Base Collet 1 each 0332 M8 x 13 x 1 Shim Washer 1 each 0019 M3 Locknut...

Page 55: ...re Aircraft USA Page 55 of 138 This document may not be distributed without permission of Miniature Aircraft USA 4B 1 Prepare Engine Parts Relationship 4B 1 a 4B 1 b 4B 1 c Washer from engine 546 6 57...

Page 56: ...you should dial indicate the fan runout to less than 002 using a dial indicator as shown Runout should be checked on both the face and the top edge of the fan hub The collet system usually makes align...

Page 57: ...ocument may not be distributed without permission of Miniature Aircraft USA 4B 2 Install Engine Mounts Parts Relationship 4B 2 a 4B 2 b 4B 2 c 115 53 115 51 119 51 115 50 119 50 0079 0079 0077 0077 00...

Page 58: ...8 of 138 Copyright Miniature Aircraft USA Created 11 14 2006 This document may not be distributed without permission of Miniature Aircraft USA 4B 2 d 4B 2 e 4B 2 f 4B 2 g 115 50 119 50 0079 0067 0003...

Page 59: ...t permission of Miniature Aircraft USA 4B 3 Install Engine 4B 3 a 4B 3 b 4B 3 c 4B 3 d 4B 3 e Building Notes There should be no more than 020 gap between the fan and clutch driver Use the clutch gap t...

Page 60: ...permission of Miniature Aircraft USA C Landing Gear Bag 4C 4C 1 Assemble Install Landing Gear Frame Bottom Plate Parts Relationship 3937 1 Skid Plugs White 4 each 0003 M3 Washer Large 4 each 0058 1 M4...

Page 61: ...ft USA Page 61 of 138 This document may not be distributed without permission of Miniature Aircraft USA 4C 1 a 4C 1 b 4C 1 c 4C 1 d 4C 1 e 4C 1 f 4C 1 g 4C 1 h 4C 1 i Drill with 29 Then with 42 Drill...

Page 62: ...thout permission of Miniature Aircraft USA D Fan Shroud Mounts Bag 4D 115 58 Fan Shroud Braces 3 each 3923 1 Round Plastic Spacers 4 each 0032 M2 9 x 9 5 Phillips Screw 2 each 0029 M2 2 x 13 Phillips...

Page 63: ...nstall Fan Shroud Mounts Parts Relationship 4D 2 a 4D 2 b Building Notes you may need to make adjustments to the fan shroud for carburetor clearance or for cylinder head or muffler mounts depending on...

Page 64: ...of 138 Copyright Miniature Aircraft USA Created 11 14 2006 This document may not be distributed without permission of Miniature Aircraft USA 4D 2 d 4D 3 Install Muffler 4D 3 a 4D 3 b Trim Shroud 115 5...

Page 65: ...sembly Manual Created 11 14 2006 Copyright Miniature Aircraft USA Page 65 of 138 This document may not be distributed without permission of Miniature Aircraft USA 0067 0032 0079 0063 0063 0060 1 0065...

Page 66: ...Assembly Manual Page 66 of 138 Copyright Miniature Aircraft USA Created 11 14 2006 This document may not be distributed without permission of Miniature Aircraft USA 0067 0063 0077 0079 0032 0061 0077...

Page 67: ...ibuted without permission of Miniature Aircraft USA Step 5 Fuel Tank A Fuel Tank Bag 5A 106 52 Fuel Tank Pre Drilled 1 each 115 65 3 fuel Pickup Tubing 1 each 0013 M5 Hex Nut 1 each 0011 M5 x 10 Washe...

Page 68: ...t Miniature Aircraft USA Created 11 14 2006 This document may not be distributed without permission of Miniature Aircraft USA 5A 1 Assemble Fuel Tank Parts Relationship 5A 1 a 5A 1 b 5A 1 c 5A 1 d 040...

Page 69: ...Extreme Assembly Manual Created 11 14 2006 Copyright Miniature Aircraft USA Page 69 of 138 This document may not be distributed without permission of Miniature Aircraft USA 5A 1 e 5A 1 f 5A 1 g 5A 1 h...

Page 70: ...bly Manual Page 70 of 138 Copyright Miniature Aircraft USA Created 11 14 2006 This document may not be distributed without permission of Miniature Aircraft USA 5A 2 Install Fuel Tank 5A 2 a 5A 2 b 5A...

Page 71: ...Aircraft USA Step 6 Swashplate Washout Mixer A Swashplate Bag 6A Kit Specific 0217 1 140 Swashplate 1 each 0159 M3 x 7 Ball Bearing 1 each 0597 3 M3 x 4 6 Brass Spacer 1 each 0009 M3 Washer Small 1 ea...

Page 72: ...8 Copyright Miniature Aircraft USA Created 11 14 2006 This document may not be distributed without permission of Miniature Aircraft USA 6A 1 Assemble Swashplate Parts Relationship 0065 0159 0597 3 000...

Page 73: ...06 Copyright Miniature Aircraft USA Page 73 of 138 This document may not be distributed without permission of Miniature Aircraft USA 6A 1 a 0065 0159 0107 0107 0107 0597 3 0009 0109 0109 0112 0112 010...

Page 74: ...s Apply a small amount of blue thread lock to the threads of the set screws and using a 1 5mm allen driver install each set screw loosely into these holes The adjustment procedure is to rotate the inn...

Page 75: ...r Bag 6B 0133 Ball Link Long 4 each 0135 Ball Link Short 2 each 0219 Washout Hub 1 each 0313 M2 x 15 Threaded Rod 1 each 0227 M2 x 42 Control Rod 2 each 106 07 M2 x 16 Steel Pins 2 each 106 08 M2 C Cl...

Page 76: ...2006 This document may not be distributed without permission of Miniature Aircraft USA 6B 1 Assemble Washout Mixer Parts Relationship 6B 1 a 6B 1 b 6B 1 c 0109 0221 0597 2 0159 0219 0221 0221 0097 009...

Page 77: ...d 11 14 2006 Copyright Miniature Aircraft USA Page 77 of 138 This document may not be distributed without permission of Miniature Aircraft USA 6B 1 d 6B 1 e 6B 1 f 6B 1 g 6B 1 h 6B 1 i 6B 1 j 6B 1 k 6...

Page 78: ...y Extreme Assembly Manual Page 78 of 138 Copyright Miniature Aircraft USA Created 11 14 2006 This document may not be distributed without permission of Miniature Aircraft USA 6B 1 m 6B 2 Install Washo...

Page 79: ...138 This document may not be distributed without permission of Miniature Aircraft USA 6B 3 Assemble Swashplate Control Rods 6D 3 a 6B 4 Install Swashplate Control Rods 6D 3 a 6D 3 b 6D 3 c Completed C...

Page 80: ...14 2006 This document may not be distributed without permission of Miniature Aircraft USA Step 7 Control System Canopy A Servo Mounts Bag 7A 115 30 Velcro 24 1 Each 0390 Wire Retainers 6 Each 0038 M2...

Page 81: ...USA Page 81 of 138 This document may not be distributed without permission of Miniature Aircraft USA 7A 1 Install Servos Radio Gear Parts Relationship Rudder Aileron Pitch Parts Relationship Elevator...

Page 82: ...ument may not be distributed without permission of Miniature Aircraft USA 7A 1 a 7A 1 b 7A 1 c 7A 1 d 7A 1 e 7A 1 f 7A 1 g 7A 1 h 7A 1 i Aileron Servo for 140 CCPM Pitch Servo for 120 CCPM Throttle Se...

Page 83: ...bly Manual Created 11 14 2006 Copyright Miniature Aircraft USA Page 83 of 138 This document may not be distributed without permission of Miniature Aircraft USA 7A 1 j 7A 1 k 7A 1 l 7A 1 m 7A 1 n 7A 1...

Page 84: ...rcraft USA Created 11 14 2006 This document may not be distributed without permission of Miniature Aircraft USA B Ball Links Bag 7B Building Notes These parts will be used in the next steps 0133 Ball...

Page 85: ...Miniature Aircraft USA C Control Rods Bag 7C 7C 1 Assemble Servo Control Rods 7C 1 a 7C 1 b 122 98 Graphite Tube 1 Each 0679 M2 x 170 Threaded Control Rod 1 Each 0373 M2 x 130 Threaded Control Rod 1 E...

Page 86: ...ure Aircraft USA E A T P R Completed Control Rods Prints Actual Size Note Lengths shown for both 120 and 140 CCPM Suggested Sizes Shown are for Futaba Servos and may need to be adjusted for your setup...

Page 87: ...138 This document may not be distributed without permission of Miniature Aircraft USA D Servo Supports Bag 7D 115 86 Servo Supports 4 Each 115 73 M2 6 Brass Servo Stud Futaba 4 Each 115 74 M3 0 Brass...

Page 88: ...e 88 of 138 Copyright Miniature Aircraft USA Created 11 14 2006 This document may not be distributed without permission of Miniature Aircraft USA 7D 1 Assemble Install Servo Wheels 7D 1 a 7D 1 b 7D 1...

Page 89: ...2006 Copyright Miniature Aircraft USA Page 89 of 138 This document may not be distributed without permission of Miniature Aircraft USA 7D 1 d 7D 1 e Pitch Ball Inside Rudder Ball Outside Elevator Ball...

Page 90: ...nual Page 90 of 138 Copyright Miniature Aircraft USA Created 11 14 2006 This document may not be distributed without permission of Miniature Aircraft USA 7D 2 Install Servo Control Rods 7D 2 a 7D 2 b...

Page 91: ...ssembly Manual Created 11 14 2006 Copyright Miniature Aircraft USA Page 91 of 138 This document may not be distributed without permission of Miniature Aircraft USA 7D 3 Install Servo Supports 7D 3 a 7...

Page 92: ...14 2006 This document may not be distributed without permission of Miniature Aircraft USA E Canopy Mounts Bag 7E 7E 1 Assemble Canopy Knobs 7E 1 a 106 22 Rubber Grommets 2 Each 115 94 Rubber Grommets...

Page 93: ...f 138 This document may not be distributed without permission of Miniature Aircraft USA F Canopy Box Contents 7F 1 a Mark Center And drill at 17 64 Mark Center And drill at 7 32 Switch Opening Left Si...

Page 94: ...ted without permission of Miniature Aircraft USA 7F 1 Prepare Canopy 7F 1 b 7F 1 c 7F 1 d 7F 1 e 7F 1 f 7F 1 g 43mm Marks are parallel to crease in canopy Drill 17 64 opening starting with smaller dri...

Page 95: ...document may not be distributed without permission of Miniature Aircraft USA Step 8 Rotor Head A Head Block Bag 8A 0855 A Head Block Assembled 1 each 0509 Head Button 1 each 0113 Double Threaded Ball...

Page 96: ...of Miniature Aircraft USA 8A 1 Head Block Assembly Parts Relationship 8A 1 a 8A 1 b 0113 0597 1 0067 0065 0509 0509 0065 0113 2 0597 1 2 0067 2 0855 A Building Notes install the two 0113 control ball...

Page 97: ...be distributed without permission of Miniature Aircraft USA B Blade Grips Step 8B 120 18 Blade Grip 2 each 0159 M3 x 7 Ball Bearing 4 each 0334 1 Bell Mixer 2 each 0597 1 M3 x 3 2 Brass Spacer 2 each...

Page 98: ...Aircraft USA Created 11 14 2006 This document may not be distributed without permission of Miniature Aircraft USA 8B 1 Assemble Bell Mixer Parts Relationship 8B 1 a 8B 1 b 8B 1 c 120 18 0017 0159 2 01...

Page 99: ...ing Notes Select the bell mixer with the inserted bolt and thread it into the rear hole on the blade grip tighten it until just before the assembly is fully tight Check the rotation of the bell mixer...

Page 100: ...5 Ball Bearing 4 each 0848 2 Retaining Clip 2 each 0844 12 One Piece Dampers 2 each 0840 10 S S Shim 2 each 0840 12 Thrust Bearing 2 each 0331 M13 x 5 S S Shim 2 each 0324 M10 x 16 x 1 Shim 2 each 084...

Page 101: ...Page 101 of 138 This document may not be distributed without permission of Miniature Aircraft USA 8C 1 Blade Arm Assembly Parts Relationship 8C 1 Assemble Blade Arms 8C 1 a 8C 1 b 8C 1 c 0319 0319 084...

Page 102: ...ot be distributed without permission of Miniature Aircraft USA 8C 1 d 8C 1 e 8C 1 f 8C 1 g 8C 1 h 8C 1 i 8C 1 j 8C 1 k 8C 1 l 0840 12 Small Diameter 0844 12 Rounded Edge 120 05 0848 2 Seat In Groove 0...

Page 103: ...sembly Manual Created 11 14 2006 Copyright Miniature Aircraft USA Page 103 of 138 This document may not be distributed without permission of Miniature Aircraft USA 8C 2 Install Blade Arms 8C 2 a 8C 2...

Page 104: ...335 M2 x 75 Control Rod 2 each 0313 M2 x 15 Control Rod 2 each 0133 Ball Link Long 8 each 0135 Ball Link Short 4 each 126 88 Flybar Control Spacer 4 each 0555 1 M3 Ball 2 each 0063 M3 x 10 Socket Bolt...

Page 105: ...ent may not be distributed without permission of Miniature Aircraft USA 8D 1 Assemble Install Flybar Control System Rod Lengths 8D 1 a 8D 1 b 8D 1 c Completed Control Rods Prints Actual Size 0337 0133...

Page 106: ...raft USA 8D 1 d 8D 1 e 8D 1 f 8D 1 g 8D 2 Assemble Install Flybar Bell Links 8D 2 a 8D 2 b Building Notes snap one end of the assembled link onto the double ball on the bell mixer and the other onto t...

Page 107: ...8 This document may not be distributed without permission of Miniature Aircraft USA 8D 3 Install Flybar 8D 3 a 8D 3 b 8D 4 Install Flybar Paddles 8D 4 a 8D 4 b 8D 4 c 8D 4 d Building Notes make sure b...

Page 108: ...38 Copyright Miniature Aircraft USA Created 11 14 2006 This document may not be distributed without permission of Miniature Aircraft USA 8D 5 Install Rotor Head 8D 5 a 8D 5 b 8D 5 c 8D 5 d 8D 5 e 8D 5...

Page 109: ...uted without permission of Miniature Aircraft USA Step 9 Tail Rotor Assembly A Tail Rotor Hub Bag 9A 122 65 Tail Rotor Hub 1 each 0873 1 T R Blade Grips 2 each 120 39 M5 x 10 Ball Bearings 2 each 0446...

Page 110: ...is document may not be distributed without permission of Miniature Aircraft USA 9A 1 Assemble Tail Rotor Hub Parts Relationship 122 65 0457 0457 120 39 120 39 0446 4 0446 4 0021 0021 0019 0019 0097 00...

Page 111: ...permission of Miniature Aircraft USA 9A 1 a 9A 1 b 9A 1 c 9A 1 d 9A 1 e 9A 1 f 9A 1 g 9A 1 h 9A 1 i 0873 1 120 39 0457 Large Diameter Race 0457 Bearing 0457 Small Diameter Race 0446 4 122 65 Locate L...

Page 112: ...ly Manual Page 112 of 138 Copyright Miniature Aircraft USA Created 11 14 2006 This document may not be distributed without permission of Miniature Aircraft USA 9A 2 Install Tail Rotor Blades 9A 2 a 9A...

Page 113: ...ed without permission of Miniature Aircraft USA B Tail Rotor Pitch Yoke Bag 9B 120 14 Pitch Yoke 1 Each 0443 M6 Retaining Clip 2 Each 0439 M6 x 10 Ball Bearing 2 Each 0859 16 Pitch Links 2 Each 0015 M...

Page 114: ...right Miniature Aircraft USA Created 11 14 2006 This document may not be distributed without permission of Miniature Aircraft USA 9B 1 Assemble TR Pitch Yoke Parts Relationship 0439 0439 0435 0437 010...

Page 115: ...tributed without permission of Miniature Aircraft USA 9B 1 a 9B 1 b 9B 1 c 9B 1 d 9B 1 e 9B 1 f 9B 1 g 9B 1 h 0437 0101 0439 2 0435 120 14 0443 0443 0015 0049 The yoke must remain free with no bearing...

Page 116: ...iniature Aircraft USA C Tail Rotor Transmission Bag 9C 123 75 Assembled Gear Box 1 Each 0445 Bellcrank 1 Each 0597 3 M3 Brass Spacer 1 Each 0159 M3 x 7 Ball Bearing 2 Each 0015 M2 Hex Nut 1 Each 0097...

Page 117: ...d 11 14 2006 Copyright Miniature Aircraft USA Page 117 of 138 This document may not be distributed without permission of Miniature Aircraft USA 9C 1 Assemble T R BellCrank Parts Relationship 123 75 00...

Page 118: ...8 Copyright Miniature Aircraft USA Created 11 14 2006 This document may not be distributed without permission of Miniature Aircraft USA 9C 1 a 9C 1 b 9C 1 c 9C 1 d 9C 2 Install T R BellCrank 9C 2 a 9C...

Page 119: ...ssembly Manual Created 11 14 2006 Copyright Miniature Aircraft USA Page 119 of 138 This document may not be distributed without permission of Miniature Aircraft USA 9C 3 Install T R Pitch Yoke 9C 3 a...

Page 120: ...ep 10 Locate Tail Boom Components A Tail Boom Components Bag 10 Building Notes Locate Bag 10 These parts are to be used in other steps They are bagged together due to their size and to ensure that the...

Page 121: ...Each 0186 Front Boom Mount Set 1 Each 122 27 Rear Canopy Mount 2 Each 0870 2 Horizontal Fin Mount 1 Each 0589 5 Horizontal Fin 1 Each 0589 4 Vertical Fin 1 Each 0077 M3 x 30 Socket Bolts 4 Each 0063...

Page 122: ...ed without permission of Miniature Aircraft USA 1A 1 Install Tube Drive 11A 1 a Building Notes before inserting the tube drive into the tail boom as shown spray inside the boom with a spray glass clea...

Page 123: ...ircraft USA Page 123 of 138 This document may not be distributed without permission of Miniature Aircraft USA 11A 3 Install Vertical Fin Mount Fin Parts Relationship 0589 4 123 86A 123 86B 0061 0009 0...

Page 124: ...006 This document may not be distributed without permission of Miniature Aircraft USA 11A 3 a 11A 3 b 11A 3 c 11A 3 d 11A 3 e 11A 3 f 11A 3 g 11A 3 h Building Notes do not overtighten any bolts in thi...

Page 125: ...ted 11 14 2006 Copyright Miniature Aircraft USA Page 125 of 138 This document may not be distributed without permission of Miniature Aircraft USA 11A 4 Install Horizontal Fin Mount Fin Parts Relations...

Page 126: ...al Page 126 of 138 Copyright Miniature Aircraft USA Created 11 14 2006 This document may not be distributed without permission of Miniature Aircraft USA 11A 4 a 11A 4 b 11A 4 c 11A 4 d 0870 2 161 mm 0...

Page 127: ...e Assembly Manual Created 11 14 2006 Copyright Miniature Aircraft USA Page 127 of 138 This document may not be distributed without permission of Miniature Aircraft USA 11A 5 Install Tail Rotor 11A 5 a...

Page 128: ...14 2006 This document may not be distributed without permission of Miniature Aircraft USA 11A 6 Install Front Tail Boom Mount Parts Relationship 11A 6 a 11A 6 b 11A 6 c 0186 0077 0077 0077 0077 122 27...

Page 129: ...od Components Bag 11B Parts Relationship 0015 M2 Hex Nut 1 Each 0043 M2 x 10 Slotted Bolt 1 Each 0020 M2 5 Hex Nut 1 Each 0039 M2 5 x 12 Phillips Bolt 1 Each 0477 Guide Support 1 Each 121 5 M3 x 75 Co...

Page 130: ...d 11 14 2006 This document may not be distributed without permission of Miniature Aircraft USA 11B 1 Assemble Install T R Pushrod Guide 11B 1 a 11B 1 b 11B 2 Install Tailboom 11B 1 a 11B 1 b 11B 1 c F...

Page 131: ...ted without permission of Miniature Aircraft USA 11B 3 Assemble T R Pushrod 11B 3 a 11B 3 b 11B 3 c 11B 3 d 11B 3 e 11B 3 f 11B 3 g 11B 3 h 11B 3 i 121 6 133 1 0868 11 0868 20 0868 11 121 5 133 1 Forw...

Page 132: ...ture Aircraft USA Created 11 14 2006 This document may not be distributed without permission of Miniature Aircraft USA 11B 3 j Building Notes test assemble all of these components before applying adhe...

Page 133: ...port Components Bag 11C 11C 1 Assemble Tail Boom Supports Parts Relationship 0872 8 Support End M4 Hole 2 Each 0872 2 Support End M3 Hole 2 Each 0004 M4 Washer 2 Each 0079 M3 x 35 Socket Bolts 2 Each...

Page 134: ...ent may not be distributed without permission of Miniature Aircraft USA Parts Relationship 11C 1 a 11C 1 b 11C 2 Install Tail Boom Supports 11C 2 a 11C 2 b 11C 2 b 11C 2 d 11C 2 e 0872 2 2 0872 8 2 00...

Page 135: ...138 This document may not be distributed without permission of Miniature Aircraft USA 11C 3 Install Rotor Blades 11C 3 a 11C 3 b Building Notes Tighten each blade equally The blade should be tight eno...

Page 136: ...XCell Fury Extreme Assembly Manual Page 136 of 138 Copyright Miniature Aircraft USA Created 11 14 2006 This document may not be distributed without permission of Miniature Aircraft USA...

Page 137: ...XCell Fury Extreme Assembly Manual Created 11 14 2006 Copyright Miniature Aircraft USA Page 137 of 138 This document may not be distributed without permission of Miniature Aircraft USA...

Page 138: ...XCell Fury Extreme Assembly Manual Page 138 of 138 Copyright Miniature Aircraft USA Created 11 14 2006 This document may not be distributed without permission of Miniature Aircraft USA...

Reviews: