background image

3

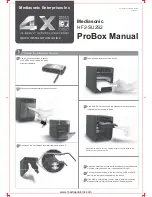
Getting Started

1. 

Make sure the Power switch is in OFF position.

2. 

If necessary, use the included hex key to unlock and open the HDD doors.

3. 

Align the SATA contacts on your disk drive with those in the enclosure, and fully insert 
the drive into the enclosure.

4. 

Close the HDD door all the way so it latches into place, and use the included hex key to 
lock the door.

5. 

Select the cable you want to use from among the two included interface cables (eSATA 
or USB 3.0) and use it to connect the EHD-3.5 to the corresponding port on your 
computer.

 If your computer has both an eSATA and a USB port, do not plug the enclosure 

 into both ports. Choose one or the other.

6. 

Use the included power adapter to connect the EHD-3.5 to an AC power source.

7. 

Slide the Power switch to the ON position to turn on the EHD-3.5. As the EHD-3.5 
powers on, the HDD status LED will glow blue. It may also flash blue and red, which 
occurs during read/write operations.

If your disk drive has been formatted, your computer will notify you that new hardware has 
been detected, and the drive will appear on the Desktop, in My Computer, or in the Finder.

If the drive has not been formatted, or if your computer cannot read or recognize it, you may 
need to format the drive. See Formatting Your Disk Drive on page 4.


Summary of Contents for EHD-3.5

Page 1: ...via one of the included high speed connection cables The EHD 3 5 accommodates a single 3 5 I II III hard disk drive USB 3 0 and eSATA ports provide optimal compatibility for connecting to your compute...

Page 2: ...Handle this product with care Clean this product with only a soft dry cloth Keep this product away from children Do not store this product in direct sunlight or in extreme high or low temperatures Al...

Page 3: ...ATA ON OFF DC 4 6 7 5 Overview Front 1 HDD status LED 2 HDD door 3 Safety lock Rear 4 Power switch 5 DC power port 6 USB 3 0 port 7 eSATA port Also included eSATA cable USB 3 0 cable DC power supply H...

Page 4: ...ter If your computer has both an eSATA and a USB port do not plug the enclosure into both ports Choose one or the other 6 Use the included power adapter to connect the EHD 3 5 to an AC power source 7...

Page 5: ...5 5 Use the included hex key to unlock the HDD door Open the door and remove the disk drive from the enclosure Mac 1 Click on the eject symbol next to the device s icon in the Finder 2 After the devic...

Page 6: ...5 Windows XP 1 Right click on My Computer and select Manage In the right column of the Computer Management window double click on Storage 2 Click on Disk Management Local 1 2...

Page 7: ...lack bar and are labeled Unallocated 4 If your disk is unformatted skip to step 6 5 If your disk is partitioned and formatted right click the partition labeled Primary partition and select Delete Part...

Page 8: ...e drop down menu to assign to the disk drive Click on Next to continue 12 In the Format Partition window select Format this partition with the following settings a From the File system drop down menu...

Page 9: ...8 9 12 10 11...

Page 10: ...ble click on Storage 2 Click on Disk Management 3 In the bottom half of the middle column you will see a list of all the connected disk drives and their partitions Formatted drives have a blue bar and...

Page 11: ...ct a letter from the drop down menu to assign to the disk drive Click on Next to continue 8 In the Format Partition window select Format this volume with the following settings a From the File system...

Page 12: ...11 e Make sure Enable file and folder compression is unselected f Click on Next to continue 6 7...

Page 13: ...ew your settings and click on Finish Windows will format the partition which will appear as formatted in the middle column of the Computer Management window The disk will appear as a usable drive in M...

Page 14: ...dow you will see a list of connected disk drives Select the disk you want to erase and click on the Erase tab in the right hand column 3 From the Format drop down menu select the file system you want...

Page 15: ...14 2 3 4 5...

Page 16: ...r defect caused by misuse neglect accident alteration abuse improper installation or maintenance EXCEPT AS PROVIDED HEREIN THE WARRANTY PROVIDER MAKES NEITHER ANY EXPRESS WARRANTIES NOR ANY IMPLIED WA...

Reviews: