background image

5

3. 

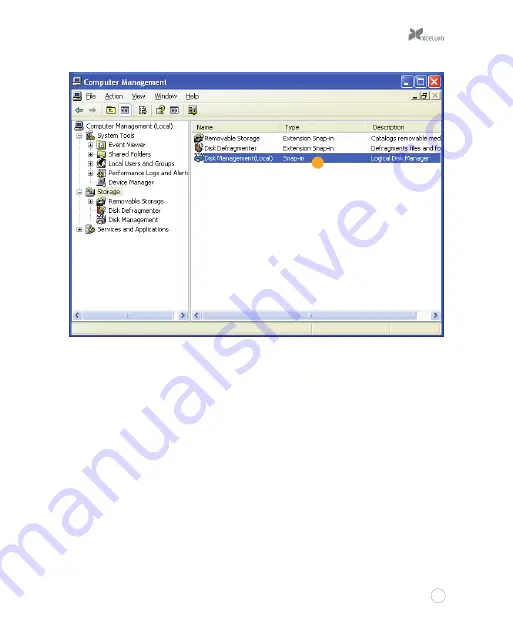
In the bottom half of the right column, you will see a list of the connected disk drives 
and their partitions. Formatted drives have a blue bar, and unformatted drives have a 
black bar and are labeled “Unallocated.”

4. 

If your disk is unformatted, skip to step #6.

5. 

If your disk is formatted and partitioned, right-click the partition labeled “Primary 
partition” and select “Delete Partition.” 

6. 

 Confirm your selection in the dialog box that follows. Windows will delete the partition, 
and the box that was labeled “Primary partition” will now be labeled “Unallocated.”

2

Summary of Contents for HDD-01

Page 1: ...HDD 01 SATAHardDriveDock UserManual ...

Page 2: ...drive instead of dismantling your computer and installing the drive you simply insert the drive directly into the dock Compatible with hard disk drives and solid state drives the HDD 01 accommodates a 2 5 laptop sized or a 3 5 desktop sized SATA I II III drive with a capacity of up to 4 TB Note Only one drive can be inserted at a time ...

Page 3: ...ad and follow these instructions and keep this manual in a safe place Back up your data before using this product in order to prevent loss of important data Xcellon will not be responsible for any data loss Keep this product away from liquids Use only the correct recommended voltage Handle this product with care Clean this product with only a soft dry cloth Keep this product away from children Do ...

Page 4: ...iew Top 1 2 5 drive slot 2 3 5 drive slot 3 SATA contacts 4 Power LED Rear 5 FireWire 400 1394a port 6 FireWire 800 1394b ports 7 USB 3 0 port 8 eSATA port 9 DC power port 10 Power button 3 1 2 4 5 6 7 8 9 10 ...

Page 5: ... hardware has been detected and the drive will appear on the Desktop in My Computer or in the Finder If the drive has not been formatted or if your computer cannot read or recognize it you may need to format the drive See Formatting Your Disk Drive beginning on page 4 During disk drive read write operations the power LED will glow simultaneously blue and red RemovingYourDiskDrive To prevent data l...

Page 6: ...puter cannot read or recognize it then you may need to format the drive Keep in mind that formatting a drive will erase all of its data If you have data on your drive make sure to back it up before formatting Windows XP and Vista 32 bit have a maximum drive capacity of 2 TB Windows XP 1 Right click on My Computer and select Manage In the right column of the Computer Management window double click ...

Page 7: ...black bar and are labeled Unallocated 4 If your disk is unformatted skip to step 6 5 If your disk is formatted and partitioned right click the partition labeled Primary partition and select Delete Partition 6 Confirm your selection in the dialog box that follows Windows will delete the partition and the box that was labeled Primary partition will now be labeled Unallocated 2 ...

Page 8: ...artition Wizard opens click on Next to continue 9 In the Select Partition Type window select Primary partition Click on Next to continue 10 In the Specify Partition Size window make sure the maximum disk space in megabytes MB is the same as the partition size in MB in order to make a whole drive partition Click on Next to continue 3 5 6 ...

Page 9: ... with the following settings a From the File system drop down menu select the file system you want to use for the disk b Set Allocation unit size to Default c Type in a name for the disk in the Volume label text entry box The default disk name is New Volume d You can opt to perform a quick format or a full format e Make sure Enable file and folder compression is unselected f Click on Next to conti...

Page 10: ...8 10 12 10 11 ...

Page 11: ...ght click on My Computer and select Manage In the middle column of the Computer Management window double click on Storage 2 Click on Disk Management 3 In the bottom half of the middle column you will see a list of all the connected disk drives and their partitions Formatted drives have a blue bar and unformatted drives have a black bar and are labeled Unallocated 4 Right click on the partition lab...

Page 12: ... window make sure the maximum disk space in MB is the same as the simple volume size in MB in order to make a whole drive partition Click on Next to continue 7 In the Assign Drive Letter or Path window select a letter from the drop down menu to assign to the disk drive Click on Next to continue 2 3 4 ...

Page 13: ... want to use for the disk b Set Allocation unit size to Default c Type in a name for the disk in the Volume label text entry box The default disk name is New Volume d You can opt to perform a quick format or a full format Perform a quick format is the default option e Make sure Enable file and folder compression is unselected f Click on Next to continue 6 ...

Page 14: ...1 2 7 8 ...

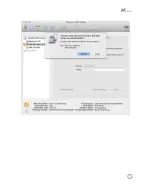
Page 15: ... of the Computer Management window and the disk will appear as a usable drive in My Computer Mac OS X 1 If your disk drive is unformatted a dialog box will appear telling you that the computer cannot read the disk Click on Initialize to open the Disk Utility application Alternatively you can go to Applications Utilities Disk Utility ...

Page 16: ...t hand column 3 From the Format drop down menu select the file system you want to use for the disk 4 Type in a name for the disk in the Name text entry box The default disk name is Untitled 5 Click on the Erase button and confirm your selection in the dialog box that follows Mac OS will format the disk and it will appear in the Finder under the Devices category 2 3 4 5 ...

Page 17: ...1 5 ...

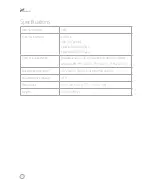
Page 18: ...ireWire800 1394b 2 FireWire400 1394a 1 System requirements AvailableeSATA USB orFireWireportonthecomputer Windows98 ME 2000 XP Vista 7 8 MacOS9 X Drivetypes supported 2 5 and3 5 SATAI II IIItypeHDDandSSD Maximum drive capacity 4TB Dimensions 5 4 3 0 2 6 13 7 7 6 6 7cm Weight 13 4oz 380g ...

Page 19: ...s been discontinued we reserve the right to replace it with a model of equivalent quality and function To obtain warranty coverage contact Xcellon to obtain a return merchandise authorization RMA number and return the defective product to Xcellon along with the RMA number and proof of purchase Shipment of the defective product is at the purchaser s own risk This warranty does not cover damage or d...

Page 20: ......

Reviews: