background image

NOTICES AND WARNINGS

Important Note:

 All safety precautions and warnings, instructions, warranties and other collateral 

information is subject to change at the sole discretion of xCraft Enterprises. For the most up-to-date 

information please contact xCraft Support. The following special language terms are used throughout the 

product literature to indicate various levels of potential harm when operating this product:

Notice: Procedures, which if not properly followed, create a possibility of property damage and/or little to no 

possibility of injury.

Caution:

 Procedures, which if not properly followed, create the probability of property damage and/or a 

possibility of serious injury.

Warning:

 Procedures, which if not properly followed, create the probability of property damage, collateral 

damage and/or serious injury or create a high probability of superficial injury.

Warning:

 Read the ENTIRE Operation Manual to become familiar with the features of the product before 

operating. Failure to operate the product correctly can result in damage to the product, property and/or cause 

serious injury.

Warning:

 This is a sophisticated product. It must be operated with caution and common sense, and requires 

some basic mechanical ability. Failure to operate this product in a safe and responsible manner could result 

in damage to the product, property and/or cause serious injury. This product is not intended for use by 

children without direct adult supervision. Do not use with incompatible components or alter this product 

in any way outside of the instructions provided by xCraft. The Operation Manual contains instructions for 

safety, operation, and maintenance. It is essential to read and follow all the instructions and warnings prior to 

assembly, setup and/or use in order to operate the product correctly and avoid damage and/or serious injury.

Age recommendation: Not for children under 18 years. This is not a toy.

General Safety precautions and Warnings:

Failure to use this product in the intended manner as described in the Operation Manual can result in damage 

to the product, property and/or cause serious injury. A Radio Controlled (RC) multirotor aircraft, APV platform, 

vehicle, etc. is not a toy! If misused it can cause serious bodily harm and damage to property.

Warning:

 As the user of this product you are solely and wholly responsible for operating it in a manner that 

does not endanger yourself and others or result n damage to the product or the property of others.

Keep your hands, face and other parts of your body away from the spinning propellers and other moving parts 

at all times. Keep items that could impact or become entangled away from the propellers including debris, 

parts, tools, loose clothing, etc. Always operate your aircraft in open areas that are free from people. Vehicles 

and other obstructions. Never fly near or above crowds, airports or buildings.

To ensure proper operation and safe flight performance never attempt to operate your aircraft nearby 

buildings or other obstructions that do not offer a clear view of the sky and can restrict GPS reception.

Do not attempt to operate your aircraft in areas with potential magnetic and/or radio interference including 

areas nearby broadcast towers, power transmission stations, high voltage power lines, etc.

Always keep a safe distance in all directions around your aircraft to avoid collisions and/or injury. This aircraft 

is controlled by a radio signal subject to interference from many source outside your control. Interference can 

cause momentary loss of control.

Do not attempt to operate your aircraft with any worn and/or damage components, parts, etc. (including, but 

not limited to, damaged propellers, old batteries, etc.)

Never operate your aircraft in poor or severe weather conditions including heavy winds, precipitation, 

lightning, etc.

Always operate your aircraft starting with a fully charged battery.

Always keep the aircraft in clear line of sight and under control, and keep the transmitter powered on while 

the aircraft is powered on.

Always move the throttle control stick down fully and disarm the motors in the event the propellers come into 

contact with any objects.

Always allow components and parts to cool after use before touching them and flying again.

Always remove batteries after use and store/transport them per the corresponding guidelines.

25

Summary of Contents for X2 Geo

Page 1: ... 2018 xCraft Enterprises X2 Geo is a trademark of xCraft Enterprises OPERATORS MANUAL REVISION 02 JAN 1 2018 ...

Page 2: ...o at https www faa gov uas registration Before you fly it is a good idea to read up on the regulations in your area at http knowbeforeyoufly org Sincerely Team xCraft XCRAFT SUPPORT Contact xCraft Support for questions and technical help Email support xcraft io Call 1 208 665 1353 Support line hours Mon Fri 8 am to 5 pm PST xCraft Enterprises 418 E Lakeside Ave Ste 08 Coeur d Alene ID 83814 xCraft...

Page 3: ...omponents or alter this product in any way outside of the documents provided by xCraft Enterprises This Operating and Maintenance Manual contains instructions for safety operation and maintenance It is essential to read and follow all of the instructions and warnings in the x2 Geo user manual prior to assembly setup or use in order to operate the product correctly and avoid damage or serious injur...

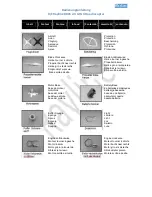
Page 4: ...ntainer Parts List Photo TRANSMITTER BATTERY X2 GEO VEHICLE PYLON BATTERY CHARGER LONG RANGE TELEMETRY KICKSTAND SPARE PROPS 3 10X5 R 3 10X5 1 FOLDING TOOLKIT TRANSMITTER BATTERIES USB CABLE MICRO USB CABLE PARTS LIST 4 ...

Page 5: ...EMETRY 11 CALIBRATING YOUR X2 GEO 12 FLYING THE X2 GEO AUTONOMOUS FLIGHT PLANNING WAYPOINT MISSION 14 AUTONOMOUS FLIGHT PLANNING SURVEY MISSION 15 FLYING THE AUTONOMOUS MISSION 16 MANUAL FLIGHT 17 SENSORS 19 UPDATING FIRMWARE 21 DATA PROCESSING 22 MAINTENANCE AND TROUBLESHOOTING 23 SPECIFICATIONS 24 NOTICES WARNINGS 25 LEGAL TERMS CONDITIONS 27 REGULATORY COMPLIANCE GOVERNMENT REGULATIONS 29 5 ...

Page 6: ...t combines the precision of a quadcopter with the speed and endurance of a fixed wing aircraft Definition of components is provided below DEFINITION OF TERMS q Wing w Pylon e Spinner r Motor t Nosecone y 10x5 Propeller u 10x5R Propeller i Folding Propeller r r r u y e e e i 6 ...

Page 7: ...TOP BOTTOM Left Elevon Right Elevon Kickstand DEFINITION OF TERMS 7 ...

Page 8: ...2 Transmitter MODE VTOL Stabilize Hold Position Mission Hover Cruise q Power Switch w Display e Throttle Yaw r Pitch Roll t VTOL Switch y Mode Switch DEFINITION OF TERMS 8 ...

Page 9: ... qOpen your x2 Geo case on a flat level surface wRemove pylon kickstand and x2 Geo vehicle from case to begin assembly eAttach pylon to x2 Geo with bolts and washer rAttach kickstand with screw and nut PREPARING THE X2 GEO FOR FLIGHT PREPARING VEHICLE 9 ...

Page 10: ...h 10x5R propeller black spinner on left wing motor Note This spinner is reverse threaded u Check all of your attachment points to be sure everything is firmly in place i Connect the battery in your vehicle Left wing motor Letters facing up Right wing motor Letters facing up i Camera connection Battery connection 10 ...

Page 11: ...ree open source program As of the writing of this manual version 3 1 3 is recommended q Plug in RFD 900 long range telemetry sensor into computer using the included USB cable w In QGroundControl Program i Click in upper left ii Click to connect to RFD 900 long range telemetry iii Click add at the bottom iv Under serial link settings select serial port for vehicle v Set baud rate to 57600 STEP 3 Ca...

Page 12: ...le until status bar see diagram 04 fills completely with green and status changes to completed r t y u q e w Diagram 02 Calibrating Compass Accelerometer It is recommended that compass and level horizon calibrations be performed before the first flight of each day Perfom other calibrations only when necessary or after updating firmware PREPARING THE X2 GEO FOR FLIGHT CALIBRATING YOUR X2 GEO y Sele...

Page 13: ...Diagram 03 Calibrating Gyroscope Diagram 04 Error notification Status bar Error Reports PREPARING THE X2 GEO FOR FLIGHT CALIBRATING YOUR X2 GEO 13 ...

Page 14: ...waypoint change command to VTOL takeoff and transition and set desired transition altitude r Select last waypoint change command to VTOL transition and land and set altitude to zero t Click when finished y In the menu that appears click upload to send mission plan to x2 Geo Diagram 06 Planning Waypoint Mission q e r w FLYING THE X2 GEO AUTONOMOUS FLIGHT PLANNING WAYPOINT MISSION y t 14 ...

Page 15: ...rvey area set desired altitude and change grid angle and grid spacing as needed Turnaround distance minimum should be 60m e Click and set final waypoint at desired landing location Set altitude to 0m r Click when finished t In the menu that appears click upload to send mission plan to x2 Geo Diagram 07 Planning Survey Mission w FLYING THE X2 GEO AUTONOMOUS FLIGHT PLANNING SURVEY MISSION vt r qe q ...

Page 16: ...tion y The vehicle will perform the mission most recently uploaded Watch the vehicle s flight path carefully ensuring that it performs the mission properly Also ensure that the vehicle lands on a clear flat and stable surface Be ready to assume manual control by switching mode switch to stabilize or hold in the event the above conditions are not met u After the vehicle sucessfully lands the motors...

Page 17: ...urns solid red r Place the mode switch in either stabilize or hold position t Arm the vehicle by moving the transmitter s left stick all the way down and to the right Hold until motors begin to spin y Throttle up to take off The x2 Geo will follow your guidence per diagrams on the next page Use the transmitter VTOL switch to toggle between hover and cruise flight u Land the vehicle on a clear flat...

Page 18: ...THROTTLE YAW inactive for Cruise PITCH ROLL FLYING THE X2 GEO MANUAL FLIGHT 18 ...

Page 19: ...SENSORS SONY Sony DSC WX220 18 2 MP MAPIR MAPIR Survey3 12 MP 19 ...

Page 20: ...ackages are available Below are several options to consider depending on type of data and desired output Pix 4D www Pix4d com Event 38 Unmanned Systems www Event38 com Dronifi www Dronifi com Drone Deploy www Dronedeploy com DATA PROCESSING 20 ...

Page 21: ...lected u In popup window select the most up to date firmware file provided by xCraft Contact xCraft or authorized dealer for the most recent firmware i Leave USB connected until upgrade completed mes sage appears confirmation tone is heard and vehicle fully reboots i After updating firmware calibrate all sensors see calibrating your x2 Geo w t e r UPDATING FIRMWARE y 21 ...

Page 22: ...undControl w Connect vehicle via USB cable e Click r Click on the right t As log files appear select each one that you want to download and click y Save to folder of choice e r t DATA PROCESSING Diagram 07 Logs 22 ...

Page 23: ...e QGroundControl Blue Pulsing Waiting for GPS lock Green Pulsing GPS locked and ready to arm x4 Green Flashing Mode changed Red Blue alternating flashing Initializing x4 White Flashes Safety switch on Disarmed x3 Red Flashes Arming denied See QGroundControl x3 Purple Flashes Parameter s updated Status Indicator Light MAINTENANCE AND TROUBLESHOOTING COLOR STATUS INDICATION Diagram 08 Status Light 2...

Page 24: ...km 305m 3000 acres 1000ft 2 Km 102m 500 Acres 400ft Weight Including Supplied Camera 1 27 kg 2 8 lbs Wingspan 84 cm 33 in Battery 14 8V 5400 MAH Camera supplied Option 1 Sony DSC WX220 18 2 MP Option 2 MAPIR Survey3 12 MP Material EPO Foam Carbon and Aluminum Propulsion 3 x 160 W Brushless DC Motor Carry Case Dimensions 92 x 51 x 20 cm 36 x 20 x 8 in Flight Planning Control Software QGroundControl...

Page 25: ...e product property and or cause serious injury A Radio Controlled RC multirotor aircraft APV platform vehicle etc is not a toy If misused it can cause serious bodily harm and damage to property Warning As the user of this product you are solely and wholly responsible for operating it in a manner that does not endanger yourself and others or result n damage to the product or the property of others ...

Page 26: ... transmitters batteries are full before each flight If the transmitter is left on for more than 5 minutes it will sound an alarm Execute some action or power it off Repair or replace the transmitter if damaged Compass To avoid possible injury or damage observe the following rules Land immediately when severe drifting occurs in flight i e the aircraft does NOT fly in straight lines Ensure the compa...

Page 27: ...ion accompanying this x2 Geo including but not limited to any failure to conduct preflight or other periodic inspections Damage arising from any combined use with any other product Damage from improper usage of any electrical source or Use of the x2 Geo in violation of any applicable local state or federal rules laws or regulations OTHER THAN THE EXPRESS LIMITED WARRANTY PROVIDED ABOVE XCRAFT MAKE...

Page 28: ...E INCLUDED IN THIS X2 GEO BY PURCHASER OR ANYONE OTHER THAN XCRAFT WILL EFFECTIVELY VOID ANY AND ALL WARRANTIES CONTAINED HEREIN Additional Terms These terms represent the entire understanding between xCraft and the purchaser and operators of the x2 Geo product In the event any provision of these terms is determined to be illegal or unenforceable that provision will be limited or eliminated to the...

Page 29: ...d become familiar with the applicable local laws and regulations It is the operator s sole responsibility to familiarize himself or herself with all applicable rules laws and regulations and other government guidance and information relating to flying the x2 Geo The below information and links are provided for convenience purposes only xCraft does not guarantee or warrant that the following links ...

Reviews: