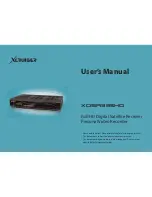
background image

User’s Manual

XDSR385HD

Full HD Digital Satellite Receiver
Personal Video Recorder

• 

Please read this User’s Manual carefully before installing the receiver.

• 

This document is subject to update without perior notice. 

• 

This document may be available in other languages. Please visit our 
website: 

http://www.xcruiser.net

Summary of Contents for XDSR385HD

Page 1: ...eiver Personal Video Recorder Please read this User s Manual carefully before installing the receiver This document is subject to update without perior notice This document may be available in other languages Please visit our website http www xcruiser net ...

Page 2: ...guration 10 2 Rear Panel Coniguration 11 3 Remote Control Unit 12 Connecting diagram 14 1 Receiver to Adaptor 14 2 Receiver to TV with Digital A V Output 14 3 Receiver to TV with Analog A V Output 16 4 Connecting to Antenna Cable 16 5 Guide to mounting an STB on TV back panel Optional 18 Guide of Functions 19 1 Selecting a Service 19 1 1 Using CH UP DOWN buttons 19 1 2 Using Service List 19 1 3 Us...

Page 3: ... Files 29 3 3 Music 29 3 4 Photo 29 4 Bookmark 30 5 Trick mode 30 Menu Map 31 Main Menu of Guide 32 1 System Tools 32 1 1 Storage Manager 32 1 2 Timer Settings 33 1 3 Service List Manager 33 1 4 Data Transfer 34 2 Coniguration 35 2 1 Recording Option 36 2 2 Parental Control 37 2 3 Display Setting 37 2 4 Time Setting 38 2 5 Language Setting 38 2 6 A V Output Setting 39 3 Installation 40 3 1 Dish Se...

Page 4: ...by the manufacturer w w Use only with the cart stand tripod bracket or table speciied by the manufacturer or sold with the apparatus When a cart is used use caution when moving the cart apparatus combination to avoid injury from tip over w w Unplug this apparatus during lightning storms or when unused for long periods of time w w Refer all servicing to qualiied service personnel Servicing is requi...

Page 5: ...ng instructions in the literature accompanying the product 3 Copyright This manual is protected by copyright laws Copy use and reproduction of this manual in part or whole without Manufacturer s prior written approval are prohibited 4 Disclaimer The manufacturers distributors and agents are not liable to any kind of damage caused by the use of the information contained in this manual The instructi...

Page 6: ... S2 w w Blind scan w w Multi LNB Controlled by DiSEqC Control Version 1 0 1 1 1 2 and USALS w w Multi Satellite Search w w Support EPG Electronic Program Guide w w On Screen Display with Full Color Resolution w w Favorite Service Groups w w Powerful Service Control by Favorites Lock Skip Move and Delete w w Service Sorting by Alphabet Transponder and CAS w w Multi language Supported OSD Menu w w T...

Page 7: ... AAA size batteries X2 HDMI cable USB hub Adaptor TV mount bracket Optional IR extension Optional NOTE Ifanyaccessorieslistedabovearemissing contactthesalesrepresentativewhereyoupurchasedthisunit ItisreadytobemountedbehindoftheTV Usethescrewsprovidedtoholdthecomponentsinplace ...

Page 8: ...POWERButton Press to switch between STANDBY and POWER ON modes 3 CHUp DownButton Press to change services in normal mode to move the highlighted bar UP DOWN in menu mode 4 STANDBY REMOTEIndicationLED RED GREEN The LED RED lights on in standby mode The LED GREEN lights on when a key on the Remote Control is pressed 5 RemoteSensor Receives signal from remote controller ...

Page 9: ...d service access 4 LNBIN Use to connect a satellite antenna 5 LNBOUT Use it when connecting to another STB for loop through 6 RS 232C Serial port for irmware update and data transfer 7 Ethernet Local area network port for direct computer connection 8 USB Use it when connecting to external USB storage device 9 HDMI Connects to the TV by using a HDMI cable for the best quality picture and audio 10 A...

Page 10: ...ols the numerical operation and service numbers directly 4 Subtitle To show multilingual subtitle 5 Teletext To show the digital teletext 6 OKorServiceList Show the service list in non menu mode and select an item or conirm in menu mode 7 ARROWButtons a Up DownButtons To change the value of a selected item with preprogrammed values in menu b Left RightButtons To move the cursor left and right in m...

Page 11: ... the next ile This button is also used to jump to end of recording during a playback 24 ColorButtons a RED Used for special function in menu RED key is used to sort lists in service list or go to previous day search in EPG or make delete the current position as a bookmark b GREEN Used for special function in menu Green key is used to set favorites setting in service list or go to the next bookmark...

Page 12: ...XDSR385HD 14 Connecting diagram 1 Receiver to Adaptor lw Connect the A C power cord between A C power cord socket of receiver and A C outlet ...

Page 13: ...gital Audio NOTE DependingontheA Vequipmentyouown therearevariouswaysyoucan connecttheSTB Tochoosethebestconnectionoption pleaserefertothemanual oftheequipmentyouwouldliketoconnectto TogetHighDeinitionplaybackof HDcontent werecommendthatyouconnectyourhighdeinitiondisplaywith aHDMIcable HDMIsupportsstandard enhancedorhigh deinitionvideoand multichannelaudioinasinglecable ...

Page 14: ... and AUDIO L R to VIDEO IN and AUDIO L R IN of TV NOTE Thecompositeconnection RCAcable isrecommendedforanalogueTV Youcannotviewhighdeinitionvideowiththecompositevideoconnector 4 Connecting to Antenna Cable lwUsing Single DISH Connect the Satellite Antenna cable to LNB IN ...

Page 15: ...XDSR385HD 17 lwUsing DiSEqC switch Connect the cable of DiSEqC switch to LNB IN lwUsing DiSEqC motor Connect the cable of DiSEqC motor to LNB IN ...

Page 16: ...R Rec Jack on the rear panel w w PLACEMENT The IR receiver should be located so that it is not directly facing a light source such as lamps or displays When mounted near a display it should be lush to the display and away from light relections that may occur w w Install the mount bracket on back panel of TV using the screws provided ...

Page 17: ... in the small screen on the top right To watch that service press the OK button once more To watch the previous service press the EXIT button In the Service List window you can also select additional functions with the COLOR buttons Press the RED button and you can sort the services by the Alphabet Transponder TP Group Tuner and CAS Conditional Access System Press the GREEN button and you can add ...

Page 18: ... service name scrambled types of service teletext subtitle Audio indication for Dolby Digital Time duration of the service and so on By pressing INFO button once again you can get more detailed information about the service 3 Multi Picture Display Press the BLUE button to display multiple pictures and use the RED button to select the display options for 9 or 12 multiple pictures 4 Electronic Progr...

Page 19: ...to see previous next guide w w Press the EPG button once to view full EPG with multi service list and press it twice to view the additional EPG information of a speciic chan nel service Keep pressing the EPG button to toggle between the full and detailed menus of EPG w w Press the GREEN button to view next day EPG and the RED but ton to view EPG for a previous day w w Select the program by using t...

Page 20: ...ubtitle language list NOTE Whenprogramdoesnot providesubtitleinformation SUBTITLEbuttonwillnotbeactive 9 Audio Control Press YELLOW button on live TV service to display Audio Control menu You can set Audio Track Sound Mode Sound Level w w AudioTrack You can see all the audio track of the service you are watching Use the ARROW buttons to choose the preferred audio track If you select Auto audio tra...

Page 21: ...11 PIP Picture in Picture When you press the PIP button a sub picture screen will appear on the main screen view If you press the PIP button one more time the primary picture and the sub picture will appear together side by side with the same size The picture of the left side is the primary and the w w If you press the PIP SERVICE LIST button you can see the list of services of sub picture You can...

Page 22: ... service program Go to Main Menu System Tools Timer Settings Press the GREEN button to acti vate the new timer edit screen In the Timer Edit screen you may choose start date time duration service mode type Recording Play then simply press the Yes button to sched ule your recording event Please note that the minimum ofset time of 3 minutes is required from the Start time current time for appropriat...

Page 23: ... 1 2 Recording Edit Press REC button while recording to see the recording message window w w Pause Select Pause Recording then press OK to pause the current recording process w w Duration Set recording duration Press LEFT RIGHT ARROW button to change recording duration w w Stop Position Set the inishing time of recording Endofcurrentevent inish recording at the end of current event Endofnextevent ...

Page 24: ...n to move forward backward freely within recorded time w w If you press YELLOW button in the Play bar you can set the Position Jump time at Auto 10sec 30sec 1min 2min 4min 10min Then press LEFT RIGHT Arrow button to jump as you set the time w w If you press the STOP button it will go to LIVE and you may press PREV FILE button to view the recorded ile from the beginning w w STB can record up to 3 d...

Page 25: ...me at Auto 10sec 30sec 1min 2min 4min 10min Then press LEFT RIGHT Arrow button to jump as you set the time w w If you press the STOP button while time shifting the screen will be turned to a live TV channel You can also use PREV FILE button to move to a start location of the Time shifted ile w w If pressing the PAUSE button during Time shift the live video is paused but the temporary recording for...

Page 26: ...o to Recorded Files menu w w Locate the recorded ile s you wish to play with the UP DOWN button and press the OK button to playback the recorded ile s w w To choose a particular selection of iles select a desired ile and press the RED button Press the OK button to begin the selected iles w w Select Device Press PLAYLIST button one more time in the Playlist mode to see Select Device window and sele...

Page 27: ... Files you can go to Imported File menu w w Locate the ile s you wish to play with the UP DOWN button and press the OK button to enjoy the movie w w To choose a particular selection of iles select a desired ile and press the RED button Press the OK button to begin the selected iles w w You can use the same Select Device Sorting and File Option features as in the Recorded Files 3 4 Photo w w If you...

Page 28: ...button then press the RED button to delete the current bookmarks 5 Trick mode w w The user can change the speed of a fast forward play with FF Fast Forward button Press FF button to change the speed to x2 x4 x6 and x8 If you once again press FF button in its x8 mode it returns to normal x1 speed play w w You can also change rewind speed with the REWIND button Press REWIND button to change the spee...

Page 29: ... Installation 1 Dish Setting 2 Positioner Setting 3 Service Search 4 Network Setting 5 System Recovery 6 System Information Coniguration 1 Recording Option 2 Parental Control 3 Display Setting 4 Time Setting 5 Language Setting 6 A V Output Setting Utilities 1 Calculator 2 Calendar 3 CAS 4 Plugin 5 Free TV 6 Internet TV ...

Page 30: ...that you want w w CurrentDevice Select the storage device you want to access with the ARROW OK buttons w w Status You can see the information of current connected devices such as Mounted Not Available w w File System It shows the ile system of the current device You can also select desired ile system that you want when you format the device NOTE NTFSistherecommended ilesystemtoformat anditwillbe a...

Page 31: ...Off to disable w w To modify existing timer entry Choose the timer entry which you wish to modify and press the OK button w w To delete an existing timer entry Choose the timer entry that you want to delete and press the RED button w w Press YELLOW button to enter to Calendar w w Press BLUE button if you want to delete all the event s NOTE Ifyoureserveoneormore eventthroughtheEPGmenu the reservede...

Page 32: ...OW and OK buttons you may select services to be deleted by placing them in the middle window The press the GREEN button to delete the selected services w w Skip Services All services will be shown on left side of the window the middle window will only show the services that are chosen to be skipped By using the ARROW and OK buttons you may move the selected services from the left to middle window ...

Page 33: ...use BOTH of the current system parameters and service data in the future this menu will allow you to store all data to your USB device Press OK button to store all current data to an external USB storage w w Transfer Service data to USB storage If you want to transfer and use ONLY the service data in the future this menu allows you to store current service data Press the OK button to store the cur...

Page 34: ...ill move to the 10 location of the total video length If you press 99 you will move to the end of the video clip recorded w w TimeShift Device You can select the TimeShift Device you wish to use USB Network Drive w w Record Device You can select the Recording device you wish to use USB Network Drive Manual TimeShift will be activated when the Pause key is pressed w w TimeShift Duration You can adj...

Page 35: ...ices w w Info Box EventType Set the event type that display in left bottom part of the informa tion window PresentEventwithTime Display the present event name with time Default PresentandFollowEvent Display the present and following event name w w VolumeBarDisplayTime Set the time duration of the volume bar being displayed on the screen after changing audio volumes w w EPGTime scale You can set th...

Page 36: ...he STB using the NUMERIC buttons Up Mode as off or Once or Daily or Weekly WakeUpDate Select the date when the STB is turn on Press the OK button to display calendar WakeUpDays Select a day of the week when the STB is turn on WakeUpTime Enter the wake up time of the STB using the NUMERIC buttons WakeUpService Select the service when the STB is turn on Press the OK button to display the service lis...

Page 37: ...solution as HD more than 576p your TV cannot display anything when the TV is connected to the Composite Video output of the STB In case of HDMI your TV can display a picture for all of the resolution settings of the STB But it is also possible that your TV may not display a picture with 576i because some HDTV s does not support 576i Display Format In case of a 4 3 ratio TV set you can select Lette...

Page 38: ...ect the LNB frequency If the required LNB frequency is not listed then enter the frequency manually using the NUMERIC buttons 3 Installation 3 1 Dish Setting Select the satellite antenna and LNB settings for service search The values that are set in this menu will be available for selection in other service searching menus w w Satellite Select the satellite which you want to do a search for Press ...

Page 39: ...ioner commands will appear UsingUSALS DishLongitude Enter the longitude position of the antenna using the NUMERIC buttons DishLatitude Enter the latitude using the NUMERIC buttons GoTo Press the OK button to rotate the dish to the selected antenna position PositionerCommand To use various positioner commands press the OK button Then available positioner commands will appear Dish Setting Press the ...

Page 40: ...ed frequency Polarity Select the polarity All Polarity Vertical Horizontal SearchType Select the search type DishSetting Press the OK button to move to the Dish Setting menu directly Symbolrate Enter the symbol rate using the NUMERIC buttons Polarity Select the polarity Vertical Horizontal SearchType Select the search type NetworkSearch You can select Of or On When you select On you can ind more t...

Page 41: ...router Ifyouselect On You will obtain the coniguration from network and be set up automatically In this case the remaining item IP Address Subnet Mask Gateway First DNS Second DNS are automatically set and you don t have to conigure them manually Ifyouselect Of You have to input the IP address manually together with the following data IPAddress SubnetMask Gateway FirstDNS SecondDNS You can input t...

Page 42: ...ta Maintain the service data and reset the coniguration data w w Reset Service data Maintain coniguration data and reset the service data w w Wireless LAN can be supported by using the USB to Wi Fi module connected Option By pressing the BLUE button you can automatically ind and do the settings for AP For the details of Wireless Wi Fi settings please refer to the additional AP manual NOTE Thespeed...

Page 43: ... And press the OK button w w CAM Initializing To watch scrambled services you need to have a Common Interface Conditional Access Module CAM and an appropriate smart card from the provider Insert the CAM together with a valid smart card into CI slot two slots available The message of CI Initializing will appear on the screen After the message disappears you can watch the service you want w w CAM in...

Page 44: ...vice to your receiver then go to Menu System Tools Storage Manager Set the Current Device to File Mount Drive Set the Mount File Name to WebZeal 201xxxxx mnt Press Connect then go to Menu Utilities Plugin to start the WebZeal NOTE IfyouareusingWebZeal byFileMountDrive currentUSB storagedevicewillnotallowtouse PVRfunctionssuchasrecording andtime shift Butitcanbeuse whenWebZealisnotinuse WebZeal Opt...

Page 45: ...le for download into USB or HDD storage NOTE Ifmorethanonestorage devicesareconnectedwiththe STBatthesametime thenthe Downloadedileswillbesaved atthefasterandbiggerstorage deviceautomatically Backward and Forward Rewind and Fast forward button playing Note Forward and Backward seeking interval can be set for 10 20 30 60 sec at Settings menu Full Screen Press OK button to view in full screen size M...

Page 46: ...trol part Play Select the service which you wish to play and press OK button Add User can add the URL of the speciic site which they want to watch And they can add more sites continuously w Install Type You can deine the type of URL default Input URL w Title You can input the name of the media contents here w URL You can input the URL address that you would like to watch w Description You can dein...

Page 47: ... that your TV supports and set the proper resolution with the remote Resolution button to obtain a picture Poor picture quality w w See NoPicture above w w Check the signal level if this is low then tries adjusting the alignment of your dish No Sound w w See NoPicture above w w Check the volume level of the TV and STB w w Check the Mute status of the TV and STB Remote Control does not operate w w ...

Page 48: ...ength K 7 DVB S 3 5 2 3 3 4 4 5 5 6 8 9 and 9 10 DVB S2 MPEG Transport Stream A V Decoding Transport Stream Proile Level Input Rate Video Formats Video Resolution Audio Decoding Audio Mode Sampling Rate H 264 MPEG 4 part 10 MPEG 4 AVC and H26L MPEG II ISO IEC 13818 2 11172 2 MPEG 4 AVC MP L4 MPEG II MP HL Max 80Mbit s 4 3 Letter Box 4 3 PanScan 16 9 720 x 576i 720 x 576p 720 x 480i 720 x 480p 1280...

Page 49: ...nel Slot Buttons Indicators Common interface 1 Smart Card Slot Rear 3 Buttons Standby CH UP DOWN 1 LEDs Standby Power and Remote DUAL TYPE Power Supply Input Voltage Type Power Consumption Protection AC 100 240V 50 60Hz ADAPTOR 12V 2A Max 24W Separate Internal Fuse Lighting protection Physical Speciication Size W x H x D Weight Net Operating Temp Storage Temp 220mm X 35mm X 145mm 0 6 Kg 0 C 45 C 1...

Reviews: