English
25
RECORD
Recording mode includes Voice Re-
cording, Audio Recording, and Video
Recording.
• Voice recording records the voice
source using a microphone.
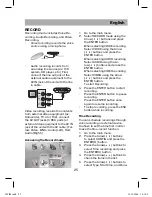
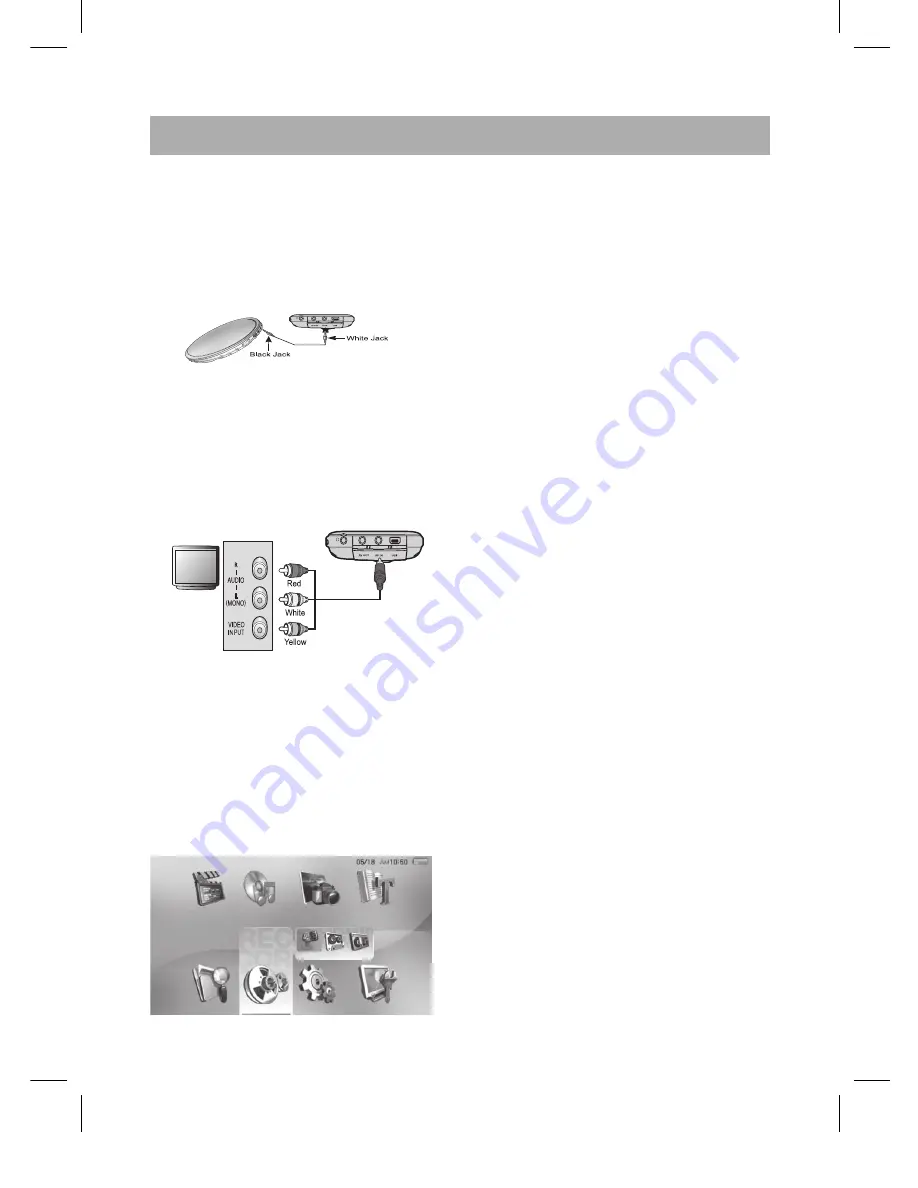
• Audio recording records from
an analog line source (ex: HiFi
system, CD player, etc.) First,
connect the line out jack of the
external audio equipment to the
AV IN jack of the unit with the line
in cable.
TV
Video recording records the contents
from external video equipment (ex:
Camcorder, TV, etc.) First, connect
the AV OUT jacks (3 RCA ports) of
external video equipment to the AV IN
jack of the unit with the AV cable. (Yel-
low: Video, White: Audio (Left), Red:
Audio (Right))
Accessing the Record mode
RECORD
VOICE
1.
Go to the main menu.
2.
Select RECORD mode using the
Arrow (
) buttons and press
the ENTER button.
When selecting VOICE recording
Select VOICE using the Arrow
(
) buttons and press the
ENTER button.
When selecting AUDIO recording
Select AUDIO using the Ar-
row(
) buttons and press the
ENTER button.
When selecting VIDEO recording
Select VIDEO using the Arrow
(
) buttons and press the
ENTER button.
To start Recording:
3.
Press the ENTER button to start
recording.
•
Press the ENTER button to pause
recording.
•
Press the ENTER button once
again to resume recording.
•
To stop recording, press the ESC
button while recording.
Time Recording
You can schedule recordings through
voice recording or external device.
You have to set the time first in order
to use the time-record function.
1. Go to the main menu.
2. Press the Arrow(
) buttons
to select CONFIG and press the
ENTER(O) button.
3.
Press the Arrow(
) buttons to
select Time recording and press
the ENTER©) button.
4.
Press the Arrow(
) buttons to
check the items in the list.
5.
Press the Arrow(
) buttons to
select Type, Start time, and Dura-
505IM.indd 25
505IM.indd 25
19.12.2006 14:12:21
19.12.2006 14:12:2

