Set It Up
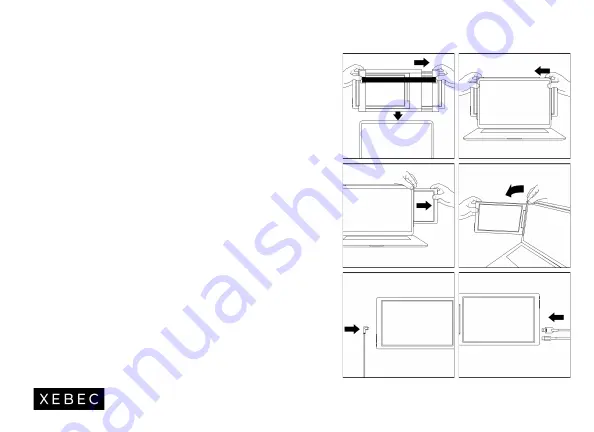
1. PUT IT ON
Place your thumbs on either side of the bracket (as
shown) and expand to the width of your laptop's screen.
Place the bracket over the back of the screen and slowly
release, allowing the bracket to hug the edges and sit on
top of the laptop screen.
2.
SLIDE IT OUT
Holding the top corner of the bracket pull out the screen
from the bracket. Repeat on the other side, then tilt the
screens to your desired viewing angle.
3.
PLUG IT IN
Using the necessary cables (identified on the previous
page), plug one end into the Tri-Screen and the other
into your laptop. See "Inputs and Buttons" on page 3 for
an input diagram.
6


