Xena Networks ApS
2009-11
Page
5
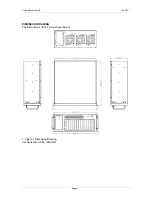
CHASSIS
MAINTENANCE
•
F
AN
R
EPLACEMENT
________________________________
Please ensure that the power of the computer is
switched off before fan replacement procedure.
________________________________
There are three 8 cm cooling fans inside the C4-12
chassis. To replace a fan, please follow the instructions
below:
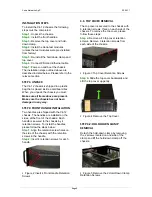
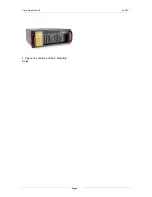
Step 1:
Loosen 2 thumbscrews for the fan that must be
replaced.
Figure 10 Locations of the Fan Bracket
Thumbscrews
Step 2:
Unplug the power cable that is connected to the
fan.
Figure 11 Unplug the Fan Power Cable
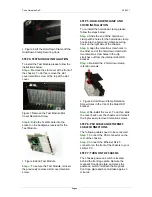
Step 3:
Remove the fan by removing the four fan
retention screws.
Figure 12 Remove the Fan Retention
Screws
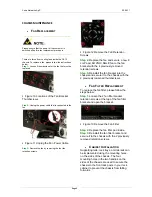
Step 4:
Replace the fan and secure a new 8
cm Papst 8412NH / NGLE fan to the fan
bracket with the 4 previously removed
retention screws.
Step 5:
Reinstall the fan bracket into the
chassis and secure it to the chassis with the
2 previously loosened thumbscrews.
•
F
AN
F
ILTER
R
EPLACEMENT
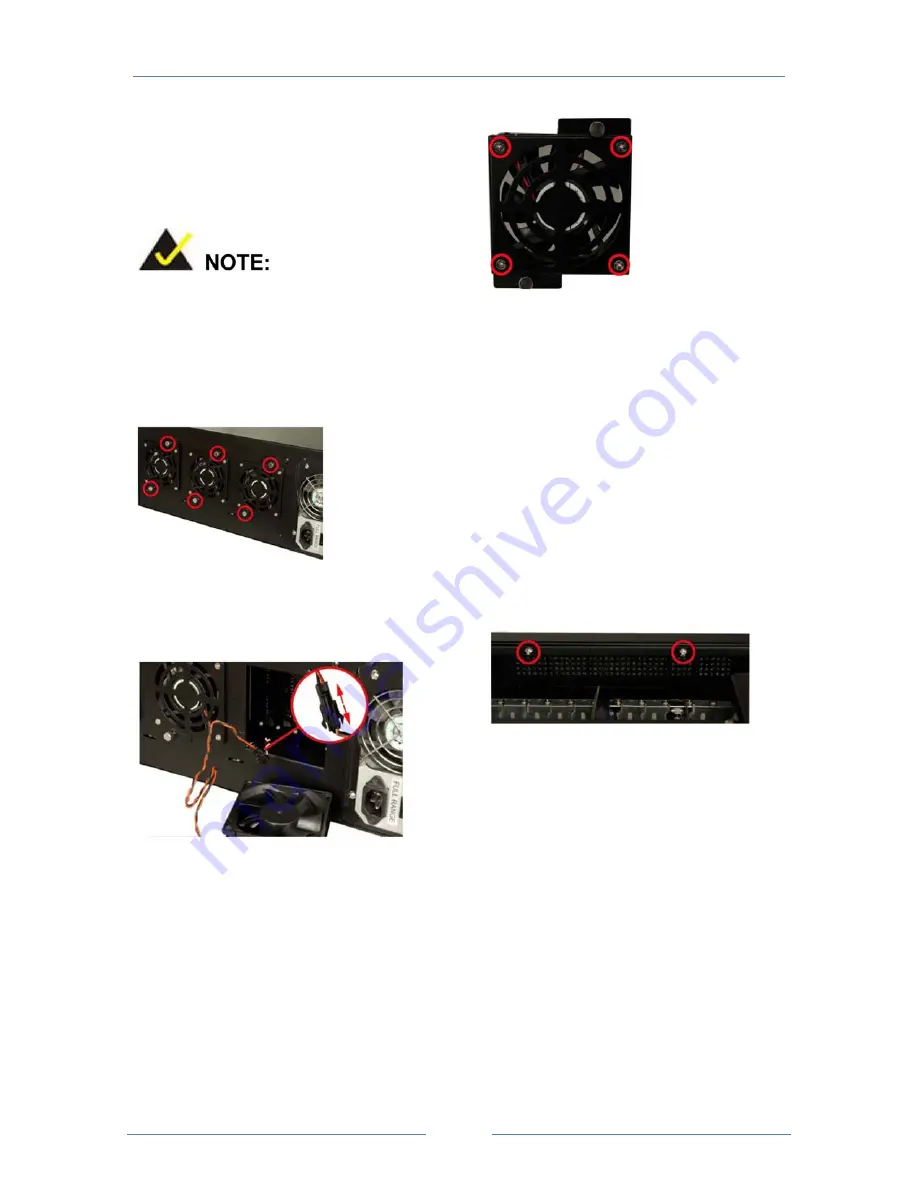
To replace the fan filter, please follow the
steps below:
Step 1:
Loosen the 2 fan filter bracket
retention screws at the top of the fan filter
bracket and open the bracket.
Figure 13 Remove the Fan Filter
Step 2:
Replace the fan filter pad inside.
Step 3:
Reinstall the fan filter bracket and
secure it to the chassis with the 2 previously
removed retention screws.
•
C
ABINET
I
NSTALLATION
Supporting rails, rack trays, or slide rails can
be implemented using the mounting holes
on the sides of the chassis. The four
mounting holes in the two handles on the
sides of the chassis are used to secure the
chassis to the front rack posts in your rack
cabinet to prevent the chassis from falling
forwards.