background image

2

XENYX 1202FX/1002FX

Important Safety 

Instructions

LEGAL DISCLAIMER

LIMITED WARRANTY

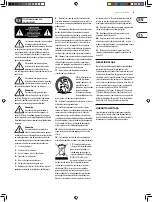
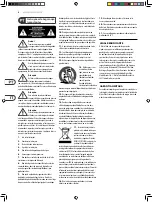
Terminals marked with this symbol carry 

electrical current of sufficient magnitude 
to constitute risk of electric shock. 

Use only high-quality professional speaker cables with 
¼" TS or twist-locking plugs pre-installed. All other 
installation or modification should be performed only 
by qualified personnel.

This symbol, wherever it appears, 

alerts you to the presence of uninsulated 
dangerous voltage inside the 

enclosure - voltage that may be sufficient to constitute a 
risk of shock.

This symbol, wherever it appears, 

alerts you to important operating and 
maintenance instructions in the 

accompanying literature. Please read the manual.

Caution

To reduce the risk of electric shock, do not 
remove the top cover (or the rear section). 

No user serviceable parts inside. Refer servicing to 
qualified personnel.

Caution

To reduce the risk of fire or electric shock, 
do not expose this appliance to rain and 

moisture. The apparatus shall not be exposed to dripping 
or splashing liquids and no objects filled with liquids, 
such as vases, shall be placed on the apparatus.

Caution

These service instructions are for use 
by qualified service personnel only. 

To reduce the risk of electric shock do not perform any 
servicing other than that contained in the operation 
instructions. Repairs have to be performed by qualified 
service personnel.

1. 

Read these instructions.

2. 

Keep these instructions.

3. 

Heed all warnings.

4. 

Follow all instructions.

5. 

Do not use this apparatus near water.

6. 

Clean only with dry cloth.

7. 

Do not block any ventilation openings. Install in 

accordance with the manufacturer’s instructions.

8. 

Do not install near any heat sources such as 

radiators, heat registers, stoves, or other apparatus 
(including amplifiers) that produce heat.

9. 

Do not defeat the safety purpose of the polarized 

or grounding-type plug. A polarized plug has two blades 
with one wider than the other. A grounding-type plug 
has two blades and a third grounding prong. The wide 
blade or the third prong are provided for your safety. If the 
provided plug does not fit into your outlet, consult an 
electrician for replacement of the obsolete outlet.

10.  

Protect the power cord from being walked on or 

pinched particularly at plugs, convenience receptacles, 
and the point where they exit from the apparatus.

11.  

Use only attachments/accessories specified by 

the manufacturer.

12.  

Use only with the 

cart, stand, tripod, bracket, 
or table specified by the 
manufacturer, or sold with 
the apparatus. When a cart 
is used, use caution when 
moving the cart/apparatus 
combination to avoid 

injury from tip-over.

13.  

Unplug this apparatus during lightning storms or 

when unused for long periods of time. 

14.  

Refer all servicing to qualified service personnel. 

Servicing is required when the apparatus has been 
damaged in any way, such as power supply cord or plug 
is damaged, liquid has been spilled or objects have fallen 
into the apparatus, the apparatus has been exposed 
to rain or moisture, does not operate normally, or has 
been dropped.

15.  

The apparatus shall be connected to a MAINS socket 

outlet with a protective earthing connection.

16.  

Where the MAINS plug or an appliance coupler is 

used as the disconnect device, the disconnect device shall 
remain readily operable.

17.  

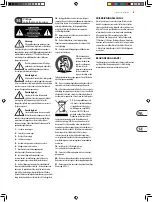
Correct disposal of this 

product: This symbol indicates 
that this product must not be 
disposed of with household 
waste, according to the WEEE 
Directive (2012/19/EU) and 
your national law. This product 

should be taken to a collection center licensed for the 
recycling of waste electrical and electronic equipment 
(EEE). The mishandling of this type of waste could have 
a possible negative impact on the environment and 
human health due to potentially hazardous substances 
that are generally associated with EEE. At the same time, 
your cooperation in the correct disposal of this product 
will contribute to the efficient use of natural resources. 
For more information about where you can take your 
waste equipment for recycling, please contact your local 
city office, or your household waste collection service.

18.  

Do not install in a confined space, such as a book 

case or similar unit.

19.  

Do not place naked flame sources, such as lighted 

candles, on the apparatus.

20.  

Please keep the environmental aspects of battery 

disposal in mind. Batteries must be disposed-of at a 
battery collection point.

21.  

This apparatus may be used in tropical and moderate

climates up to 45°C.

Music Tribe accepts no liability for any loss which may 
be suffered by any person who relies either wholly or in 
part upon any description, photograph, or statement 
contained herein. Technical specifications, appearances 
and other information are subject to change without 
notice. All trademarks are the property of their 
respective owners. Midas, Klark Teknik, Lab Gruppen, 
Lake, Tannoy, Turbosound, TC Electronic, TC Helicon, 
Behringer, Bugera, Oberheim, Auratone and Coolaudio 
are trademarks or registered trademarks of Music 
Tribe Global Brands Ltd. © Music Tribe Global Brands 
Ltd. 2021 All rights reserved.

For the applicable warranty terms and conditions 
and additional information regarding Music Tribe’s 
Limited Warranty, please see complete details online at 
musictribe.com/warranty. 

Summary of Contents for 1202FX

Page 1: ...Quick Start Guide XENYX 1202FX 1002FX Premium 12 10 Input 2 Bus Mixer with XENYX Mic Preamps British EQs and Multi FX Processor V 6 0 A54 00002 82561...

Page 2: ...enacart isused usecautionwhen movingthecart apparatus combinationtoavoid injuryfromtip over 13 Unplugthisapparatusduringlightningstormsor whenunusedforlongperiodsoftime 14 Referallservicingtoqualified...

Page 3: ...adosporel fabricanteosuministrados juntoconelequipo Altransportarelequipo tengacuidadoparaevitar da osyca dasaltropezarconalg nobst culo 13 Desenchufeelequipodurantetormentasosinovaa utilizarlodurante...

Page 4: ...ts desdiables despr sentoirs despieds etdessurfacesde travailrecommand s parlefabricantou livr savecleproduit D placezpr cautionneusementtoutchariotoudiable charg pour viterd ventuellesblessuresencasd...

Page 5: ...ile dielautHerstellergeeignetsind 14 Verwenden SienurWagen Standvorrichtungen Stative HalteroderTische dievomHerstellerbenannt oderimLieferumfang desGer tsenthalten sind FallsSieeinen Wagenbenutzen se...

Page 6: ...specificados pelofabricante 14 Utilizeapenascom ocarrinho estrutura trip suporte oumesa especificadospelo fabricanteouvendidos comodispositivo Quandoutilizarum carrinho tenhacuidadoao moveroconjuntoca...

Page 7: ...osi spostalacombinazione carrello apparecchioperevitarelesionidovuteal ribaltamento 13 Scollegarequestoapparecchioduranteitemporalio senon utilizzatoperlunghiperiodiditempo 14 Pertutteleriparazioniriv...

Page 8: ...nc q onderdelen 14 Gebruikhetapparaat uitsluitendincombinatie metdewagen hetstatief dedriepoot debeugelof tafeldiedoordeproducent isaangegeven ofdie incombinatiemethet apparaatwordtverkocht Bijgebruik...

Page 9: ...naalltid varatillg nglig 13 Anv ndendasttillkopplingarochtillbeh rsom angettsavtillverkaren 14 Anv ndendast medvagn stativ trefot h llareellerbordsom angettsavtillverkaren ellersoms ltstill sammansmed...

Page 10: ...leceniamiproducenta 14 U ywa jedyniezalecanych przezproducenta lubznajduj cych si wzestawie w zk w stojak w statyw w uchwyt w isto w Wprzypadku pos ugiwaniasi w zkiemnale yzachowa szczeg ln ostro no w...

Page 11: ...Quick Start Guide 11...

Page 12: ...n FR Etape 1 Connexions DE Schritt 1 Verkabelung PT Passo 1 Conex es IT Passo 1 Allacciare NL Stap 1 Hook Up SE Steg 1 Anslutning PL Krok 1 Pod czeni L R XM8500 B215D Active Speakers Bass Guitar DI10...

Page 13: ...Quick Start Guide 13 UCA222 V AMP3 XM8500 C 1 B212D HPS3000 Keyboard B2031A...

Page 14: ...14 XENYX 1202FX 1002FX XENYX 1202FX 1002FX Controls 1 2 3 5 6 7 8 9 12 11 13 16 17 21 20 14 23 24 25 4 22 26 27 18 19 10 15...

Page 15: ...Quick Start Guide 15 1 2 3 5 6 7 8 9 11 12 22 13 16 4 17 21 20 23 24 27 26 18 19 25 10 15 14...

Page 16: ...ithin the stereo image This control features a constant power characteristic which means the signal is always maintained at a constant level irrespective of position in the stereo panorama 8 LEVEL The...

Page 17: ...not require any processing 21 CD TAPE TO CTRL ROOM Press the CD TAPE TO CTRL ROOM PHONES switch if you want to monitor the 2 track input via the CTRL ROOM OUT This provides an easy way to monitor sig...

Page 18: ...ectamente al procesador de efectos interno Para que ste reciba una se al el control del env o auxiliar no debe estar completamente cerrado 7 PAN Con el regulador PAN se determina la posici n de la se...

Page 19: ...ional para la introducci n de cintas instrumentos MIDI u otras fuentes de se al que no requieran m s adaptaciones 21 CINTA A SALA DE CONTROL Presione el conmutador cinta a sala de control TAPE TO CTRL...

Page 20: ...t dans le multi effet int gr Pour que ce dernier re oive effectivement un signal la commande FX Send ne doit pas tre en but gauche 7 PAN Panorama On ajuste la position du signal de chaque canal dans l...

Page 21: ...CD TAPE TO CTRL ROOM Magn to vers R gie Pour couter le signal magn to au casque ou sur les moniteurs enfoncez la touche CD TAPE TO CTRL ROOM PHONES L entr e magn to est alors rout e vers les sorties m...

Page 22: ...ebenfalls der direkteWegzumeingebautenEffektprozessor Damit der Effektprozessor ein Eingangssignal erh lt darf dieser Regler also nicht vollst ndig auf Linksanschlag gedreht sein 7 PAN Mit dem PAN Reg...

Page 23: ...t wird der Zweispureingang auf den Main Mix geschaltet und dient somit als zus tzlicher Eingang f r Bandeinspielungen MIDI Instrumente oder sonstige Signalquellen die keiner weiteren Bearbeitung bed r...

Page 24: ...itos integrado Para que o processador de efeitos receba um sinal de entrada este regulador n o deve estar completamente regulado para o limitador esquerdo 7 PAN Com o regulador PAN definida a posi o d...

Page 25: ...rruptor CD TAPE TO MIX estiver premido a entrada de duas pistas comutada para a mistura principal servindo assim de entrada adicional para inser es de faixas instrumentos MIDI ou outras fontes de sina...

Page 26: ...l canale all interno del fronte stereo Questo controllo ha una caratteristica di potenza costante ci significa che il segnale sempre mantenuto ad un livello costante indipendentemente dalla posizione...

Page 27: ...sorgenti di segnale che non richiedono alcuna elaborazione 21 CD TAPE TO CTRL ROOM Premere l interruttore CD TAPE TO CTRL ROOM PHONES se desiderate monitorare l ingresso 2 track tramite CTRL ROOM OUT...

Page 28: ...eker van te zijn dat de effectprocessor een ingangssignaal ontvangt mag u deze regelaar niet helemaal naar links draaien 7 PAN De PAN regelaar bepaalt de positie van het kanaalsignaal binnen het stere...

Page 29: ...0 CD TAPE OM TE MENGEN Als de TAPE TO MIX schakelaar wordt ingedrukt wordt de 2 track ingang toegewezen aan de hoofdmix waardoor er een extra ingang is voor bandmachines MIDI instrumenten of andere si...

Page 30: ...lls p en konstant niv oavsett position i stereopanorama 8 NIV LEVEL kontrollen best mmer niv n p kanalsignalen i huvudmixen 9 KL MMA CLIP lysdioderna f r monokanalerna t nds n r insignalen drivs f r...

Page 31: ...enkelt s tt att vervaka signaler som kommer tillbaka fr n bandet f r att s kerst lla att de spelar in korrekt 22 FX TILL CTRL RUM Om du bara vill vervaka FX s ndningssignalen i dina h rlurar eller mon...

Page 32: ...o 15 dB W 1002FX 1202FX wysy ka FX jest kierowana bezpo rednio do wbudowanego procesora efekt w Aby mie pewno e procesor efekt w odbiera sygna wej ciowy nie nale y obraca tego pokr t a do ko ca w lewo...

Page 33: ...TO MIX jest wci ni ty 2 cie kowe wej cie jest przypisane do g wnego miksu zapewniaj c dodatkowe wej cie dla maszyn ta mowych instrument w MIDI lub innych r de sygna u kt re nie wymagaj przetwarzania...

Page 34: ...steuerung Zum Einpegeln sollten Sie den LEVEL Regler der Eingangskan le in Mittelstellung 0 dB bringen und mit dem GAIN Regler die Eingangsverst rkung auf 0 dB anheben Bei der Aufnahme mit Digitalreko...

Page 35: ...du spelar in p digitala inspelare b r inspelarens toppm tare inte verbelastas Medan analoga inspelare kan verbelastas i viss utstr ckning vilket bara skapar en viss distorsion vilket r vanligt och oft...

Page 36: ...tecture Number of voices 6 analog OSC 2 per voice LFO 2 per voice VCF 2 pole 4 pole HPF Common to all voices 6 dB per octave Envelopes VCA VCF MOD Mod Matrix 25 sources 133 destinations Digital Efects...

Page 37: ...siblesuniquementpardes mod lesexactementdem metailleetdem mevaleur lectrique sansaucuneexception 1 Online registrieren BitteregistrierenSie IhrneuesMusicTribe Ger tdirektnachdemKaufaufder Websitemusic...

Page 38: ...ljare intefinnsidinn rhetkandukontaktaMusicTribe AuthorizedFulfillerf rdittlandlistatunder Support p musictribe com Omdittlandinte rlistat kontrolleraom dittproblemkanhanterasavv r Onlinesupport som...

Page 39: ...ference by one or more of the following measures Reorient or relocate the receiving antenna Increase the separation between the equipment and receiver Connect the equipment into an outlet on a circuit...

Page 40: ...We Hear You...

Reviews: