


Xerox Document Centre Reference Guide
Page 13 - 3
1
3. Pa
per &
Sto
ck
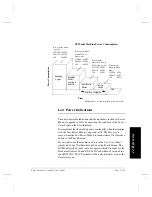
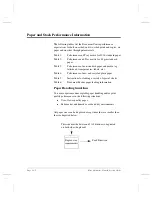
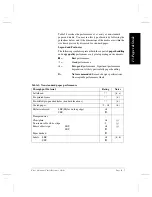
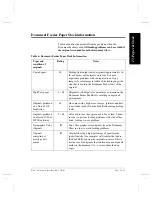
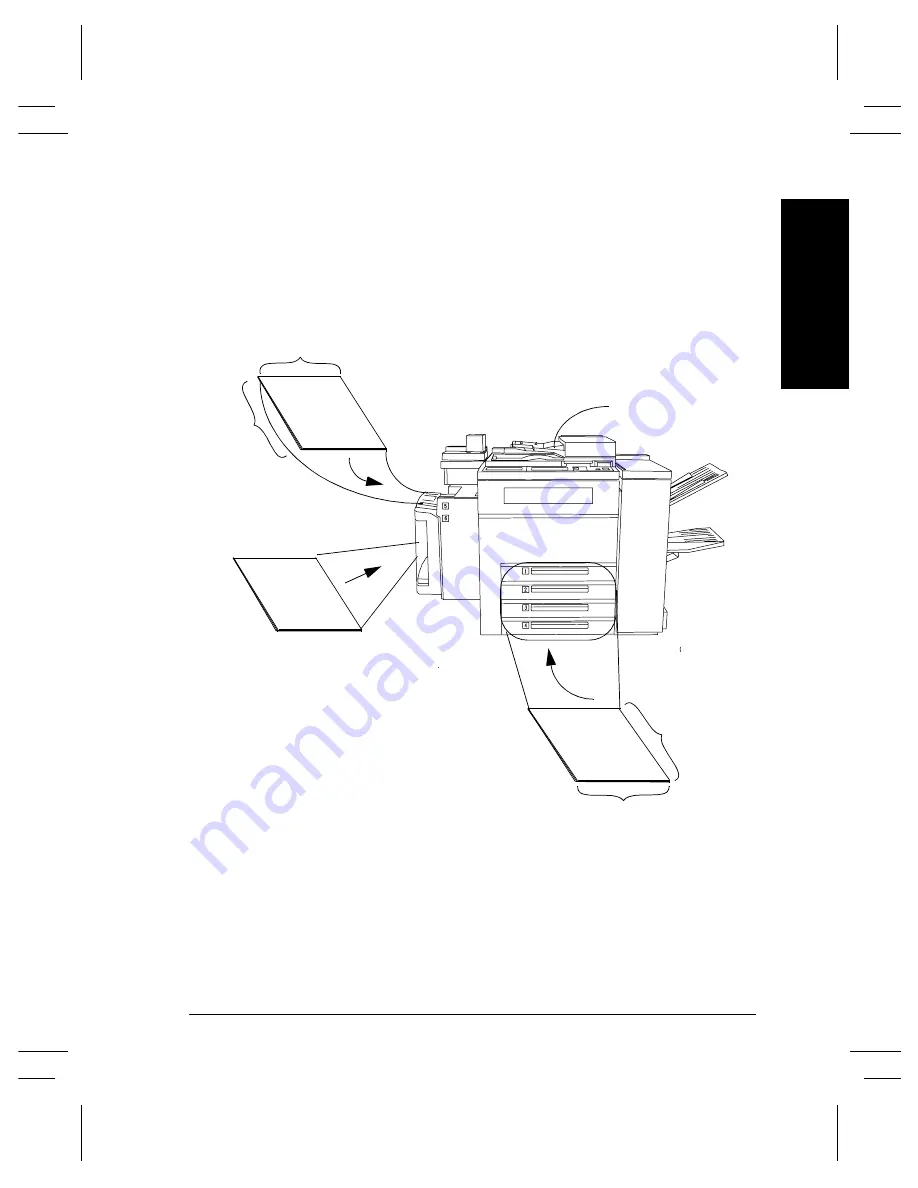
Paper Tray Media Capability
The illustration below outlines the capabilities of the individual
paper trays and their ability to process a variety of paper sizes.
Trays 1-4
8 to 17 in. or 203 to 432 mm
Tray 5
Bypass
Tray
4 t
o
12
i
n
.
o
r
1
02
to
30
5 mm
5.83 to 18 in. or
148 to 457 mm
Tray 6
Only
8.5 x 11 inch or A4
LEF
5
.25
to 1
2
in.
or
1
33
to
30
5 mm
Call the Welcome Center to set Trays
1, 2, 3, or 4 to process 12 x 18 inch
stock permanently.
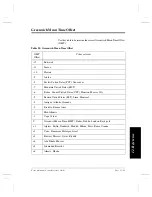
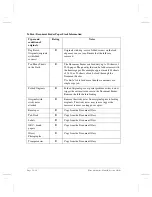
Document Feeder
Refer to Table 6 for more information
Summary of Contents for 255 DC
Page 2: ......
Page 20: ...x Xerox Document Centre Reference Guide ...
Page 84: ...Page 4 36 Xerox Document Centre Reference Guide Notes ...
Page 100: ...Page 5 16 Xerox Document Centre Reference Guide Notes ...
Page 112: ...Page 6 12 Xerox Document Centre Reference Guide ...
Page 182: ...Page 9 56 Xerox Document Centre Reference Guide Notes ...
Page 213: ...Xerox Document Centre Reference Guide Page 10 31 10 Tracking Usage System Tools Notes ...
Page 214: ...Page 10 32 Xerox Document Centre Reference Guide ...
Page 225: ...Xerox Document Centre Reference Guide Page 11 11 11 Sixth Sense System Tools Notes ...
Page 226: ...Page 11 12 Xerox Document Centre Reference Guide ...
Page 260: ...Page 12 34 Xerox Document Centre Reference Guide ...
Page 276: ...Page 13 16 Xerox Document Centre Reference Guide Notes ...
Page 288: ...Page 14 12 Xerox Document Centre Reference Guide Notes ...
Page 304: ...Page 15 16 Xerox Document Centre Reference Guide ...
Page 310: ...Page 16 6 Xerox Document Centre Reference Guide ...
Page 321: ......


