SETTING THE SYSTEM CONFIGURATION
4-26
XEROX DOCUPRINT 4850/4890 IPS GUIDE TO CONFIGURING AND MANAGING THE SYSTEM
Printing a trace file
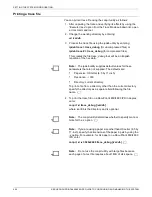
You can print a trace file using the conprt utility as follows:
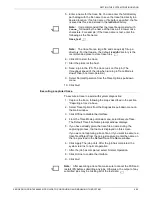
1. After capturing the trace and verifying its effects by using the
“Execute trace” option from the Trace Mode pull-down list, open
a Unix command tool.
2. Change the working directory by entering:
cd /var/db
3. Process the trace file using the ipdeb utility by entering:
ipdeb trace > trace_debug (for uncompressed files) or
ipdeb trace.Z > trace_debug (for compressed files)
This creates the file trace_debug that will be an English
rendition of the hex data.
Note:
The ipdeb utility supplies default values for those
parameters that are not supplied. The defaults are:
•
Paper size: USLetter (8.5 by 11-inch)
•
Resolution: -r 300
•
Directory: current directory.
To print a file from a directory other than the current directory,
specify the directory as a separate field following the file
name.
4. To print the trace file on a DocuPrint 4850/4890 IPS in duplex,
enter:
conprt -d trace_debug [/var/db]
where /var/db is the directory, and is optional.
Note:
The conprt utility determines whether to specify mono or
hilite for the -c option.
Note:
If you are using a paper size other than USLetter (8.5 by
11-inch), specify the dimensions of the paper in pels by using the
-x option. For example, for A4 paper on a DocuPrint 4850/4890
IPS enter:
conprt -d -x 3520x2480 trace_debug [/var/db]
Note:
Do not use the conprt utility with large files because
each page of a text file requires about 1 MB of disk space.

