October 2012
6-53
ColorQube 8570/8870 Service Manual
Network Problems
General Troubleshooting
Xerox Internal Use Only - Revised, 3rd Revision
Network Problems
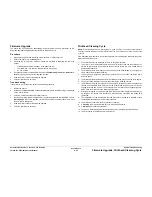
Perform Network Diagnostics to run a test on the TCP/IP connection (Ethernet Port).
1.
From the Control Panel menu, select Troubleshooting -> Network Problems -> Net-
work Diagnostics.
2.
A “Running network diagnostics - please wait” message is displayed.
3.
If no errors are detected, the message Network diagnostics completed, No problem
detected is displayed, along with options for Help or printing either the Connection Setup
or Configuration page.
NOTE: The Connection Setup and Configuration pages list current network parameters
stored in the printer’s NVRAM.
If Network Diagnostics detects an error, the fault message displays with menu options to
assist in correcting the error.
4.
For help, press Help (?) to access the text listing steps to help diagnose and clear the
error.
In situations where Network Diagnostics completes without an error, but printing continues to
fail, test the printer’s Ethernet Port directly using a cross-over cable and a second, known
good, Ethernet Port. A successful test using this procedure eliminates the printer’s networking
hardware as the root cause.
NOTE: The Ethernet Port verification procedures were developed for Windows XP or Mac OS
X. If a different operating system is in use, adapt the steps as necessary.
Windows Ethernet Port Verification
1.
Connect a crossover cable between the printer and computer’s Ethernet Ports.
2.
Verify that the printer is Ready.
3.
From the computer menu, click Start -> Run at the computer to access the Run dialog.
4.
In the Run
5.
Type in cmd and click OK to launch the MS-DOS command window.
6.
At the MS_DOS command prompt, type ipconfig and press Enter to display the com-
puter’s IP Address, Subnet Mask, and Default Gateway.
7.
Print the Configuration page to verify that TCP/IP is enabled and obtain the current TCP/
IP values stored in the printer’s NVRAM.
NOTE: Configure the printer’s TCP/IP network parameters to enable direct communica-
tion with the computer.
8.
Disable DHCP/BOOTP and AutoIP on the printer.
9.
Select an IP address for the printer that matches the computer, except for the last field,
which must be unique.
10. Edit the printer’s Gateway and Subnet Mask to match the computer.
11.
At the MS_DOS command prompt, type ping followed by a space and the printer’s IP
address, and then press Enter. If the number of packets sent and received match, the
Ethernet Port is functional. If the request times out and fails to reply, either the cable or
the port is defective.
Ethernet Port Verification for LOCAL LINK Default IP Addresses
An alternate method is required to test the Ethernet port when the PC’s IP address falls within
the range 169.254.xxx.xxx. PCs that have not been configured for a specific network default to
a “LOCAL LINK” value within the 169.254.xxx.xxx range.
NOTE: To comply with industry standards, ColorQube products cannot be manually configured
for IP addresses within the LOCAL LINK range.
NOTE: Always print the Configuration page to obtain a record of the printer settings before
changing the IP address. After testing the printer, be sure to restore the printer’s original net-
work settings.
1.
Connect a crossover cable between the PC and printer.
2.
Verify the printer is Ready.
3.
Use the printer’s control panel to enable AutoIP:
a.
From the Control Panel menu, select Printer Setup -> Connection Setup -> Net-
work Setup -> TCP/IPv4.
b.
Select and set AutoIP to on.
c.
Exit the menu so the printer is Ready.
4.
Reset the printer to cause AutoIP to assign a new IP address (cycle power or from the
Shut Down menu, select Restart Printer).
5.
After the printer’s IP address is set, test communication by sending the “PING” command.
6.
If the test fails, install a different cable and retest.
Mac OS X Ethernet Port Verification
1.
Turn the printer on and wait until it is Ready.
2.
To check the computer’s TCP/IP settings, use the Apple menu to select System Prefer-
ences.
3.
Select Network.
4.
Select Show Built-in Ethernet.
5.
Click the TCP/IP tab and record the computer’s IP Address, Subnet Mask, and Gateway.
6.
Print the Configuration page and verify that TCP/IP is enabled on the printer.
7.
Select an IP address for the printer that matches the computer, except for the last field,
which must be unique.
8.
Edit the printer’s Gateway and Subnet Mask to exactly match the computer’s.
9.
Connect a crossover cable between the Ethernet Ports on the printer and the Mac.
10. Test the application using Network Utility by double-clicking the hard drive icon.
11.
Select Applications -> Utilities -> Network Utility.
12. Click the PING tab.
13. Enter the printer’s IP address.
14. Configure the utility to ping the printer four times. The test will end after four attempts.
15. Click the PING button to complete the test.
16. If the number of packets sent and received match, the test was successful and the Ether-
net port is functioning. If the request times out and fails, the cable or the port are malfunc-
tioning.
Summary of Contents for COLORQUBE 8570
Page 1: ...ColorQube 8570 8870 Printer ColorQube 8570 8870 Service Manual Xerox Internal Use Only...
Page 2: ......
Page 423: ......


