October 2012
6-54
ColorQube 8570/8870 Service Manual
Network Problems, USB Port Testing
Revised, 3rd Revision - Xerox Internal Use Only
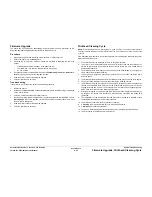
General Troubleshooting
Network Logging
The printer maintains 4 logs in memory detailing network functions. The logs contain TCP/IP
and AppleTalk initialization events. The logs can also be accessed remotely via CentreWare.
The logs list events chronologically. The log is limited in length; when the log is full, the printer
stops recording data to the log. The logs are stored on the Hard Drive so only new data is
stored each time the printer’s power is cycled.
There is a Connection Setup page, Configuration page, and a network available for trouble-
shooting network problems.
To print an Event Log or Runtime Log:
1.
Place the printer in Customer Mode.
2.
From the Control Panel menu, select Troubleshooting -> Network Problems -> Net-
work Log Pages.
3.
Select the appropriate log from the list and press Enter to print the log.
•
TCP/IP Start Log
•
TCP/IP Runtime Log
•
AppleTalk Start Log
•
AppleTalk Runtime Log
NOTE: To print the Connection Setup or Configuration page, from the main menu, select
Information -> Information Pages.
Obtaining Serial Back Channel Trace
In rare cases the printer may exit unusual behavior that is difficult to troubleshoot. In such
cases, if feasible, it can be useful to obtain a Back Channel Trace from the printer’s on-board
serial port. The Back Channel Trace, lists step-by-step what the printer is doing up to the point
that an error occurs. The trace may offer clues to help troubleshoot the problem.
NOTE: For Windows 7, down load a third party software such as Tera Term or PuTTY in place
of HyperTerminal.
Required Tools
•
Computer with a serial port or a USB to Serial DB9 adaptor
•
Serial Null Modem Cable - P/N 600T80375
•
Serial Adapter Cable - P/N 600T80374
Procedure (for Windows XP)
1.
Connect the serial cable to the computer. Serial port settings are 19.2 kbaud, 8 bits,
None Parity, 1 Stop bit, and Hardware control or Xon/ Xoff for bidirect communication.
2.
Turn Off the printer.
3.
Connect the serial cable with adapter to the 5-pin connector (J14). The label THIS SIDE
UP of the serial port adapter should face towards the back of the printer.
4.
Start up a terminal program such as in MS Window’s HyperTerminal (usually located in
Programs -> Accessories -> Communications -> HyperTerminal). Ensure the serial
port settings, usually COM1: is correct.
5.
Turn on the printer.
The trace should appear in the terminal dialog window. Examine the trace to troubleshoot the
problem. Save the trace as a file, if necessary.
USB Port Testing
In situations where USB communications fail, test the printer’s USB Port directly using a USB
cable and a second, known good, USB Port. A successful test using this procedure eliminates
the printer’s USB Port as the root cause.
Initial Actions
•
Check that the driver software is properly installed on the host.
•
Make sure the USB cable is connected at both ends and is serviceable.
•
Print a Configuration page and verify that USB 2.0 is enabled in the printer’s NVRAM.
NOTE: The testing procedure was developed for Windows XP. If a different operating sys-
tem is in use, adapt the steps as necessary.
USB Port Verification
1.
Verify that the printer is Ready.
2.
Insert the “Software and Product Documentation” CD-ROM into the computer.
3.
If the installer autoruns, exit the installer window.
4.
Connect a USB cable between the printer and computer’s USB Ports. The computer auto-
matically detects the new hardware and creates a driver.
NOTE: If the driver is not installed on the computer, locate the driver files on the CD-
ROM. Once the files are located, the computer installs the driver and automatically config-
ures it to match the printer’s feature set.
5.
On the computer, click Start -> Settings -> Printers and Faxes.
6.
Locate the printer being tested, right-click and from the pull-down menu, select Proper-
ties.
7.
Open the General tab and click the Print Test Page button to generate the test print. If
the test page is printed, the USB port is functioning normally.
Summary of Contents for COLORQUBE 8570
Page 1: ...ColorQube 8570 8870 Printer ColorQube 8570 8870 Service Manual Xerox Internal Use Only...
Page 2: ......
Page 423: ......

