October 2012
2-31
ColorQube 8570/8870 Service Manual
91,720, 91,721
Fault Messages and Codes
Xerox Internal Use Only - Revised, 3rd Revision
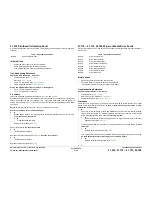
Check for an E-ring. Is there an E-ring on the end of the Head Tilt Cam Shaft
outside of the Damper Assembly?
Y
N
Remove the Damper Gear and Bracket. Install the E-ring. Lift the latch pull cam
away from the frame to seat fully. Install the Damper Assembly, Damper Gear,
and E-ring.
NOTE: Be careful not to push the Head Tilt Gear back into the printer.
Remove the Printhead Restraints (
REP 2.9
). Inspect the Printhead journals, bear-
ings surfaces, chassis base under the Head Tilt gear, and Roll Block for ink puddles
or debris. Is there visible ink outside of the Printhead that would hinder the
Head Tilt Gear or Printhead motion?
Y
N
Install the Printhead Restraints. Rehome the Process Drive (
ADJ 1.3
). Reboot
the printer. Does the Process Drive chatter before engaging the Head Tilt
Drive?
Y
N
Rehome the Process Drive (
ADJ 1.3
). Lift the latch and verify the Head Tilt
Gear has engaged the Drive Train. Turn the DM Cam Shaft. Does the
Head Tilt Drive tilt the Head?
Y
N
The Head Tilt Gear is broken. Replace the Head Tilt Gear (
REP 4.8
).
The Process Drive is worn. Replace the Process Drive (
REP 4.13
).
The Process Drive is worn. Replace the Process Drive (
REP 4.13
).
The Printhead has overflowed. Remove the Printhead (
REP 2.3
). Clean the chassis
and gear train of ink debris. Reinstall a new Printhead.
Does the Process Drive chatter before engaging the Head Tilt Drive?
Y
N
Rehome the Process Drive (
ADJ 1.3
). Lift the latch and verify the Head Tilt Gear has
engaged the Drive Train. Turn the DM Cam Shaft. Does the Head Tilt Drive tilt the
Head?
Y
N
The Head Tilt Gear is broken. Replace the Head Tilt Gear (
REP 4.8
).
The Process Drive is worn. Replace the Process Drive (
REP 4.13
).
The Process Drive is worn. Replace the Process Drive (
REP 4.13
).
The Printhead has overflowed.
Remove the Printhead (
REP 2.3
). Clean the chassis and gear train of ink debris. Reinstall a
new Printhead.
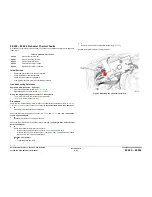
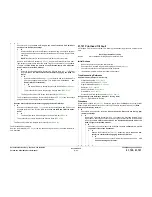
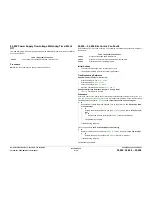
91,721 Printhead Tilt Fault
A Printhead Tilt error has occurred. The following troubleshooting procedure applies to this
error.
Initial Actions
•
Reboot the printer and verify the error persists.
•
Check that the Process Drive gear train is properly homed (
ADJ 1.3
).
•
Check for obstructions or ink spills around the Printhead.
•
If the problem persists, perform the following procedure.
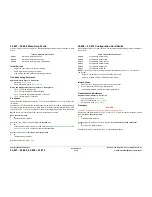
Troubleshooting Reference
Applicable Parts (Chapter 5 - Parts List)
•
Printhead Assembly,
PL 2.1 Item 3
•
Left Printhead Restraint,
PL 2.1 Item 9
•
Right Printhead Restraint,
PL 2.1 Item 10
•
Roll Block,
PL 2.1 Item 28
•
Head Tilt Solenoid,
PL 4.1 Item 4
•
X-Axis Motor,
PL 4.1 Item 11
•
Process Drive with Gear Box and Motor,
PL 4.1 Item 13
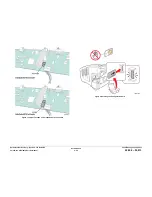
Wiring and Plug/Jack Reference (Chapter 7 - Wiring Data)
•
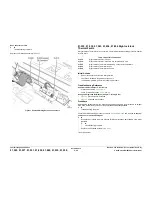
Figure 1
, Right Side Wire Routing
Procedure
Rehome the Process Drive (
ADJ 1.3
). Reboot the printer. (Use the Sleep button on the Control
Panel to cycle the Printhead into and out of Sleep 10 times to test the Printhead Tilt.) Does
the Process Drive stay in time?
Y
N
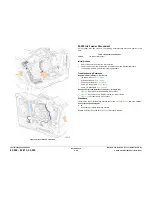
Check the wiring harnesses. Are the wires around the Process Drive Swing Arm
routed incorrectly?
Y
N
Remove the Printhead Restraints (
REP 2.9
). Inspect the Printhead journals, bear-
ings surfaces, chassis base under the Head Tilt gear, and Roll Block for ink puddles
or debris. Is there visible ink outside of the Printhead that would hinder the
Head Tilt gear or Printhead motion?
Y
N
Check the top and left sides of the Printhead. Is there collected ink on the
top and left sides of the Printhead?
Y
N
Rehome the Process Drive (
ADJ 1.3
). Reboot the printer. Does the Pro-
cess Drive chatter before engaging the Head Tilt Drive?
Y
N
Inspect the Cone-nut on the X-Axis Motor lead screw shaft. Is the
Cone-nut damaged or broken?
Table 1 Applicable Fault Code
91,721
Motor stalled while tilting Head Forward from Park
A
B
C
A
B
C
D
E
Summary of Contents for COLORQUBE 8570
Page 1: ...ColorQube 8570 8870 Printer ColorQube 8570 8870 Service Manual Xerox Internal Use Only...
Page 2: ......
Page 423: ......


