Layout Adjustment
ColorQube™ 9201/9202/9203
Copy
29
Book Copying
CAUTION:
Do Not
close the document feeder when scanning bound originals.
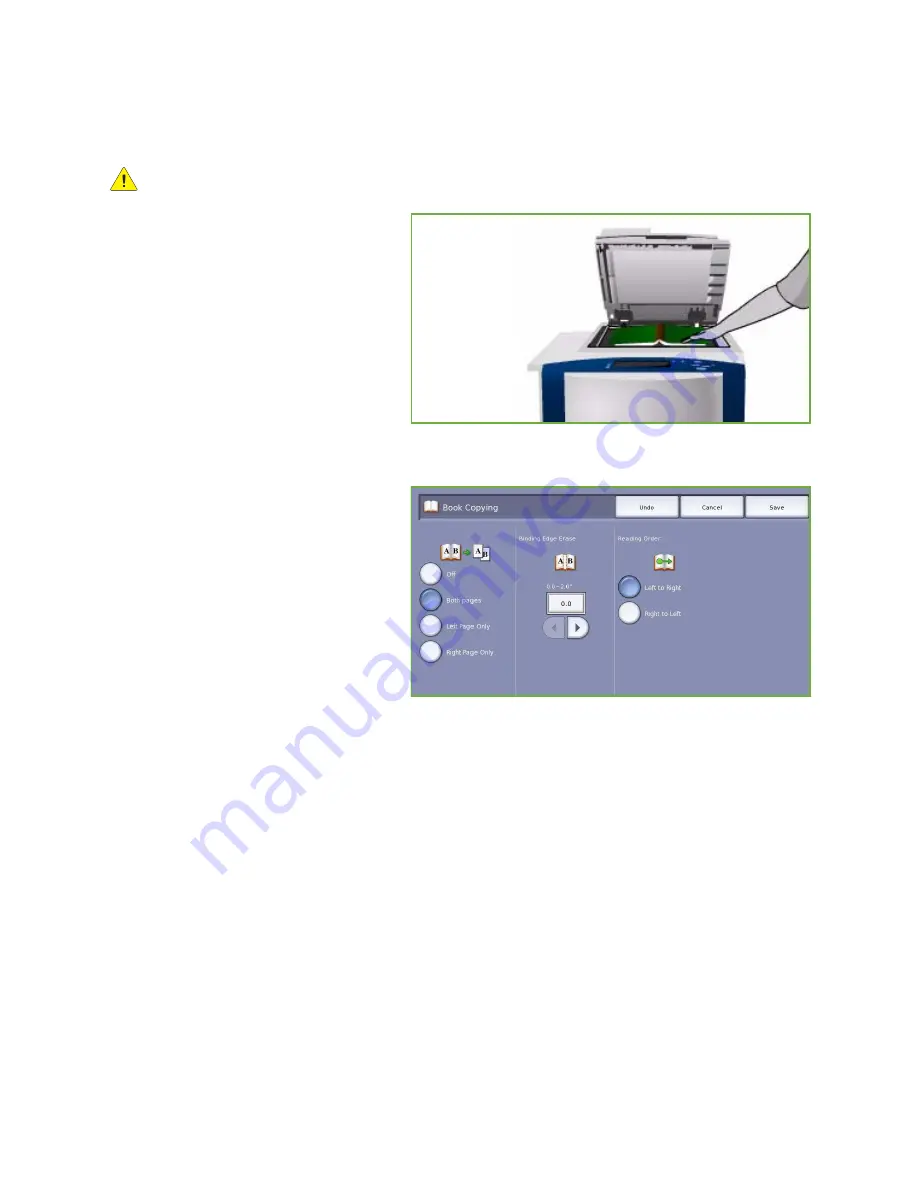
This feature enables you to specify which
page or pages of a book are to be scanned.
The book original is placed face down on
the
document glass
with the spine of the
book lined up with the marker on the rear
edge of the glass. Align the top of the
bound original against the rear edge of
the
document glass
.
The device will identify the size of the
original during scanning. If the pages have
a black or dark colored border the device
will assume that the pages are smaller than they really are. To overcome this use the
Custom Scan
Area
feature in
Original Size
to enter the exact size of the page. Refer to
Original Size
on page 28.
•
Both Pages
use to scan both pages,
the left page of the book will be
scanned first. Use the
arrow
buttons
to specify an amount from 0 to 50
mm (0 to 2”) to be deleted from the
center of the book in order to delete
unwanted marks reproduced from the
gutter of the book.
•
Left Page
use to scan the left page
only. Use the
arrow
buttons to specify
an amount from 0 to 25mm (0 to 1”)
to be deleted from the right side of
the page in order to delete unwanted marks reproduced from the gutter of the book.
•
Right Page
use to scan the right page only. Use the
arrow
buttons to specify an amount from 0 to
25mm (0 to 1”) to be deleted from the left side of the page in order to delete unwanted marks
reproduced from the gutter of the book.
•
Reading Order
use to select if the pages read from
Left to Right
or
Right to Left
.
Note:
The
Reading Order
option may not be displayed if it has not been enabled in
Tools
. Refer to
the
Administration and Accounting
guide for more information.
Select
Save
to save your selections and exit.
Several pages of a bound document can be copied using the
Build Job
feature. Refer to
Build Job
on
page 47 for more information.
Summary of Contents for ColorQube 9201
Page 1: ...Version 2 0 06 09 Xerox ColorQube 9201 9202 9203 All Guides ...
Page 12: ...Table of Contents ColorQube 9201 9202 9203 All Guides 12 ...
Page 13: ...Version 2 0 06 09 Xerox ColorQube 9201 9202 9203 Copy ...
Page 52: ...Log In Out ColorQube 9201 9202 9203 Copy 52 ...
Page 53: ...Version 2 0 06 09 Xerox ColorQube 9201 9202 9203 Fax ...
Page 81: ...Version 2 0 06 09 Xerox ColorQube 9201 9202 9203 Server Fax ...
Page 96: ...Log In Out ColorQube 9201 9202 9203 Server Fax 96 ...
Page 97: ...Version 2 0 06 09 Xerox ColorQube 9201 9202 9203 Internet Fax ...
Page 115: ...Version 2 0 06 09 Xerox ColorQube 9201 9202 9203 Fax from PC ...
Page 126: ...Fax from PC Options ColorQube 9201 9202 9203 Fax from PC 126 ...
Page 127: ...Version 2 0 06 09 Xerox ColorQube 9201 9202 9203 Print ...
Page 147: ...Version 2 0 06 09 Xerox ColorQube 9201 9202 9203 Workflow Scanning ...
Page 177: ...Version 2 0 06 09 Xerox ColorQube 9201 9202 9203 E mail ...
Page 196: ...Log In Out ColorQube 9201 9202 9203 E mail 196 ...
Page 197: ...Version 2 0 06 09 Xerox ColorQube 9201 9202 9203 Reprint Saved Job ...
Page 207: ...Version 2 0 06 09 Xerox ColorQube 9201 9202 9203 Internet Services ...
Page 217: ...Version 2 0 06 09 Xerox ColorQube 9201 9202 9203 Paper and Media ...
Page 234: ...Storage and Handling ColorQube 9201 9202 9203 Paper and Media 234 ...
Page 235: ...Version 2 0 06 09 Xerox ColorQube 9201 9202 9203 Machine and Job Status ...
Page 248: ...Machine Status ColorQube 9201 9202 9203 Machine and Job Status 248 ...
Page 249: ...Version 2 0 06 09 Xerox ColorQube 9201 9202 9203 Administration and Accounting ...
Page 287: ...Version 2 0 06 09 Xerox ColorQube 9201 9202 9203 General Care and Troubleshooting ...
Page 307: ...Version 2 0 06 09 Xerox ColorQube 9201 9202 9203 Safety and Regulations ...
Page 331: ...Index ColorQube 9201 9202 9203 All Guides 331 ...


