February 2013
2-458
ColorQube® 9303 Family
94-524-00, 94-526-00
Status Indicator RAPs
94-524-00 Drum Drive Motor Over Current RAP
94-524-00 Drum drive motor is taking too much current.
Initial Actions
WARNING
Ensure that the electricity to the machine is switched off while performing tasks that do
not need electricity. Refer to
GP 14
. Disconnect the power cord. Electricity can cause
death or injury. Moving parts can cause injury.
CAUTION
Use care when working near the drum. The drum can be damaged easily, which will cause
print quality defects.
•
Check that the print media loaded into all of the trays matches the UI display for each tray.
If necessary correct the settings or load the correct media. Media that is too thick for the
machine settings will cause drive errors.
•
Check the trays for mixed media weights and correct if necessary.
•
Check for evidence of multi-feeds. Multiple sheets of media may cause drum drive errors.
If multi-feeds are indicated go to
OF 8
Multi-feed RAP.
Procedure
Go to
dC123
Pest Fault History and check for faults related to the drum, drum drive or drum
control components.
1.
Check the wiring between PJ6AC on the power supply unit and CN1 on the drum drive
motor.
Refer to
WD 1.1
. Repair as necessary,
REP 1.1
.
2.
Go to
WD 1.1
,
WD 9.1
and
WD 9.3
. Check the wiring between the drum drive motor
encoder and the
Drum driver PWB
, PJ802. Repair the wiring as necessary,
REP 1.1
. If
necessary install a new harness:
•
Drum driver to front components harness (PJ501),
PL 1.15 Item 14
.
•
Cleaning unit interface harness (PJ601, PJ802),
PL 1.15 Item 17
.
3.
Remove the drum drive motor,
REP 91.24
. Perform the following:
•
Check that the motor shaft rotates freely.
•
Check for a resistance of 510 to 1800 ohms across pins 1 and 6 of the drum drive
motor encoder.
•
Check the resistance of the winding on the drum drive motor. The resistance should
be in the range 9 to 12 ohms. Check across pin 1 and pin 2, pin 2 and pin 3 and pin
1 and pin 3, all three values should be the same. If the resistance is outside of this
range, install a new drum drive motor.
4.
Check system grounds, refer to
GP 7
. Pay particular attention to the media path baffles,
transfix roller, and drum ground connections.
5.
Install new components as necessary:
•
Drum drive motor,
PL 94.20 Item 6
.
•
Power supply unit,
PL 1.15 Item 2
.
•
Drum driver PWB,
PL 1.15 Item 4
.
94-526-00 Drum Drive Stall RAP
94-526-00 Drum has stalled.
Initial Actions
WARNING
Ensure that the electricity to the machine is switched off while performing tasks that do
not need electricity. Refer to
GP 14
. Disconnect the power cord. Electricity can cause
death or injury. Moving parts can cause injury.
CAUTION
Use care when working near the drum. The drum can be damaged easily, which will cause
print quality defects.
•
Check that the print media loaded into all of the trays matches the UI display for each tray.
If necessary correct the settings or load the correct media. Media that is too thick for the
machine settings will cause drive errors.
•
Check the trays for mixed media weights and correct if necessary.
•
Check for evidence of multi-feeds. Multiple sheets of media may cause drum drive errors.
If multi-feeds are indicated go to
OF 8
Multi-feed RAP.
•
Check the fault history for Mis-Feed Jam fault codes 71-101-00 to 71-155-00, 72-101-00
to 72-155-00, 73-101-00 to 73-155-00, 74-101-00 and 75-101-00. If the fault codes are
present, perform the appropriate RAP before proceeding with this RAP.
•
Check the fault history,
dC122
for 10-500-00 to 10-540-00 or 10-550 fault codes. If the
fault codes are present, perform the appropriate RAP before proceeding with this RAP.
•
Enter
dC978
Transfix Calibration Values. Check the calibration values against the label
on the front of the drum frame. If necessary, enter the correct transfix load values.
NOTE: The calibration values are found on a label on the drum frame behind the inner
cover,
PL 81.11 Item 2
.
Procedure
Go to
dC123
Pest Fault History and check for faults related to the drum, drum drive or drum
control components.
Refer to
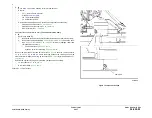
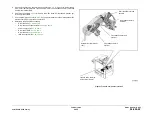
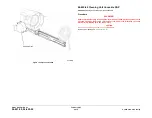
Figure 1
. Perform the following:
1.
While the transfix roller is not loaded, spin the roller. Check that the roller spins freely
without binding or generating unusual noise. Check the surface of the transfix roller for
contamination or damage. Install new components as necessary,
PL 10.20
.
2.
Remove the drum and abatement fan assembly, refer to
REP 91.24
. Release the drum
belt tension. With the drum drive and transfix roller disengaged from the drum, manually
rotate the drum. If the drum does not rotate freely, install new components as necessary,
PL 94.20
and
PL 31.11
.
3.
Remove the drum drive motor, refer to
REP 91.24
. Check that the motor shaft rotates
freely. If necessary, install a new drum drive motor,
PL 94.20 Item 6
.
4.
If 10-536 is in the fault history,
dC122
, check the transfix calibration values,
dC978
. If the
transfix values have been reset, re-enter the correct transfix values.
NOTE: The calibration values are found on a label on the drum frame behind the inner
cover,
PL 81.11 Item 2
.
Summary of Contents for ColorQube 9303 Series
Page 1: ...Xerox ColorQube 9303 Family Service Manual 708P90290 February 2013...
Page 4: ...February 2013 ii ColorQube 9303 Family Introduction...
Page 18: ...February 2013 1 2 ColorQube 9303 Family Service Call Procedures...
Page 92: ...February 2013 2 68 ColorQube 9303 Family 05F Status Indicator RAPs...
Page 104: ...February 2013 2 80 ColorQube 9303 Family 12 701 00 65 Status Indicator RAPs...
Page 200: ...February 2013 2 176 ColorQube 9303 Family 12N 171 Status Indicator RAPs...
Page 292: ...February 2013 2 268 ColorQube 9303 Family 16D Status Indicator RAPs...
Page 320: ...February 2013 2 296 ColorQube 9303 Family 42 504 00 42 505 00 Status Indicator RAPs...
Page 500: ...February 2013 2 476 ColorQube 9303 Family 94B Status Indicator RAPs...
Page 648: ...February 2013 3 2 ColorQube 9303 Family Image Quality...
Page 653: ...February 2013 3 7 ColorQube 9303 Family IQ 1 Image Quality Figure 1 IQ defects 1...
Page 654: ...February 2013 3 8 ColorQube 9303 Family IQ 1 Image Quality Figure 2 IQ defects 2...
Page 655: ...February 2013 3 9 ColorQube 9303 Family IQ 1 Image Quality Figure 3 IQ defects 3...
Page 656: ...February 2013 3 10 ColorQube 9303 Family IQ 1 Image Quality Figure 4 IQ defects 4...
Page 657: ...February 2013 3 11 ColorQube 9303 Family IQ 1 Image Quality Figure 5 IQ defects 5...
Page 658: ...February 2013 3 12 ColorQube 9303 Family IQ 1 Image Quality Figure 6 IQ defects 6...
Page 660: ...February 2013 3 14 ColorQube 9303 Family IQ 1 Image Quality Figure 9 IQ defects 9...
Page 661: ...February 2013 3 15 ColorQube 9303 Family IQ 1 Image Quality Figure 10 IQ defects 10...
Page 662: ...February 2013 3 16 ColorQube 9303 Family IQ 1 Image Quality Figure 11 IQ defects 11...
Page 663: ...February 2013 3 17 ColorQube 9303 Family IQ 1 Image Quality Figure 12 IQ defects 12...
Page 664: ...February 2013 3 18 ColorQube 9303 Family IQ 1 Image Quality Figure 13 IQ defects 13...
Page 728: ...February 2013 3 82 ColorQube 9303 Family IQ 29 IQ 30 Image Quality...
Page 736: ...February 2013 3 90 ColorQube 9303 Family TP 15 Image Quality Figure 2 Media path test pages...
Page 758: ...February 2013 3 112 ColorQube 9303 Family IQS 7 IQS 8 Image Quality...
Page 778: ...February 2013 4 20 ColorQube 9303 Family REP 1 9 Repairs Adjustments...
Page 794: ...February 2013 4 36 ColorQube 9303 Family REP 3 10 Repairs Adjustments...
Page 1144: ...February 2013 4 386 ColorQube 9303 Family REP 94 1 Repairs Adjustments...
Page 1176: ...February 2013 4 418 ColorQube 9303 Family ADJ 62 3 ADJ 62 4 Repairs Adjustments...
Page 1182: ...February 2013 4 424 ColorQube 9303 Family ADJ 75 3 Repairs Adjustments...
Page 1184: ...February 2013 4 426 ColorQube 9303 Family ADJ 82 1 Repairs Adjustments...
Page 1186: ...February 2013 4 428 ColorQube 9303 Family ADJ 91 1 Repairs Adjustments...
Page 1552: ...February 2013 6 260 ColorQube 9303 Family dC140 General Procedures Information...
Page 1576: ...February 2013 6 284 ColorQube 9303 Family dC640 General Procedures Information...
Page 1578: ...February 2013 6 286 ColorQube 9303 Family dC708 dC715 General Procedures Information...
Page 1600: ...February 2013 7 2 ColorQube 9303 Family Wiring Data...
Page 1696: ...February 2013 8 2 ColorQube 9303 Family Principles of Operation...
Page 1808: ...February 2013 8 114 ColorQube 9303 Family Principles of Operation...
Page 1809: ...XEROX EUROPE...
Page 1810: ...XEROX EUROPE...
Page 1811: ...XEROX EUROPE...
Page 1812: ...XEROX EUROPE...


