Xerox
®
D95/D110/D125 Copier/Printer Security Function Supplementary Guide
45
This section describes how to specify printing and paper parameters, enter accounting
information, and select the delivery method for your print job.
Follow the steps below to select the features available on the [Print] tab.
1.
Click [Print] on the Main Panel of the home page.
2.
The [Job Submission] page is displayed.
3.
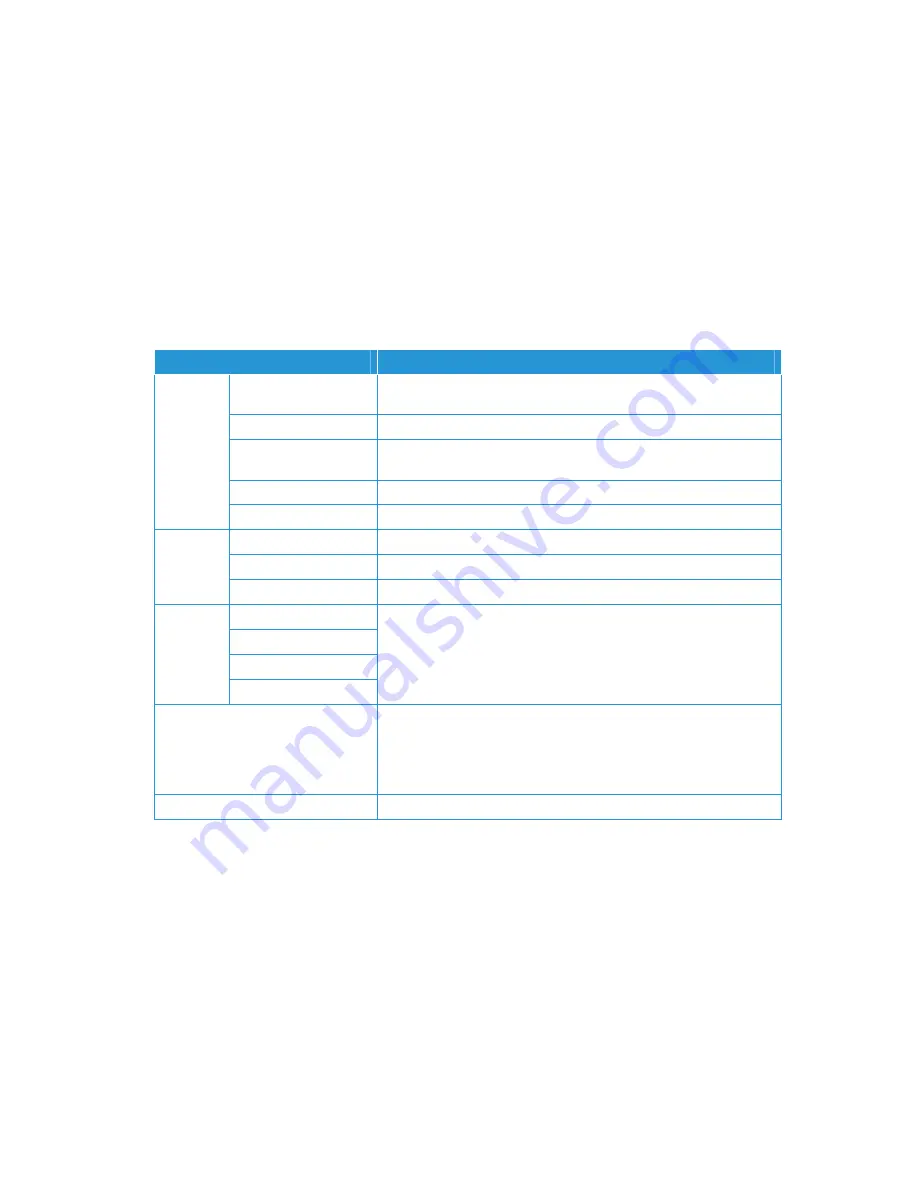
Job Submission allows you to print the files stored in your computer. Specify the following
settings, and click [Start] to submit the job.
Feature
Setting items
Quantity
Enter the number of sets to print. You can enter a number between 1
and 999.
Collated
Specify whether to collate printouts or not.
2 Sided Printing
Allows you to select from 1 sided prints or 2 sided prints (head to
head or head to toe).
Output Color
Allows you to set whether to print in color or in monochrome.
Output Destination
Allows you to select output trays from the drop down menu.
Paper
Paper Supply
Allows you to select the paper tray from the drop down menu.
Paper Size
Allows you to select the output paper size.
Paper Type
Allows you to select the type of the paper to be used.
Delivery
Immediate Print
In the case of user authentication mode, regardless of these
settings, print data will be stored to the authenticated user’s private
charge print.
Sample Set
Delayed Print
Secure Print
File Name
Allows you to specify the file to be printed. If you click the [Browse]
button next to the [File Name] edit box, the [Choose File] dialog box
opens and you can select the file to be printed. You can print only
files with the following extensions:
.pdf, .tif, .jpg, and .xps.
Submit Job
Click this button to print the file.
Scan (Folder Operation)
This section describes how to configure Folder.
Follow the steps below to select the features available on the [Scan] tab.
1.
Click [Scan] on the Main Panel of the home page.
2.
Select [Folder] on the [Scan] screen.
3.
The [Folder] page is displayed.


