background image

Getting to Know Your Product

QuickStart Practice Guide

13

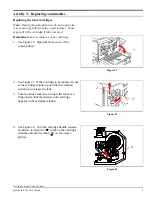
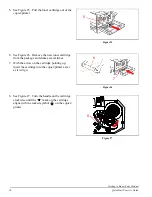
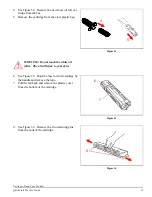
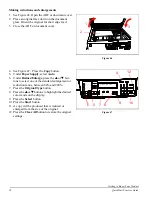
4. See Figure 34.  Remove the new fuser oil roll car-

tridge from the box.

5. Remove the cartridge from the clear plastic bag.

WARNING: Do not touch the white oil 
roller.  The oil will stick to your skin.

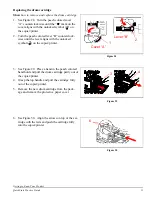
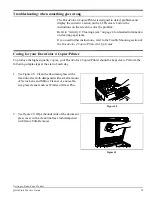
6. See Figure 35.  Hold the fuser oil roll cartridge by 

the handle and remove the tape.

7. Pull the tab back and remove the plastic cover 

from the bottom of the cartridge.

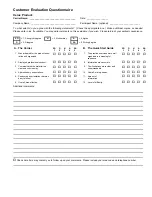
8. See Figure 36.  Remove the two retaining pins 

from the ends of the cartridge.

4

5

Figure 34

!

6

7

Figure 35

8

Figure 36

Summary of Contents for DocuColor DocuColor 4

Page 1: ...Getting to Know Your Product DocuColor 4 Copier Printer QuickStart Practice Guide August 1999 701P31131...

Page 2: ...tory or judicial law or hereinafter granted including without limitations material generated from the software programs which are displayed on the screen such as icons screen displays looks etc Printe...

Page 3: ...ss tray 5 Clearing a jam in the right side 6 Clearing a jam in the fuser 7 Clearing a jam in the left side 8 Clearing a jam in the two tray module 8 Activity 3 Replacing consumables 9 Replacing the to...

Page 4: ...Getting to Know Your Product iv QuickStart Practice Guide Caring for your DocuColor 4 Copier Printer 19 Resources 20 Frequently asked questions 20...

Page 5: ...oduct knowledge It can be conducted at your own leisure and at your own pace This Guide is yours to keep so that you can review the information or provide this same orientation to your colleagues if y...

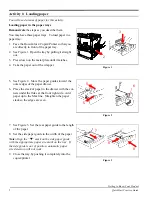
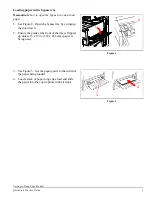
Page 6: ...ut of the wrapper 5 See Figure 2 Move the paper guides toward the outer edges of the paper drawer 6 Place the stack of paper in the drawer with the cor ners under the fluke at the front right side Add...

Page 7: ...4 Open the bypass tray by swinging the door down 2 Ensure the guide at the front of the tray is flipped up unless 13 x 19 in 330 x 483 mm paper is being used 3 See Figure 5 Set the paper guide to the...

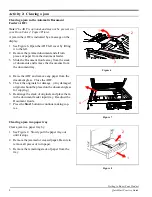
Page 8: ...nd remove the documents from the document tray 4 Raise the ADF and remove any paper from the document glass Close the ADF 5 Check the originals for damage Any damaged originals should be placed on the...

Page 9: ...ray being sure the paper is under the fluke at the front right side 6 Slowly push the paper tray back into the copier printer as far as it will go Clearing a jam in the bypass tray Show how to clear a...

Page 10: ...ay 2 Pull out the lower right unit as far as it will go 3 See Figure 13 Lift up on the green handle to open the cover 4 Turn the green knob to move the jammed paper 5 Pull the paper out Be sure no pie...

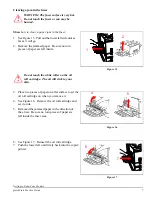
Page 11: ...are left inside Do not touch the white roller on the oil roll cartridge The oil will stick to your skin 3 Place two pieces of paper on a flat surface to set the oil roll cartridge on when you remove...

Page 12: ...Be sure no torn pieces of paper remain inside the copier printer 3 See Figure 19 Close the top left cover Clearing a jam in the two tray module Show how to clear a jam in the two tray module 1 See Fig...

Page 13: ...dge 1 See Figure 22 Open the front cover of the copier printer 2 See Figure 23 If the cartridge to be replaced is not at the cartridge window push the anti rotation switch up to release the lock 3 Tur...

Page 14: ...w toner cartridge from the package and shake several times 7 With the arrow on the cartridge pointing up insert the cartridge into the copier printer as far as it will go 8 See Figure 27 Turn the hand...

Page 15: ...ntil the lever aligns with the unlocked symbol on the copier printer 3 See Figure 29 Place a hand in the peach colored hand hold and pull the drum cartridge partly out of the copier printer 4 Grasp th...

Page 16: ...ed symbol on the copier printer 9 See Figure 32 Close the front cover of the copier printer Replacing the fuser oil roll cartridge Show how to remove and replace the fuser oil roll cartridge 1 See Fig...

Page 17: ...lastic bag WARNING Do not touch the white oil roller The oil will stick to your skin 6 See Figure 35 Hold the fuser oil roll cartridge by the handle and remove the tape 7 Pull the tab back and remove...

Page 18: ...rd the printer and aline the green label and arrow at the left end of the fuser oil cartridge with the green label on the housing 10 Slide the cartridge straight down 11 Rotate the cartridge down unti...

Page 19: ...raphs or negative films not printed pho tos in color 4 B W Text Phto This setting is for copying black and white documents containing both text and photographs 5 B W Text When the document being copie...

Page 20: ...r other black and white original To make a black and white copy from the document glass 1 See Figure 42 Raise the document glass cover or ADF 2 Place the 8 5 x 11 in original face down and flush again...

Page 21: ...eed 3 Slide the copies forward until the green light on the back cover of the ADF lights 4 Adjust the edge guide to just touch the end of the paper 5 See Figure 45 Press the Copy button 6 Under Paper...

Page 22: ...Paper Supply select Auto 6 Under Reduce Enlarge press the s or t but tons to select one of the standard enlargement or reduction ratios between 64 and 200 7 Press the Original Type button 8 Press the...

Page 23: ...the Trouble Shooting section of the DocuColor 4 Copier Printer Set Up Guide Caring for your DocuColor 4 Copier Printer To produce the highest quality copies your DocuColor 4 Copier Printer should be k...

Page 24: ...1 2 x 11 in or A3 paper being fed long edge first How do I select color copying mode You don t have to make any special selections for color copying The copier defaults to full color setting This mean...

Page 25: ...code and telephone number SD 1 Strongly disagree N 3 Neither way A 4 Agree D 2 Disagree SA 5 Strongly agree A The Carrier SD 1 D 2 N 3 A 4 SA 5 B The Quick Start Guide SD 1 D 2 N 3 A 4 SA 5 1 Was pre...

Page 26: ...ed States BUSINESS REPLY MAIL First Class Mail Permit No 229 El Segundo CA Postage will be paid by Addressee Xerox Corporation Customer Education Services Attn GTKYP CSMS Suite 2000 ESL2 211 360 N Sep...

Reviews: