background image

Overview of

the Printer

1.1 Main Components and Their Functions .................................................. 2
1.2 Getting Ready to Print ............................................................................ 4
1.3 Special Features of the Printer ............................................................... 6
1.4 Setting Printer Environment.................................................................... 7
1.5 Network Printer Environments ............................................................... 8
1.6 Setting IP Address for Network Environment ...................................... 13
1.7 Setting Port ........................................................................................... 18
1.8 Power Saver......................................................................................... 22
1.9 About the Attached CD-ROM .............................................................. 23

Summary of Contents for Document Centre 505 Series

Page 1: ...Document Centre 706 705 606 605 506 505 Series User Guide Printer This PDF file is best viewed using Acrobat Reader 4...

Page 2: ...Computer Inc Adobe Adobe Type Connection Adobe Type Manager PostScript PostScript 3 the PostScript logo and PageMaker are trademarks of Adobe Systems Incorporated Helvetica Palatino Times are trademar...

Page 3: ...m our manufacturing facilities We are committed to leadership in the conservation of resources by re using and recycling post consumer waste material such as paper cartridges and parts from our custom...

Page 4: ...e machine is the cause of radio interference Perform the following procedures until the interference is corrected Move the machine and the TV and radio away from each other Reposition or re orientate...

Page 5: ...s Manuals bundled with the the Printer Scanner kit or printer model User Guide Printer Explains the printer functions installation configuration of the printer drivers as well as the setting up and op...

Page 6: ...4 Installing Configuring the Printer Drivers Explains how to install configure the printer drivers Chapter 5 Setting Up for Direct Print Utility Explains the settting up process when using Direct Pri...

Page 7: ...14 Precautions and Limitations Explains the precautions and limitations when using the printer functions in general NetWare TCP IP LPD and SMB Chapter 15 Troubleshooting Explains how to solve problem...

Page 8: ...noted without double quotes while specific sections like 1 9 2 Disabling the power saver mode are found within double quotes Special marks characters used in this manual Double quotes are used to indi...

Page 9: ...quires close attention Read and follow instructions carefully to ensure the task is accomplished safely This symbol is used to alert operators to a specific operating procedure that must not be perfor...

Page 10: ...13 1 6 2 Using touch panel display for setting 14 1 6 3 Checking Setting DHCP environment 17 1 7 Setting Port 18 1 7 1 Activating port 18 1 7 2 Other setting items 21 1 8 Power Saver 22 1 8 1 Using t...

Page 11: ...Uninstalling the Printer Drivers 45 4 2 1 For a local DC 706 705 606 605 506 505 series printer 45 4 2 2 For a network DC 706 705 606 605 506 505 series printer 48 4 2 3 Uninstalling the printer drive...

Page 12: ...P IP in Printer 108 7 3 1 Defining IP address 108 7 3 2 Activating port and setting protocol 108 7 3 3 Other settings 110 7 4 Changing Printer and Workgroup Name 111 7 4 1 Through Windows Network 111...

Page 13: ...43 10 3 Configuring Printer 144 10 3 1 Activating Internet Service 144 10 3 2 Other Internet Service Settings items 146 10 4 Activating Browser 147 10 4 1 Activating Browser 147 10 4 2 Help 148 Chapte...

Page 14: ...face port 202 14 2 5 Others 202 14 3 On Using TCP IP LPD 203 14 3 1 During setup 203 14 3 2 During switching power on off 203 14 3 3 During printing 204 14 4 On Using SMB 205 14 4 1 During setting up...

Page 15: ...0 A 2 Printing Area 231 B Connectors and Allocation Signal 232 C Printing Data Combined Using Overlays 234 C 1 Creating an overlay 234 C 2 Printing with an overlay 235 D Printing Secured Print and Sam...

Page 16: ......

Page 17: ...s 2 1 2 Getting Ready to Print 4 1 3 Special Features of the Printer 6 1 4 Setting Printer Environment 7 1 5 Network Printer Environments 8 1 6 Setting IP Address for Network Environment 13 1 7 Settin...

Page 18: ...uide Copier of the same series 1 1 1 Back view Parallel interface connector Connects the printer to a host computer by a centronics IEEE1284 compliant interface cable Ethernet interface connector Conn...

Page 19: ...play the respective setting screen Scan Mode Select this button to display the Scan Mode screen for setting the various scan features User Guide Scanner Copy Mode Select this button to display the Cop...

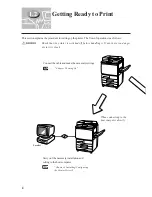
Page 20: ...f before handling it If not there is a danger of electric shock 1 2 Getting Ready to Print Connect the cable and make the necessary settings Chapter 2 Setting Up Carry out the necessary installation a...

Page 21: ...e settings according to the network environment 1 4 Setting Printer Environment 1 5 Network Printer Environments 1 6 Setting IP Address for Network Environment Chapter 7 Setting Up for Windows Network...

Page 22: ...se resolution and produce smooth printing without any notches equivalent to 2 400 dpi Besides the standard parallel interface it can be used in a network multi protocol environment through the install...

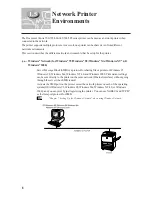
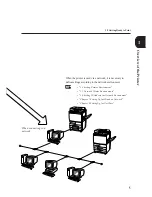
Page 23: ...roceed When using AppleTalk refer to the manuals that come with the PostScript software kit 1 Refer to Chapter 7 Setting Up for Windows Network 2 Refer to 1 6 Setting IP Address for Network Environmen...

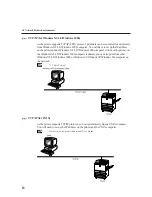
Page 24: ...is a protocol for sharing file or printer on Windows 95 Windows 98 Windows Me Windows NT 4 0 and Windows 2000 Print data or settings can be sent directly to the printer on the same network Ethernet i...

Page 25: ...98 Window Me computer to a printer on the same network Ethernet interface without going through the server As the printer supports TCP IP LPD protocol the print data can be sent directly and printed f...

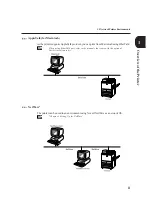
Page 26: ...ter And once the printer on the Windows NT 4 0 Windows 2000 computer is shared you can also print from other Windows NT 4 0 Windows 2000 or Windows 95 Windows 98 Windows Me computer on the network 1 7...

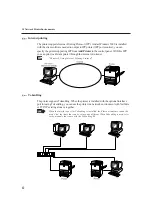
Page 27: ...ou can print from Macintosh using EtherTalk When using EtherTalk port refer to the manuals that come with the optional PostScript software kit NetWare The printer can be used in an environment using N...

Page 28: ...et or intranet Chapter 9 Using Internet Printing Protocol TokenRing The printer supports TokenRing When the printer is installed with the optional interface port for using TokenRing you can use the pr...

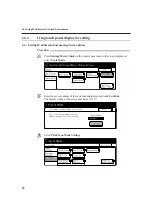
Page 29: ...etting as a guide but changing the procedure as follows 1 Follow Steps to to display the screen for setting TCP IP IP Address 2 Select Auto Obtain BOOTP instead of Specify Address for Step and then to...

Page 30: ...edure Press Settings Meter Check on the control panel and on the screen displayed select Tools Mode Enter the access number of the system administrator and touch Confirm The factory setting of the acc...

Page 31: ...r to touch select TCP IP IP Address and then touch Change Settings Select Specify Address The IP address will be displayed when there is a DHCP or BOOTP environment The factory setting for TCP IP IP A...

Page 32: ...utomatically To move to the next bit when less than three digits are entered touch Enter Next Once the input is completed touch Save If necessary enter the subnet mask and gateway address Touch Close...

Page 33: ...ver Address Secondary WINS Server Address The DHCP server and WINS server are operating The printer IP address is set by the DHCP server The name FX xxxxxx listed in Host Name of SMB in the printer se...

Page 34: ...ing Up for Windows Network when using SMB port and to Chapter 8 Setting Up for NetWare when using NetWare port Refer to the manuals that come with the PostScript software kit when using EtherTalk port...

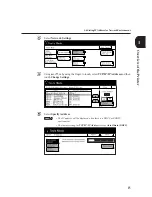
Page 35: ...ettings Select Port Settings Select LPD Select Port Status and then touch Change Settings Although the default setting of Port Status is Enable we display the Disable setting here for illustrating thi...

Page 36: ...ting uisng Auto Obtain DHCP the screen for setting the IP address will be displayed when LPD is set to Enable Enter the IP address on the IP address setting screen Select Save Select Close twice Selec...

Page 37: ...is installed factory setting will be Auto With LPD you can store the print data output from the application in the spool file of the printer temporarily to be processed for printing Set the spool mod...

Page 38: ...thout being used for a certain period of time This is called the Auto Power Saver mode which consists of the followingtwomodes Low Power Mode the state where the temperature of the the heater is lower...

Page 39: ...95 Windows 98 Windows Me Windows NT 4 0 Windows 2000 DP Direct Print Utility forWindows95 Windows98 WindowsMe SCN Network Scanner Utility for Windows 95 Windows 98 Windows NT 4 0 Windows 2000 ACROBAT...

Page 40: ...ws 98 Windows Me Windows NT 4 0 Macintosh ACROBAT Adobe Acrobat Reader for Windows 95 Windows 98 Windows Me Windows NT 4 0 Windows 2000 Macintosh MS_PS PPD and INF files for Microsoft PostScript forWi...

Page 41: ...Setting Up 2 1 Connecting Interface Cable 26 2 2 Memory Allocation 28...

Page 42: ...erface cable provided by our company as an optional kit For details contact your Fuji Xerox Customer Support Centre When you have to use a cable not provided by our company choose one less than two me...

Page 43: ...ows Switch off the power supply of the printer Connect the interface cable to the Ethernet interface connector Use an interface cable that is suitable for your network connection Switch on the printer...

Page 44: ...are receive buffer the default value is usually sufficient For the AppleTalk receive buffer it is recommended that as many areas are maintained as possible Page buffer use Area for drawing the actual...

Page 45: ...Checking Job Status 33 3 3 Cancelling Printing From Printer 34 3 4 Forced Outputting 36 3 5 Switching Printer to Offline 38 3 6 Printing vs Copying Scanning 39 3 7 Loading Paper 40 3 8 Replacing Drum...

Page 46: ...er check the following 1 Port status in Tools Mode Printer Scan Mode Settings Port Settings theenabledportishighlighted 2 Print mode of the port in Port Settings selected port Print Mode Chapter 13 Co...

Page 47: ...Output tab If necessary define the various settings on this tab If necessary define the settings on other tabs Click OK 3 1 3 Online Help Refer to the online Help for explanation on each of the printe...

Page 48: ...fer to the manual of the application regarding its operation Before sending print data from the client computer check the following 1 Port status in Tools Mode Printer Scan Mode Settings Port Settings...

Page 49: ...job status and touch Close To check the detailed contents touch the job directly by your fingers Select to display jobs that you are looking for and to return to the previous screen select To check th...

Page 50: ...e manual of the application software used 3 3 1 Cancelling jobs in process Procedure Press the button Stop on the control panel or select Stop on the screen The printer will be stopped temporarily or...

Page 51: ...the Job Status screen Select to display the jobs that you are looking for and to return to the previous screen select Select Stop from the screen displayed Jobs in process will be stopped temporarily...

Page 52: ...Outputting waiting jobs Procedure Press the button Job Status Stop on the control panel The Job Status screen is displayed Select Output Waiting Jobs on the Job Status screen Jobs with Print Wait mes...

Page 53: ...rectly on the job displayed with Get Data message Select to display the jobs that you are looking for and to return to the previous screen select From the screen displayed select End Receive Data Prin...

Page 54: ...en to switch the printer to offline Once Offline is selected the printer will not be able to receive data Also data that are being transmitted will be interrupted and cannot be printed Select Online f...

Page 55: ...After these jobs are completed documents sent by the computer will be printed in the order received Select Exit during printing Copying scanning operations can be programmed ahead without disrupting...

Page 56: ...40 Chapter 2 Loading Paper of the User Guide Copier 3 7 Loading Paper...

Page 57: ...Useful Operations 41 3 8 Replacing Drum Cartridge Toner Cartridge Chapter 8 Daily Care of the User Guide Copier...

Page 58: ...42 3 9 Paper Jams Chapter 7 Troubleshooting of the User Guide Copier...

Page 59: ...Installing Configuring the Printer Drivers 4 1 About the Printer Drivers 44 4 2 Installing Uninstalling the Printer Drivers 45 4 3 Configuring the Printer Drivers 51...

Page 60: ...rinter driver for Windows NT 4 0 Windows 2000 The printer drivers for this DC 706 705 606 605 506 505 series printer are named DC 706 606 506 CP 4 1 2 Installation configuration methods The methods of...

Page 61: ...printer that is directly connected to your computer Procedure Start Windows 95 Windows 98 Windows Me Windows NT 4 0 or Windows 2000 In this example we will install the PCL 6 driver on the Windows 98...

Page 62: ...ck Next Thefollowing PrinterInstallation dialogboxappears Determine the printer name and then click Next The Ready to Start Copying dialog box appears Click Finish to continue Aftertheinstallationisco...

Page 63: ...s for details on configuring the printer driver You must restart Windows in order for the driver to work properly You may run the Setup exe program to install the Windows 95 Windows 98 Windows Me prin...

Page 64: ...2 1 For a local DC 706 705 606 605 506 505 series printer todisplaythe PrinterInstallation dialogbox Click Add Network Port The Add Network Printer Port dialog box appears Select the network printer...

Page 65: ...pen the Printers window and erase the applicable printer icons Procedure Click Start and select Run In the Run dialog box displayed click Browse In this example we will uninstall the PCL 6 driver on t...

Page 66: ...the Printer Drivers The following Ready to Start Deleting dialog box appears Click Finish to continue When the uninstallation is completed click Restart Windows Now to ensure that the driver is compl...

Page 67: ...per Output You will need to specify the appropriate options on the Printer tab first before the other tabs If not the other tabs may not show options appropriate to your machine For the Windows NT 4 0...

Page 68: ...ndows 2000 Accessing the document defaults printing preferences dialog box Follow Steps and of the procedure for Windows 95 Windows 98 Windows Me to select the FX DC 706 606 506 CP printer icon Select...

Page 69: ...ndows NT 4 0 Windows 2000 drivers Device Halftoning Paper Output This property controls several aspects of how the printer works with paper and how it handles a print job Settings include Job Type Pap...

Page 70: ...r image display on the Paper Output tab will be updated once this is selected High Capacity Feeder default condition off Select this if your printer is installed with the High Capacity Feeder The prin...

Page 71: ...landscape orientation because of the bypass tray specification Device Halftoning for Windows NT 4 0 Windows 2000 Click to display the Device Color Halftone Properties dialog box to define the colour...

Page 72: ...put and output devices You can either click on these displays or choose from the combo boxes to make selections Job Type Specify the type of job that you want to output Options include Print default S...

Page 73: ...ooklet on A3 You can define your own paper size by clicking the Custom Paper Size button Paper Source Specify the tray to use Options include Auto default Paper will be automatically selected Tray 1 T...

Page 74: ...paper source if Fit To Output Size or Logical On Physical is selected for Layout Mode on the Layout tab Tray 2 1 2 2 and 2 3 are available only if Multi Tray is installed Output Destination Specify a...

Page 75: ...short edge of the paper Options include 1 Sided Print default Prints only on one side of the paper Flip on Long Edge Two sided printing aligned to the long edge of the paper available only if Tray 5 B...

Page 76: ...ument to be arranged Collate default on Click on the check box to collate or uncollate your documents Enabled if more than one copy is selected for Copies on the Paper Output tab Finishing Specify whe...

Page 77: ...50 sheets The paper sizes and positions that can be stapled are as follows Size Document Top Double Left Double Top Left Corner Image Bottom Double Right Double Top Right Corner Orientation Bottom Le...

Page 78: ...ion first before selecting the punch position B5 portrait long edge A4 portrait long edge B4 short edge A3 short edge 8 5 11 portrait long edge 11 17 short edge For A4 A5 B5 8 5 11 the positions that...

Page 79: ...fault Tray 1 Tray 2 available only if Multi Tray is not selected for Paper Source Options on the Printer tab Tray 2 1 Tray 2 2 Tray 2 3 tray 2 1 tray 2 2 and tray 2 3 are available only if Multi Tray...

Page 80: ...is slower Vector default This mode enables images to be printed faster but not all graphic images can be printed under this mode If the printed graphic images do not appear the same way as they did on...

Page 81: ...degrees of grey Disabled if Print as Graphics is selected for TrueType Mode TrueType Mode The drivers are capable to download the Windows TrueType fonts in three different ways Download as TrueType de...

Page 82: ...Windows NT 4 0 Windows 2000 The Overlays tab allows you to create use and delete page overlays A Page Overlay is a group of PCL commands and or data created and stored in your computer Once stored in...

Page 83: ...r all of the destinations Query Page Overlay When this check box is selected a message box requesting for confirmation will appear whenever a page overlay command is sent to the printer If this is not...

Page 84: ...p default Booklet Creation Fit To Output Size Zoom Logical On Physical Poster Selecting each of the features will display one of the following corresponding options 1 Multi Up available when Multi Up...

Page 85: ...oklet Creation available when Booklet Creation is selected for Layout Mode This function allows the document to be printed as a booklet It ensures that the output sheets when folded and stacked will h...

Page 86: ...n allows enlargement or reduction of each document page to be printed Zoom default 100 Define a zoom of between 50 to 400 for enlargement 100 or reduction 100 of your page Page Position Specify the po...

Page 87: ...ion allows you to enlarge proportionally and print the image of each document across multiple physical pages Style Specify the style for outputting the document image i e the number of times of its pa...

Page 88: ...colour Specify the position and angle of the text by adjusting the Angle scrollbar 90 to 90 degrees and the scrollbar just below the preview window which moves the x and y position values These positi...

Page 89: ...document Otherwise the watermark will be printed on top of all images in the document Disabled if As Outline Only is selected First Page Only Selecting this prints watermark on the first page of the...

Page 90: ......

Page 91: ...Setting Up for Direct Print Utility 5 1 Using Direct Print Utility 76 5 2 Setting Up the Printer 78 5 3 Installing Direct Print Utility 81 5 4 Status Indication 88 5 5 Uninstalling 90...

Page 92: ...ements Installed with the English version of Windows 95 Windows 98 Windows Me IBM PC AT and its compatible computer Equipped with Intel CPU x86 compatible Using TCP IP protocol on a network environmen...

Page 93: ...ort layer 5 2 Setting Up the Printer InstallingDirectPrintUtility Install Direct Print Utility on a PC with Windows 95 Windows 98 Windows Me OS 5 3 Installing Direct Print Utility Printing Print from...

Page 94: ...anel and the port status may be set to Disable automatically If this happens set the ports which are not in use to Disable and change the memory size 5 2 1 When the LPD port is disabled Follow the pro...

Page 95: ...s Select Port Settings Select LPD Select Port Status and then touch Change Settings Although the default setting of Port Status for LPD Port is Enable we display the Disable setting here for illustrat...

Page 96: ...owever there is no need to change the factory setting of these items for normal use Print Mode factory setting PCL PJLSwitch factory setting On LPDSpool factory setting Hard Disk spool If the optional...

Page 97: ...dure for details on the installation method If no printer has been set up earlier it is necessary to add one to the local printer port 4 2 Installing Uninstalling the Printer Drivers for details on th...

Page 98: ...edure Start Windows 95 Windows 98 or Windows Me Click Start and select Settings followed by Control Panel Double click the Network icon to display its dialog box Click Addonthe Configuration tabdialog...

Page 99: ...ows Me Click Start and select Run to display its dialog box Insert in the PCL Driver Network Utility Windows CD ROM and enter E English Utility Win9x_Me DP Setup exe ontheRundialogbox Thenclick OK The...

Page 100: ...e destination location click Next to continue When the installation is completed a dialog box like the one below appears Click on the radio button of Yes I want to restart my computer now and then cli...

Page 101: ...rocedure of the Direct Print Utility port is as follows Procedure Double click the My Computer icon followed by the Printers icon Then double click the icon of the printer for which you will set the p...

Page 102: ...n the radio button for Other followed by the port FX TCP IP DPU Port and then OK The FX TCP IP DPU Port Setup dialog box appears Enter the port name and IP address by referring to the explanations bel...

Page 103: ...d IP address consists of four numbers separated by periods with each value between 0 255 xxx xxx xxx xxx If you do not know the IP address of your printer either ask your system administrator or print...

Page 104: ...the printer Unable to print Network Error The printer is unable to print Either the power is off or there is a problem in the network When Network Error occurs printing cannot be automatically re exec...

Page 105: ...he print file Progress Total number of pages for a print file During printing the number of printed pages will be indicated here Started At Time when printing started This will be displayed by the Win...

Page 106: ...printer that uses the relevant printer port e g FX TCP IP DPU Port Click the Details tab and change the port setting from the printer port used to another one like LPT1 Save the new setting by clicki...

Page 107: ...g Fuji Xerox DPU Port Then click Add Remove A Confirm File Deletion dialog box appears Click Yes A Remove Programs From Your Computer dialog box appears Click OK when the uninstall is successfully co...

Page 108: ......

Page 109: ...Setting Up for TCP IP Windows NT Windows 2000 6 1 Setting Up for TCP IP Windows NT Windows 2000 94 6 2 Setting Up the Printer 95 6 3 Setting Up Windows NT Windows 2000 100...

Page 110: ...r to TCP IP and enter the IP address 6 2 Setting Up the Printer SettingupWindowsNT Windows2000 Install the printer for Windows NT Windows 2000 For 1 only Next install the Windows 95 Windows 98 Windows...

Page 111: ...cally If this happens set the ports which are not in use to Disable and change the memory size 6 2 1 Setting the LPD port to Enable Follow the procedure below to set the LPD port to Enable Once the LP...

Page 112: ...e Settings Select Port Settings Select LPD Select Port Status and then touch Change Settings Although the default setting of Port Status for LPD Port is Enable we display the Disable setting here for...

Page 113: ...ows NT Windows 2000 97 Select Enable Select Save Restart the machine for the new setting to take place Repeat Steps to Select NetWork Settings Select TCP IP Subnet Mask and then touch Change Settings...

Page 114: ...net mask using the numeric keypad To move to the next bit touch Enter Next When the input is completed select Save Repeat Steps to and input TCP IP Gateway Address in the same way Select Save until th...

Page 115: ...wever the factory setting of these items do not need to be changed for normal use Chapter 13 Configuring by the Tools Mode Screen for details on the printer setting items Print Mode Factory setting PC...

Page 116: ...ll the printer driver for Windows NT 4 0 Windows 2000 by running the Setup exe program Click Add Network Port and select the network printer from Network Neighborhood 4 2 2 For a network DC 706 705 60...

Page 117: ...Setting Up for Windows Network 7 1 Introduction 102 7 2 Setting NetBEUI in Printer 104 7 3 Setting TCP IP in Printer 108 7 4 Changing Printer and Workgroup Name 111 7 5 Auto Driver Dowloading 116...

Page 118: ...mation 7 1 1 System structure SMB operates in an environment where the port is set and the printer connected to the internet network It uses NetBEUI or TCP IP as the transport protocol You can use eit...

Page 119: ...y On for NetBEUI factory setting On 7 2 Setting NetBEUI in Printer When using TCP IP From the touch panel display select Enable for the port status of SMB factory setting Enable followed by On for TCP...

Page 120: ...7 2 1 Activating port and setting protocol Follow the procedure below to activate the SMB port using the touch panel display Procedure Press the Settings Meter Check button on the control panel and se...

Page 121: ...ter Select Port Settings Select SMB SMB Select Port Status and then touch Change Settings Although the default setting of Port Status for SMB Port is Enable we display the Disable setting here for ill...

Page 122: ...to be processed for printing Set the spool mode by using the SMB spool of the receive buffer capacity Spool mode The mode which stores print data output from the application in the spool file of the...

Page 123: ...ADMIN Administrator Password Factory setting admin Administrator password check Maximum Sessions Factory setting 5 Auto Driver Download Factory setting On Unicode Support Factory setting Enable Auto...

Page 124: ...for information on defining the IP address Depending on the network environment used it may be necessary to set the subnet mask and gateway address as well Discuss with your network administrator on t...

Page 125: ...ect Port Settings Select SMB SMB Select Port Status and then touch Change Settings Although the default setting of Port Status for SMB Port is Enable we display the Disable setting here for illustrati...

Page 126: ...Select Enable Select ON for TCP IP Select Save twice Select Close twice followed by Exit Tools The machine will be rebooted 7 3 3 Other settings Refer to 7 2 2 Other settings 7 3 Setting TCP IP in Pri...

Page 127: ...ere However only the administrator is allowed to do this The procedure below explains how to overwrite the setting file config txt at the first instance Subsequently you will need to know the followin...

Page 128: ...kgroup and host name and then overwrite and close config txt The workgroup and host names can be set up to 15 bytes For details on config txt refer to next page Setting format of config txt The messag...

Page 129: ...d it will become Off Max Spool Size The maximum receive buffer size 512 32768 1024Kbyte duringspooling unit Kbyte Can be set in 256 Kbyte units Max Receive Buffer The maximum receive buffer size 64 10...

Page 130: ...s 0 0 0 0 WINS Primary Server Set the WINS primary server 0 0 0 0 Address address WINS Secondary Set the WINS secondary server 0 0 0 0 Server Address address Administrator Name Administratorname Maxim...

Page 131: ...115 Setting Up for Windows Network Example of config txt 7 4 Changing Printer and Workgroup Name...

Page 132: ...needed in order to use the auto driver downloading feature Only the administrator can define this setting Procedure Open Network Neighborhood from the Windows client computer followed by Workgroup fac...

Page 133: ...files of the printer driver in the appropriate AddPrint folder in the CD ROM e g Win9x_Me PCL6 AddPrint to the win98 folder Switch off the power of the printer and wait for five seconds before switch...

Page 134: ...ndows client computer followed by Workgroup factory setting Workgroup and then the printer e g Fx 0a6b95 and the printer icon of the printer driver 9x mee pcl The factory setting of Workgroup is Workg...

Page 135: ...r and No if you do not want to Then click Next Click Yes if you want to print a test page and No if you do not want to Then click Finish to start the installation If you have chosen to print a test pa...

Page 136: ...and the printer is now ready for use The printer window is displayed for you to specify settings From the Printers menu select Properties The printer properties dialog box is displayed Refer to 4 3 C...

Page 137: ...Setting Up for NetWare 8 1 Using NetWare 122 8 2 Setting Up for NetWare 124 8 3 Setting Up the Printer 125 8 4 Setting Up the Client 129...

Page 138: ...functions as a print server In the PSERVER mode the printer will function as a print server and retrieve print jobs from the print queue for printing As it fully utilizes the functions of the printer...

Page 139: ...packets of each frame type on the connected network and activate automatically by the frame type which responded first However if other protocols are running simultaneously on the same network use th...

Page 140: ...e print service Using PCONSOLE or NetWareAdministrator NWADMIN create print queue print server and printer and assign the respective objects When using in the PSERVER mode use the device name checked...

Page 141: ...port to Enable leads to insufficient memory a message about the insufficient memory may be displayed on the control panel and the port status may be set to Disable automatically If this happens set t...

Page 142: ...126 Select Print Scan Mode Settings Select Port Settings Select NetWare Select Port Status and then touch Change Settings 8 3 Setting Up the Printer...

Page 143: ...tings on the printer However the factory setting of these items do not need to be changed for normal use Print Mode Factory setting PCL PJLSwitch Factory setting On NetWare Receive Buffer Factory sett...

Page 144: ...Mode Settings IPX SPX Setup Network Address and device name Host Interface Setup NetWare Device Procedure When the Menu screen is not displayed press the Menu button on the control panel Select Print...

Page 145: ...select the network printer from Network Neighborhood 4 2 2 For a network DC 706 705 606 605 506 505 series printer for details on the installation of the printer driver When you are printing make sure...

Page 146: ......

Page 147: ...Using Internet Printing Protocol 9 1 Introduction 132 9 2 Setting Printer and Installing Printer Driver 135...

Page 148: ...y printing to a IPP supported printer from the Add Printer window of the control panel Using IPP you can print to a distant printer via internet or intranet 9 1 1 System environment The essential syst...

Page 149: ...tings Port Settings Internet Service Enable factory setting Enable Chapter 13 Configuring by the Tools Mode Screen At the computer and on the CentreWare Internet Services screen select the Properties...

Page 150: ...ut from the application in the spool file of the printer temporarily to be processed for printing Set the spool mode by using the IPP spool of the receive buffer capacity Spool mode The mode which sto...

Page 151: ...ver an error message Cannot be connected to the internet may appear when setting the printer When this happens change the setting of the IP address without going through the proxy server by selecting...

Page 152: ...intranet enter the following URL and then click Next http printerIPaddress ipp The printer connection dialog box appears If the DNS setting has been defined for the client and the host name is effect...

Page 153: ...cturer s files from and then click OK In this example we assume that drive E is the CD ROM drive Enter the appropriate letter for your CD ROM drive You can also click Browse to locate the driver folde...

Page 154: ...Printer Driver Select Yes when you want to use the printer as the default printer and No when you do not want to use it as the default The essential files will be copied After the copying is done the...

Page 155: ...Using CentreWare Internet Services 10 1 Using CentreWare Internet Services 140 10 2 Configuring Browser 142 10 3 Configuring Printer 144 10 4 Activating Browser 147...

Page 156: ...settings Depending on the items some settings become effective only after rebooting after switching on off the printer or after defining the system settings using the printer control panel 10 1 1 Stru...

Page 157: ...selected in the category 10 1 2 System environment To use CentreWare Internet Services you will need to activate the network environment using TCP IP protocol as well as to set the Internet service to...

Page 158: ...ck Cache under Advanced Select Once per session or Every time for Document in cache is compared to document on network Click OK The dialog box is closed For Internet Explorer Procedure Select Internet...

Page 159: ...browser For details on how to define these settings refer to the manuals of the browser that you are using Port number setting The factory setting of the port number of the CentreWare Internet Servic...

Page 160: ...een defined follow the message displayed to define it after the Internet Service is activated Procedure Press the Settings Meter Check button on the control panel and select Tools Mode on the screen d...

Page 161: ...145 Usiing CentreWare Internet Services 10 3 Configuring Printer Select Port Settings Select Internet Service SMB With Port Status selected touch Change Settings Select Enable and then touch Save...

Page 162: ...tings items Define the following settings for CentreWare Internet Service after Internet Service has been enabled at the printer You can define these items by clicking Internet Services Settings on th...

Page 163: ...itch on the host computer and activate the browser At the address column of the browser enter the IP address or internet address of the printer and then press Enter on the keyboard Example of specifyi...

Page 164: ...148 10 4 Activating Browser The screen of the CentreWare Internet Services is displayed 10 4 2 Help For details on the items of each screen click Help to check Help...

Page 165: ...Setting Print Mode 11 1 Print Mode Operation 150 11 2 PCL 6 Settings 151...

Page 166: ...the printer driver the parameters set by the driver will override those set here in the PCL 6 settings Print Mode can be used to switch the printer to Offline When Online is selected the printer is a...

Page 167: ...of the specific tray is selected only Adjust to Specified Tray will be displayed in Output Size and no other options of paper size will be available for selection Output Size Sets the paper size Avai...

Page 168: ...lv It Antique Olive Italic 14 AntiqueOlv Bd Antique Olive Bold 15 CGOmega CGOmega 16 CGOmegaIt CGOmegaItalic 17 CGOmegaBd CGOmegaBold 18 CGOmegaBdIt CGOmegaBoldItalic 19 Garamond Antiqua Garamond Anti...

Page 169: ...Palatino It Palatino Italic 61 Palatino Bd Palatino Bold 62 Palatino BdIt Palatino Bold Italic 63 ITCBookmanLt ITCBookmanLight 64 ITCBookmanLtIt ITC Bookman Light Italic 65 ITCBookmanDm ITCBookmanDem...

Page 170: ...ndows 3 1 Latin 5 DESKTOP DeskTop PSTEXT PSText MCTEXT MCText MSPUB Microsoft Publishing MATH 8 Math 8 HP Math 8 PIFONT Pi Font HP Pi Font LEGAL Legal HPLegal ISO 4 ISO 4 United Kingdom ISO 6 ISO6 ASC...

Page 171: ...of specified output from Netware and lpd cannot be changed to the operator panel If there is instruction from the host device regarding the number of output copy that value will be reflected and prin...

Page 172: ...tings by using the illustration of setting Paper Size to A3 Procedure Select Print Mode from the menu screen Touch PCL6 Settings Select the PCL 6 Settings item Paper Size by touching until it is selec...

Page 173: ...157 Setting Print Mode Select A3 and then touch Save Select Close until the menu screen appears 11 2 PCL 6 Settings...

Page 174: ......

Page 175: ...Printing Reports Lists 12 1 Types of Reports Lists 160 12 2 How to Print Report List 180...

Page 176: ...eter Report PostScript Settings List Stored Print Job List The PostScript Fonts List and PostScript Settings List are available only when the optional PostScript Software kit is installed Paper sizes...

Page 177: ...2 Printer Settings List About Printer Settings List Prints the information in the system menu Printingresult Thefollowingitemswillbeincludedinthelist System Settings Printer Settings Communication Set...

Page 178: ...162 12 1 Types of Report List...

Page 179: ...Job Info Page Info Pages Sheets Job Status The print log is basically printed chronologically but the printing sequence can be changed when cancelling jobs or executing jobs with short processing tim...

Page 180: ...of PCL memory printing cannot be processed Treatment Increase the PCL memory setting PCLCommandError Cause A PCL command error has occurred Treatment Check the print data Max User Number Exceeded Caus...

Page 181: ...Printing Reports Lists 165 12 1 Types of Report List...

Page 182: ...Error History Report Prints information related to printer errors Printingresult The Error History Report will display up to 50 of the latest errors Thefollowingitemswillbeprinted Date Time Error Code...

Page 183: ...Printing Reports Lists 167 12 1 Types of Report List...

Page 184: ...er Printingresult Thefollowingitemswillbeprinted Paper Tray Output Size PaperSize Output Destination Output Orientation 2 Sided Print Binding Edge Font Symbol Set Font Size Font Pitch FormLines Vertic...

Page 185: ...Printing Reports Lists 169 12 1 Types of Report List...

Page 186: ...70 12 1 Types of Report List 12 1 6 PCL Fonts List About PCL Fonts List Prints the list of PCL fonts that can be used by the printer Printingresult The result of the printing is shown on the next page...

Page 187: ...Printing Reports Lists 171 12 1 Types of Report List Fonts stated in the PCL Fonts List are trademarks of Bitstream Inc and International Type Company...

Page 188: ...out PostScript Fonts List Prints the list of PostScript fonts that can be used by the printer The PostScript Fonts List is available only when the optional PostScript Software kit is installed Printin...

Page 189: ...Printing Reports Lists 173 12 1 Types of Report List...

Page 190: ...ages printed and the number of sheets of paper used for printing for each job owner Also prints the total number of pages printed as well as the total number of sheets of paper used Printingresult The...

Page 191: ...Printing Reports Lists 175 12 1 Types of Report List...

Page 192: ...The list printed out is named PostScript Logical Printer List Logical Printer is set using CentreWare Internet Services The PostScript Settings List is available only when the optional PostScript Sof...

Page 193: ...Printing Reports Lists 177 12 1 Types of Report List...

Page 194: ...ts information about the mailbox size Secured Print and Sample Set jobs Printingresult Thefollowingitemswillbeincludedinthelist MailboxSize Size Used Free Space Secured Print Sample Set User ID Docume...

Page 195: ...Printing Reports Lists 179 12 1 Types of Report List...

Page 196: ...the Menu button on the controlpanel Select Print Report List Select PCL Fonts List on the screen and press the Start button on the control panel The PCL Fonts List will be printed When there are other...

Page 197: ...Configuring by the Tools Mode Screen 13 1 Tools Mode 182 13 2 System Meter Settings 184...

Page 198: ...e You need the access number of the system adminstrator in order to operate the Settings Meter Check feature The factory setting of the access number is 11111 Procedure Press the Settings Meter Check...

Page 199: ...as an example Select the required item 13 1 2 Exiting the Tools Mode screen You can return to the default screen by the following procedure after you have selected the required features If System Admi...

Page 200: ...tions of the User Guide Copier Audio Tones Items Scan Job Complete Tone The tone when a scan job is completed without error Available options Off Soft Normal Loud Print Job Complete Tone The tone when...

Page 201: ...s Report Settings Item Job History Report A feature to automatically print information job history about print and scan jobs that have been executed Available options Do not print Print automatically...

Page 202: ...g Available options Top Bottom Edges 0 50 mm Left Right Edges 0 50 mm Output to Finisher Select whether to enable or disable copies from being delivered to the Finisher when the paper size has been ch...

Page 203: ...set to 255 255 240 0 it will still activate as 255 255 255 0 TCP IP Subnet Mask Sets the necessary subnet mask for using the TCP IP protocol Displayed as aaa bbb ccc ddd where aaa bbb ccc ddd are each...

Page 204: ...e IP address using this screen At this point if the IP address is not set using this screen Agent UDP Start Up will be forcibly set to Off Agent Community String Specifies the community name for enabl...

Page 205: ...Parallel Items Port Status Defines the setting of the parallel port when the power is on Available options Disable Enable The note items at the end of this tabulation of print mode settings Print Mod...

Page 206: ...port when the power is on Available options Disable Enable The note items at the end of this tabulation of print mode settings Transport Protocol Define the setting of the transport protocols TCP IP...

Page 207: ...e print mode Available option PostScript PJLSwitch Sets the PJL commands sent from the host device to valid or invalid Available options Off On Port Settings Item Salutation Port Status Sets the salut...

Page 208: ...NetWare Receive Buffer AppleTalk Receive Buffer Sets the memory capacity of the receive buffer for the respective interfaces Receive buffer is the temporary storage location of the data sent from the...

Page 209: ...32 00 MB in increments of 0 25 MB 5 0 MB When the Port Status of the port is set to Disable the item corresponding to the port will not be selectable Depending on the data volume sent from the compute...

Page 210: ...initialisation of Print Meter memory All Hard Disks Hard Disk Partition 1 Hard Disk Partition 2 Hard Disk Partition 3 Executes initialisation of the hard disk or the hard disk partition 1 3 applicable...

Page 211: ...Settings is explained here Procedure Press the Settings Meter Check button on the control panel and select Tools Mode on the screen displayed Enter the access number of the system administrator by us...

Page 212: ...196 Select Port Settings Select LPD Select Port Status and then touch Change Settings Select Enable Select Save 13 2 System Meter Settings...

Page 213: ...Precautions and Limitations 14 1 In General 198 14 2 On Using NetWare 200 14 3 On Using TCP IP LPD 203 14 4 On Using SMB 205...

Page 214: ...to display the Job Status Confirm screen Next select jobs with Printing displayed followed by Stop Then press the Clear C button Whencancellingprinting When the printing is not allowed to end normall...

Page 215: ...en punched or stapled are output to finisher tray 2 Do not remove any paper from finisher tray 2 when the printer is outputting paper to it Once finisher tray 2 is full with paper printing will stop W...

Page 216: ...e ServerName Use only half width alphanumeric characters Cannot use mathematical symbol dot backslash tilde There is no difference between underscore _ and space There is no difference between the cap...

Page 217: ...nnot be carried out For Bindery Take note of the following when setting up environment in bindery Item For Pserver Mode No of file server Up to 16 servers per tree No of print queue Up to 48 queues No...

Page 218: ...nd Mount paper Stop print server Not supported supported 14 2 4 Using TokenRing interface port When the TokenRing interface port is installed the MAC address will be changed When using gateway in Toke...

Page 219: ...ved the data may not be received Setting up at the PC workstation Be very careful in setting up IP addresses which are controlled as an entire system Consult your network administrator before defining...

Page 220: ...may re send immediately when the print data has exceeded the receiving capacity When this occurs the client computer appears as if it has crashed To rectify this situation the client computer must be...

Page 221: ...system Consult your network administrator before defining any IP address Before setting any network such as the IP address to a host being used under Network Information Service NIS consult the NIS a...

Page 222: ...the printer has accepted a print request from a host computer it will not receive another print request from another host computer When the IP address or computer name is changed When the IP address...

Page 223: ...g 15 1 When Problems Occur 208 15 2 When the Print Quality is Poor 212 15 3 Using Direct Print Utility 216 15 4 Using NetWare 218 15 5 Using TCP IP 223 15 6 Using SMB 225 15 7 Using CentreWare Interne...

Page 224: ...er breaker switch and power switch Turn off the power switch and check that the power cord is pluggedinproperly Then turn on the power switch Check that the power source is 100 V 13 5 A 110 V 15 A or...

Page 225: ...ff the power insert an add on RAM module to increase the memory When the memory capacity is not enough the printer will disable the interface automatically and reboot Replace with the correct paper si...

Page 226: ...not be pulled out when the power is switched off Switch off the power without forcefully moving the paper tray After a few seconds switch it on Check that the printer is in the state to receive data a...

Page 227: ...When paper of a different size have been set in the paper tray always specify the paper size by the Tools Mode screen User Guide Copier When printing has not been correctly processed the information...

Page 228: ...the treatment contact the Fuji Xerox Customer Support Centre Condition Cause Treatment Replace with new paper User Guide Copier Replace with a new drum or toner cartridge User Guide Copier Replace wi...

Page 229: ...w drum or toner cartridge User Guide Copier Contact your Fuji Xerox Customer Support Centre The transportation route for the paper is stained The drum or toner cartridge is defective or damaged The pa...

Page 230: ...tre Replace with new paper User Guide Copier Replace with suitable paper User Guide Copier Set the drum or toner cartridge properly User Guide Copier Multiple sheets of paper are fed at once double fe...

Page 231: ...ier Replace with a new toner cartridge User Guide Copier Adjust and set the side guide and end guide correctly User Guide Copier The paper used is not suitable The paper used is from different reams T...

Page 232: ...t for the way to output a printer settings list Action Enter the correct IP address set at the printer in the FX TCP IP DPU Port Setup dialog box Status Display Unable to print Network Error Verificat...

Page 233: ...rinter menu On the Details tab check that Fuji XeroxDC FX TCP IP DPU Port is displayed at Print to the following port Click Spool Settings to display its dialog box Check if the Print directly to the...

Page 234: ...is not compatible with the auto setup of the frame type There is a breakdown in the network from the workstation to the printer The user name and group name are not registered in User of the print qu...

Page 235: ...eues of the printer in the print server mode The slave file server is not set up in the bindery service mode The print type is incorrect The setting for the slave file server is incorrect in the binde...

Page 236: ...is not set Connected to another printer object NetWare port cannot be activated File server is down There are printers with similar host name on the network Network port is not activated At the consol...

Page 237: ...curs in the NetWare interface Switch off and then on the power 15 4 3 Unable to obtain desired print results Cause Verification Action Check the print language of the printer The print language of the...

Page 238: ...f the user name and group name are registered in Print Server Information Printer Printer xxx Environment Settings Notify Not registered in the Notify Candidate List of the print server Register the u...

Page 239: ...tor of the network to check the network for errors Status Display Unable to print Network Error Verification From the printer window select Properties from the Printer menu Click the Details tab of th...

Page 240: ...ion of Ctrl D Refer to the PRINTER WRI file provided by Windows 4 0 for the details Cause Verification Action Ask the network administrator to check that the IP address is correct Check the upper limi...

Page 241: ...nt There are multiple browsers The network subnet is wrong Name search of the the host name is not working correctly for TCP IP The host name specified already exists in the printer Specify similar tr...

Page 242: ...above Cause Verification Action Check if the printer is processing print instructions For Windows 95 Windows 98 Windows NT 4 0 an error message about insufficient storing space for waiting print jobs...

Page 243: ...ent types of printer drivers are saved The printer driver is not saved within two levels from the drivers folder The printer driver is not saved in a folder which is named within eight alphanumeric ch...

Page 244: ...ry for Confirm Password is not similar to Password Enter the correct password Reboot the printer Is the Auto Refresh set Either set Auto Refresh Interval of Internet Services Settings on the Propertie...

Page 245: ...ions 230 B Connectors and Allocation Signal 232 C Printing Data Combined Using Overlays 234 D Printing Secured Print and Sample Set Jobs 236 E Configuring Using PostScript Logical Printer 241 F Direct...

Page 246: ...et that improvements in specifications appearance of the product may be made withoutpriornotice Power 100V 13 5A 50 60Hz 110V 15A 60Hz 220 240V 7A 50 60Hz Powerconsumption maximum 1 35kW 100 110Vmodel...

Page 247: ...size 600 dpi a b A3 297 420mm 6804 9711 B4 257 364mm 5859 8388 A4 210 297mm 4749 6804 B5 182 257mm 4089 5859 A5 148 210mm 3285 4749 A6 105 148mm 2268 3285 B6 128 182mm 2811 4089 11 17 Ledger 6390 999...

Page 248: ...l Ground 4 Data3 I 22 Signal Ground 5 Data4 I 23 Signal Ground 6 Data5 I 24 Signal Ground 7 Data6 I 25 Signal Ground 8 Data7 I 26 Signal Ground 9 Data8 I 27 Signal Ground 10 nAck O 28 Signal Ground 11...

Page 249: ...ve signal which indicates that there is no more paper Select Pin No 13 A HIGH active signal which indicates that it is possible to receive data nAutoFd Pin No 14 The signal when the bidirectional is O...

Page 250: ...Windows 98 as an example Depending on the application software the way to display the printer properties dialog box might be different Check the manuals of the application software used C 1 Creating a...

Page 251: ...erlay appears click Yes to confirm The ovelay will be stored in your computer C 2 Printing with an overlay Next print your data with the overlay Procedure Using the application software create the dat...

Page 252: ...trol panel This feature is known as Secured Print You can also send data to the printer without a password This feature is useful for storing frequently used data in the printer and then using only th...

Page 253: ...sing 1 24 characters This is mandatory If no user ID is specified you will be prompted by a warning message For Document Name specify a document name using 1 24 characters This is optional If you do n...

Page 254: ...red print or Sample set job that has been stored in the printer Here we will print a Secured Print job as an illustration Procedure Press the button Job Status Stop on the control panel The Job Status...

Page 255: ...assword Entry screen appears Enter your password and then Confirm This Password Entry screen will not appear for Sample Set jobs as well as Secured Print jobs without password entered in the printer d...

Page 256: ...8888 Document Name Orange Stored Date Time 2001 05 22 10 27 AM Select whether to save or delete document after printing Print and Delete Print and Save Cancel Job Select Print and Delete if you want t...

Page 257: ...for the items that can be set E 2 Configuring the computer and specifying printing The logical printer configured in CentreWare Internet Services can be specified from the clientcomputerinenvironments...

Page 258: ...mputer as follows When using Sun OS lpr P logical printer name WhenusingHP UX Solaris lp d logical printer name When the PostScript logical printer and C option of lpr have been specified simultaneous...

Page 259: ...pecify P option oflprcommand onUnix Printerinternally registeredlogical printer registerlogical printerby CentreWare Internet Services Specify printing parameters by the C optionoflprcommand Setprinti...

Page 260: ...nal User Guide for details on using the lpr command Unix environment When PDF file has been done in direct printing it may be printed on unintended size if the paper size selected is within the limit...

Page 261: ...the number of dots that can be printed within a width of 1 inch Used as the unit for resolution DPU Stands for Direct Print Utility a software which uses TCP IP protocol to allow PC to send and print...

Page 262: ...onsumption by lowering the temperature of the printer s fuser The power saver mode is automatically activated when the time set has elapsed after the previous print job Printing area The actual area o...

Page 263: ...p the printer 78 troubleshooting 216 uninstalling 90 using 76 Dynamic Host Configuration Protocol DHCP 17 E EMF Spooling 63 Error History Report 166 Error Report 55 Ethernet interface 2 6 8 9 12 26 27...

Page 264: ...ing 184 Output Destination 58 151 Output Orientation 151 Output Size 151 Overlays 66 234 P Page buffer 28 Paper Output Options 54 Paper Size 57 Paper Source 57 Paper Source Options 54 Paper Tray 151 P...

Page 265: ...ngs 185 Report List 160 S Sample Set 56 236 Screen Layout of Common Settings 184 of Copy Mode Settings 186 of Print Scan Mode Settings 187 Secured Print 56 236 Select Substitution Tray 55 Server Messa...

Page 266: ......

Page 267: ...y or organisation Address About the Manual Strongly Neutral Strongly agree disagree 1 It is handy 1 2 3 4 5 2 It is easy to read 1 2 3 4 5 3 Titles of chapters and sections make sense 1 2 3 4 5 4 Info...

Page 268: ......
Page 269: ...Centre 706 705 606 605 506 505 Series User Guide Printer Human Interface Design Development Document Products Company Fuji Xerox Co Ltd DE 1388E2 Edition 2 Copyright 2002 by Fuji Xerox Co Ltd Printed...

Reviews: