SETTING THE SYSTEM CONFIGURATION
XEROX DOCUPRINT 92C IPS GUIDE TO CONFIGURING AND MANAGING THE SYSTEM
4-41
Note:
After you complete all edits to your media icon,
click Apply, and close the Create a new Media Icon
window, your temporary form type will be deleted.
If you want to save the temporary form type to the Form
Type list, do the following before closing the window:
1. Click the Add button. The Add a New Form Type
window displays with your temporary form name
already displayed on the New Form Type Name
line.
2. Click the Add button. Your formerly temporary
form name will now appear in the Form Type
list.
To delete a name from the Form Type list: Click the item
to be deleted, then click the Delete button located below the
Form Type box.
•
Weight (lbs.) — Specifies in pounds the weight of the
media you are adding. Use the incremental spin buttons to
display your desired paper weight. You can specify weights
only within the range supported by your printer.
For information on changing the weight units, refer to the
“Specifying the media units” section earlier in this chapter.
•
Color — Specifies the color of the stock represented by the
media icon you are creating. There are two ways to do this:
—
Select a standard stock color by clicking one of the
color boxes in this field.
—
Specify another color by entering its name on the
Other Color line below the color boxes. The text you
enter also displays in the media icon display box at the
bottom of the screen.
•
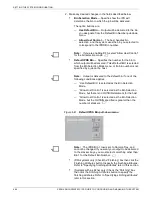
Icon display box — Displays the media icon you are
currently creating or changing, and reflects all changes as
you make them.
5. Click Apply. Your new media icon displays in the Media Library
window.
Note:
If you want the Create a new Media Type window to
remain open while you create multiple icons, be sure the pin
button in the upper left corner of this window is “in” before you
click Apply. Otherwise, the window closes when you click Apply,
and you must reopen it to create another icon.
•
To “push the pin in,” click once the pin button that is in the
“out” position.
•
When you are finished creating icons, click once the pin
button (in the “in” position), or click the Cancel button to
close the window.
6. Repeat steps 3–5 for any additional media icons you wish to
create.
Summary of Contents for DocuPrint 92C IPS
Page 8: ...TABLE OF CONTENTS viii XEROX DOCUPRINT 92C IPS GUIDE TO CONFIGURING AND MANAGING THE SYSTEM...
Page 12: ...INTRODUCTION xii XEROX DOCUPRINT 92C IPS GUIDE TO CONFIGURING AND MANAGING THE SYSTEM...
Page 132: ...INDEX INDEX 6 XEROX DOCUPRINT 92C IPS GUIDE TO CONFIGURING AND MANAGING THE SYSTEM...


