02/2000
2-63
DocuPrint N2025/N2825
RAP 68
Status Indicator Repair Analysis Procedures
Initial Issue
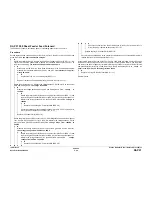
RAP 68 E8: OCT Jam
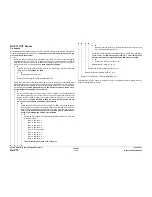
There is a paper jam at the OCT Sensor.
Procedure
The front edge of the paper is located within the Exit Assembly.
Y
N
Remove and reinstall the OCT Assembly (REP 10.1). Run a Test Print for simplex print.
The Error Code E4 still appears.
Y
N
Problem solved.
The paper is discharged from the top of the OCT Assembly.
Y
N
Rotate the 14/33 Idler Gear counter clockwise manually. Observe the correct contact
between the 14/33 Idler Gear and the 29 Gear and Offset Gear. All of the gears
rotate smoothly.
Y
N
Replace parts as necessary (PL 13.1).
Run a Test print. Observe the rotation of the Inlet Roll and Offset Roll (REP 10.12).
The Inlet Roll and Offset Roll rotates in the same direction smoothly.
Y
N
Replace the OCT Motor Assembly (REP 10.10).
Press and release the actuator of the Duplex Sensor (REP 9.6). The Duplex Sen-
sor actuates by lifting up the actuator and deactuates by releasing the actua-
tor.
Y
N
Replace the OCT Sensor (REP 9.6).
Replace the Print Engine Controller PWB (REP 8.5).
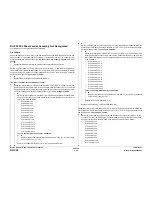
Remove the Top Cover (REP 1.3). Remove the Rear Cover Assembly (REP 1.9). Rotate
the Inlet Roll counterclockwise manually. The Inlet Roll rotates smoothly.
Y
N
Replace the OCT Assembly (REP 10.1).
Rotate the 14/33 Idler Gear counter clockwise manually. Observe the correct contact
between the 14/33 Idler Gear and the 29 Gear and Offset Gear. All of the gears rotate
smoothly.
Y
N
Replace parts as necessary (PL 13.1).
Run a Test print. Observe the rotation of the Inlet Roll and Offset Roll. The Inlet Roll and
Offset Roll rotates in the same direction smoothly.
Y
N
Replace the OCT Motor Assembly (REP 10.10).
Press and release the actuator of the OCT Sensor (REP 9.6). The OCT Sensor actu-
ates by lifting up the actuator and deactuates by releasing the actuator.
Y
N
Replace the OCT Sensor (REP 9.6).
Replace the Print Engine Controller PWB (REP 8.5).
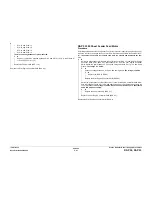
Remove the Top Cover (REP 1.3). Remove the Rear Cover Assembly (REP 1.9). Rotate the
Inlet Roll counterclockwise manually. The Inlet Roll rotates smoothly.
Y
N
Replace the OCT Assembly (REP 10.1).
Rotate the 14/33 Idler Gear counter clockwise manually. Observe the correct contact between
the 14/33 Idler Gear and the 29 Gear and Offset Gear. All of the gears rotate smoothly.
Y
N
Replace parts as necessary (PL 13.1).
Run a Test print. Observe the rotation of the Inlet Roll and Offset Roll. The Inlet Roll and Off-
set Roll rotates in the same direction smoothly.
Y
N
Replace the OCT Motor Assembly (REP 10.10).
Press and release the actuator of the OCT Sensor. The OCT Sensor actuates by lifting up
the actuator and deactuates by releasing the actuator.
Y
N
Replace the OCT Sensor (REP 9.6).
Replace the Print Engine Controller PWB (REP 8.5).
A
A
Summary of Contents for DocuPrint N2025
Page 12: ...02 2000 1 2 DocuPrint N2025 N2825 Initial Issue Service Call Procedures...
Page 20: ...02 2000 2 2 DocuPrint N2025 N2825 Initial Issue Status Indicator Repair Analysis Procedures...
Page 86: ...02 2000 3 2 DocuPrint N2025 N2825 Initial Issue Image Quality Repair Analysis Procedures...
Page 114: ...02 2000 4 4 DocuPrint N2025 N2825 Introduction Initial Issue Repair Adjustment...
Page 120: ...02 2000 4 10 DocuPrint N2025 N2825 REP 1 8 REP 1 9 Initial Issue Repair Adjustment...
Page 128: ...02 2000 4 18 DocuPrint N2025 N2825 REP 2 10 REP 2 11 Initial Issue Repair Adjustment...
Page 134: ...02 2000 4 24 DocuPrint N2025 N2825 REP 3 7 Initial Issue Repair Adjustment...
Page 144: ...02 2000 4 34 DocuPrint N2025 N2825 REP 5 5 Initial Issue Repair Adjustment...
Page 152: ...02 2000 4 42 DocuPrint N2025 N2825 REP 7 6 REP 7 7 Initial Issue Repair Adjustment...
Page 160: ...02 2000 4 50 DocuPrint N2025 N2825 REP 8 9 Initial Issue Repair Adjustment...
Page 186: ...02 2000 4 76 DocuPrint N2025 N2825 REP 11 21 REP 11 22 Initial Issue Repair Adjustment...
Page 204: ...02 2000 4 94 DocuPrint N2025 N2825 REP 12 29 Initial Issue Repair Adjustment...
Page 206: ...02 2000 4 96 DocuPrint N2025 N2825 ADJ 1 1 Initial Issue Repair Adjustment...
Page 208: ...02 2000 5 2 DocuPrint N2025 N2825 Initial Issue Parts list...
Page 234: ...02 2000 6 2 DocuPrint N2025 N2825 Initial Issue General Procedures Information...
Page 236: ...02 2000 6 4 DocuPrint N2025 N2825 GP 1 1 Initial Issue General Procedures Information...
Page 274: ...02 2000 6 42 DocuPrint N2025 N2825 GP 3 5 Initial Issue General Procedures Information...
Page 282: ...02 2000 6 50 DocuPrint N2025 N2825 GP 4 8 Initial Issue General Procedures Information...
Page 324: ...02 2000 6 92 DocuPrint N2025 N2825 GP 5 23 Initial Issue General Procedures Information...
Page 326: ...02 2000 6 94 DocuPrint N2025 N2825 GP 6 1 GP 6 2 Initial Issue General Procedures Information...
Page 328: ...02 2000 6 96 DocuPrint N2025 N2825 GP 7 1 Initial Issue General Procedures Information...
Page 330: ...02 2000 6 98 DocuPrint N2025 N2825 GP 8 1 Initial Issue General Procedures Information...
Page 332: ...02 2000 7 2 DocuPrint N2025 N2825 Initial Issue Wiring Data...
Page 361: ...02 2000 7 31 DocuPrint N2025 N2825 Base Engine Wiring Data Initial Issue Figure 16 Figure 17...

